One of the best things about LEGO toys for photographers is that we’re not just stuck with figures as subjects, but they can literally be anything we can build. One of my favorite non-minifigure subjects to take photos of outdoors is small LEGO buildings because they have their own kind of charm and character.
None more so full of charm and character than the magic shop and bakery in the Dream Village 40657 set I reviewed last month.
Unfortunately, they’re not exactly camera-ready out of the box. They’re designed as half-buildings with just a front and an open back that are great for play, but really limit camera angles and lighting choices.
I didn’t really enjoy shooting them as is. They had a lot of potential though since they could easily be modified into complete buildings.
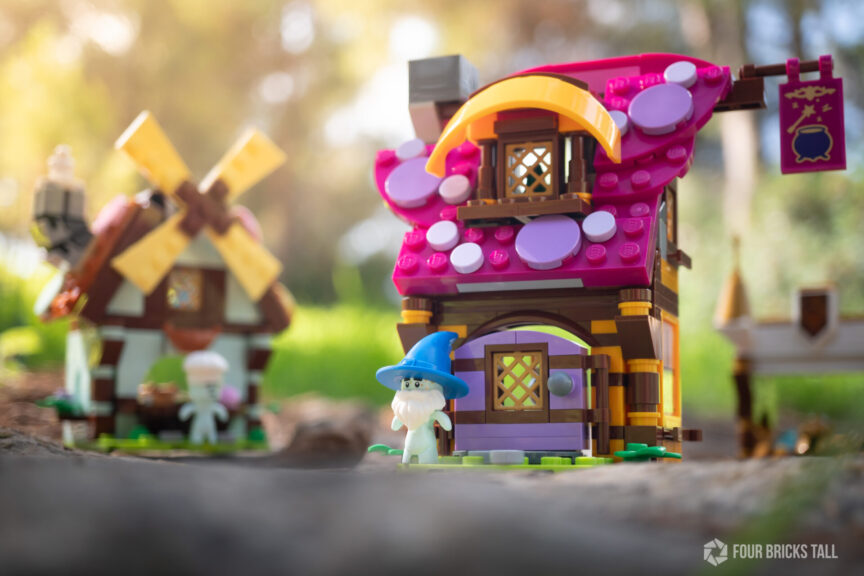
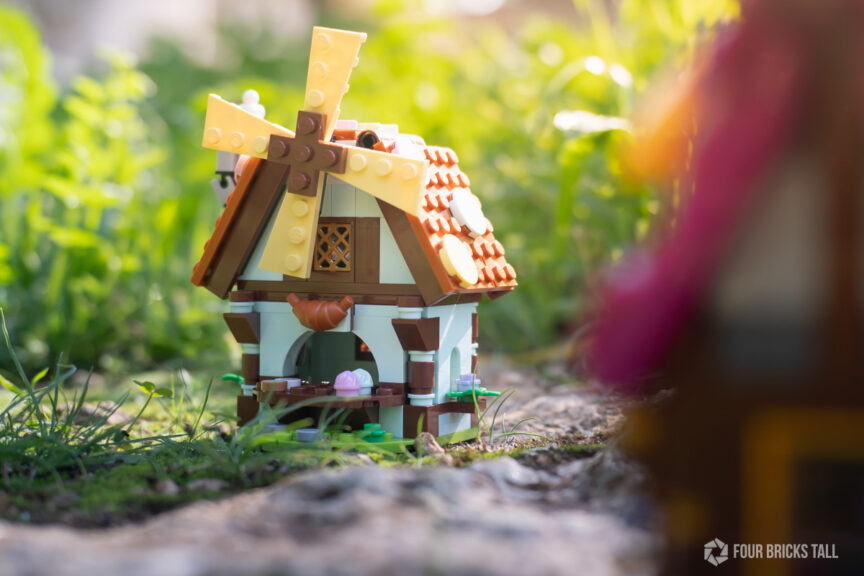
And that’s what I did a few weeks later! With a handful of bricks, the magic shop and bakery were ready to give me all their best angles. I’ll list those bricks at the end of this post.

This completed magic shop looks a whole lot better to me not only because I have something more than a frontal angle to work with, but also because the windows aren’t showing the green background through them where there should be interior walls. That’s not the kind of magic I wanted.
I’ll add that “magic” when I add lights to the interior, which is my next step!
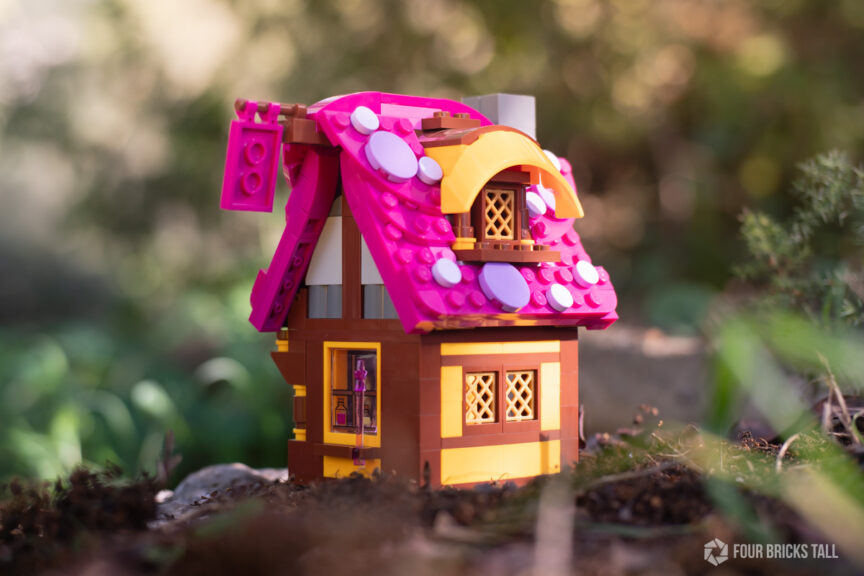
Modifications were pretty straightforward: I simply mirrored the roof and made it wider by one stud on each side to create an overhang. I extended it so I could cover the significant gap between the gray slopes and the roof with a plate and inverted slope.
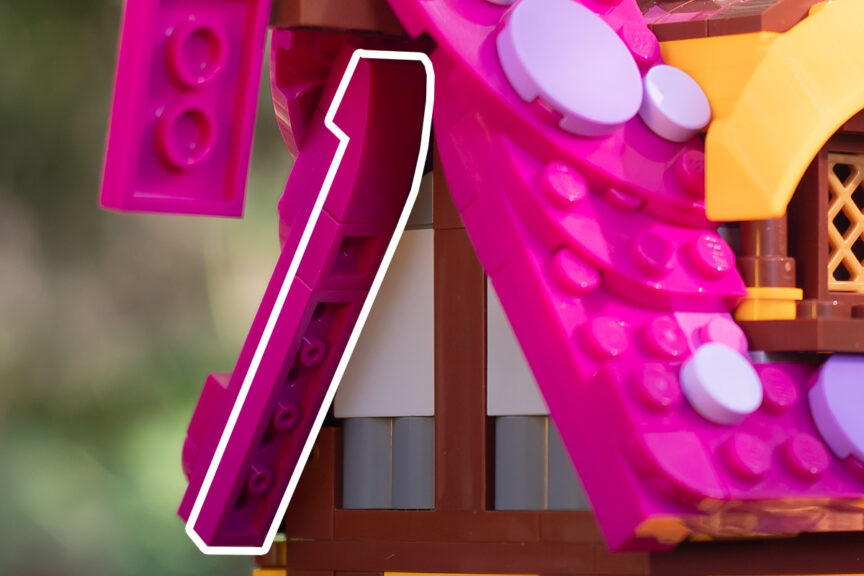
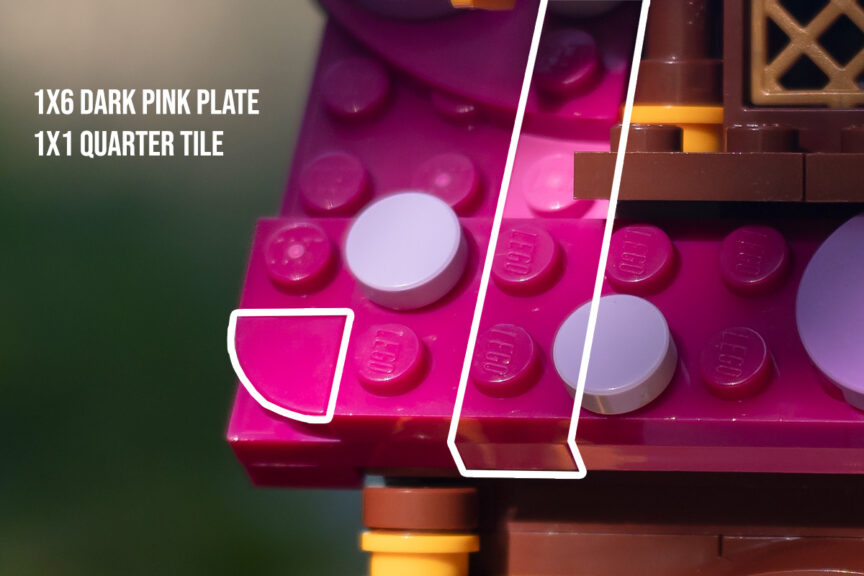
I didn’t have a 1×6 plate in magenta like the rest of the roof but I had it in dark pink, which works just as well. I placed them on both sides of the window. I also rounded out the bottom roof corners with 1×1 quarter tiles.
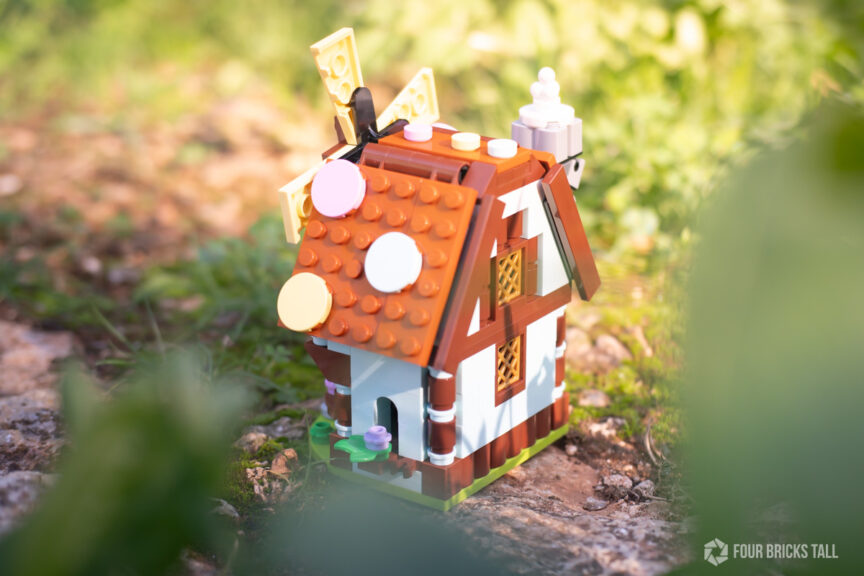
For the bakery, I also extended the roof by one stud on each side by adding a 2×6 plate. I moved the brackets holding the reddish-brown tiles inward so that they wouldn’t interfere with the windmill blades. On the back, they are as they were on the original build, which slightly protrudes.
The rest of the build was fairly simple and happened in the back. I basically stacked bricks to make a 1-stud thick wall with whatever parts I had. I didn’t bother with a door but that might be something I do later.
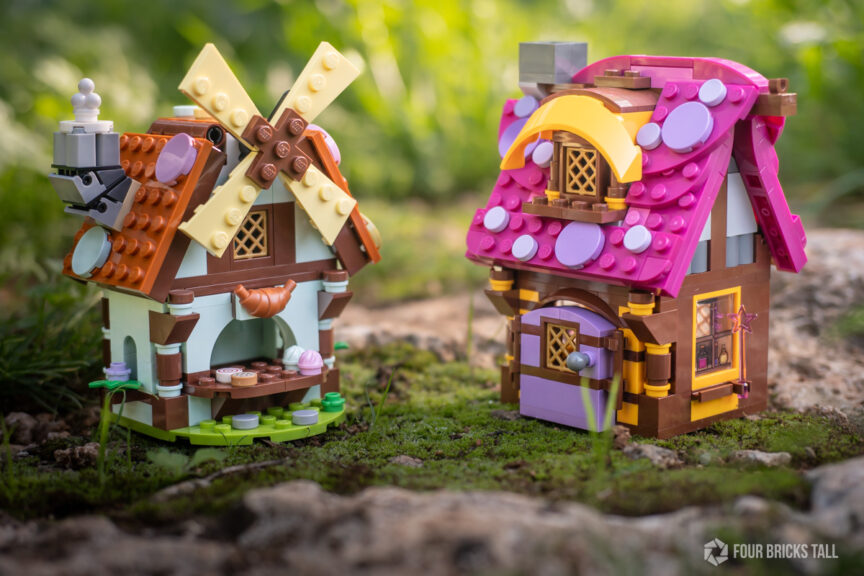
With just a few more bricks, I got two complete models that I could add to my medieval display shelf or take outside for photography.
List of parts for the magic shop
Ok, maybe it’s not “a few more bricks” but more like “a few more bucks” now that I have this list for the magic shop parts. The total cost for the extra parts is about $9-12 in some BrickLink stores but others were much higher. Such is BrickLink.
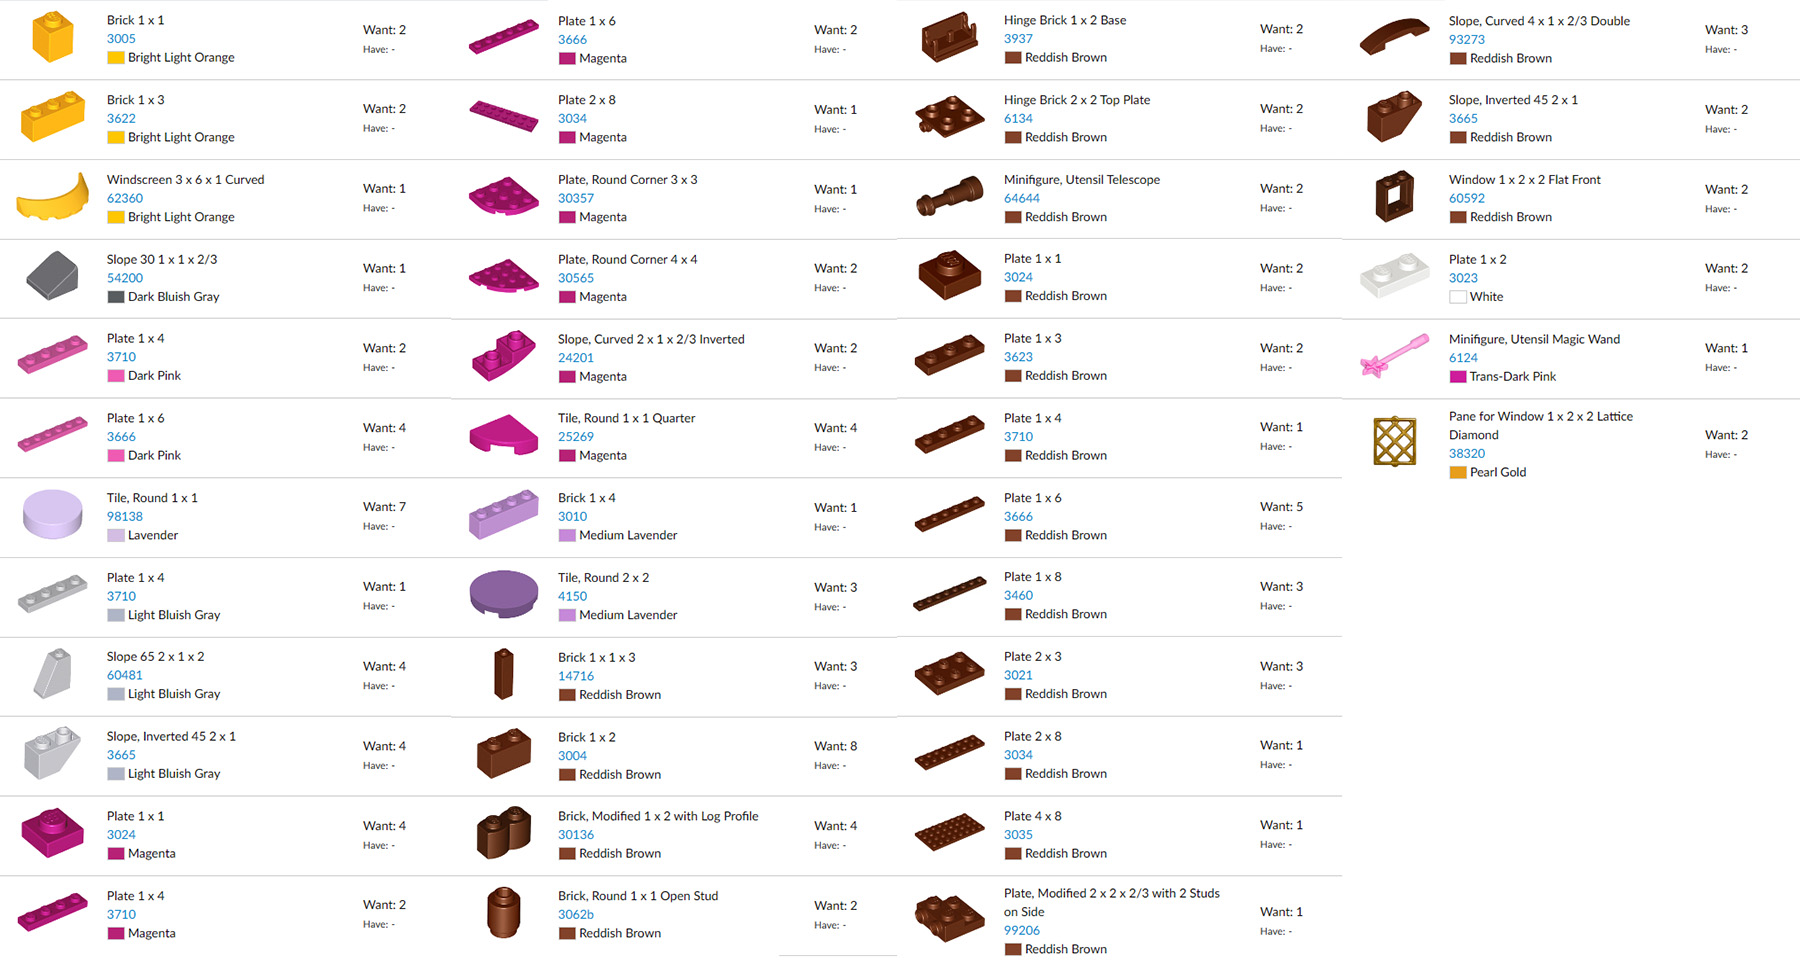
You could also get most of the parts on Pick a Brick but it would be a mix of Bestseller and Standard so there would be a service fee if all you were buying were just these parts.
Another way to go cheaper is by not mirroring the roof as in my modification, but I liked the shape and having two windows for the attic to make it more spacious.
Tips for shooting buildings in nature
If you haven’t tried shooting a LEGO set outdoors yet, it feels quite different than shooting a minifig. For one thing, the models are larger so they’re easier to focus on and to fill the frame with. Oftentimes, minifig portraits make the environment irrelevant by simplifying one way or another, but for buildings, context is important.
Uneven ground might be a challenge for posing a minifig, but it’s an even bigger issue for buildings because of the flat baseplate. You want those buildings upright and not have gaps under them so you need to find somewhat even ground to place them on.
Unfortunately, even ground isn’t easy to come by in nature so I try to find loose dirt or low foliage to help me settle the flat base into. I sometimes bring a small gardening tool to flatten surfaces for larger buildings.
Another trick is to use a lower angle so you don’t have much of the base in the frame at all. I used that method for the image of the original half-builds near the top of the article.
If there are tiny gaps between the base and the ground, I don’t bother myself too much about it when I’m shooting. I’m not going for realism anyway– it’s LEGO.
But if the gaps later turn out to be more distracting than I thought, I’ll usually just quickly clone-stamp some of the dirt, grass, or whatever to fill it in during post.
To be completely candid, beginners would have an easier time taking photos of a vehicle rather than a building. They’re fully built so you can shoot them from any angle and you don’t have to find flat ground to set it on. The wheels don’t even have to be touching the ground at all. It’s totally okay to have a tilted vehicle, but not so much for a building, unless it’s some ramshackle cottage or the Leaning Tower of Pisa.
But I generally like buildings more than vehicles as subjects in toy photography and these ones in particular are adorable.
The Dream Village set is a great starter set for modifying official buildings for toy photography. It’s available now for $29.99.
If you want to shoot something more than a minifigure but don’t want to have to modify a small building, LEGO has a fantastic Land Rover Classic Defender 40650 for $14.99 that could work in any environment.
One Comment
Comments are closed.