Space– the final frontier. Not only for toy photography but within reason, we can take some bricks or figures almost anywhere on the planet to take pictures. Not everyone has millions of dollars to build real rockets and go to space.
So if we want to take LEGO to (outer) space, we have to fake it.
In this tips and tricks article, I collected some techniques I use to get a “spacey background”. Some of these techniques are also very useful, if you are looking for a starry background on Earth or a distant planet.
After this short introduction– Let’s engage…
Green/Bluescreen
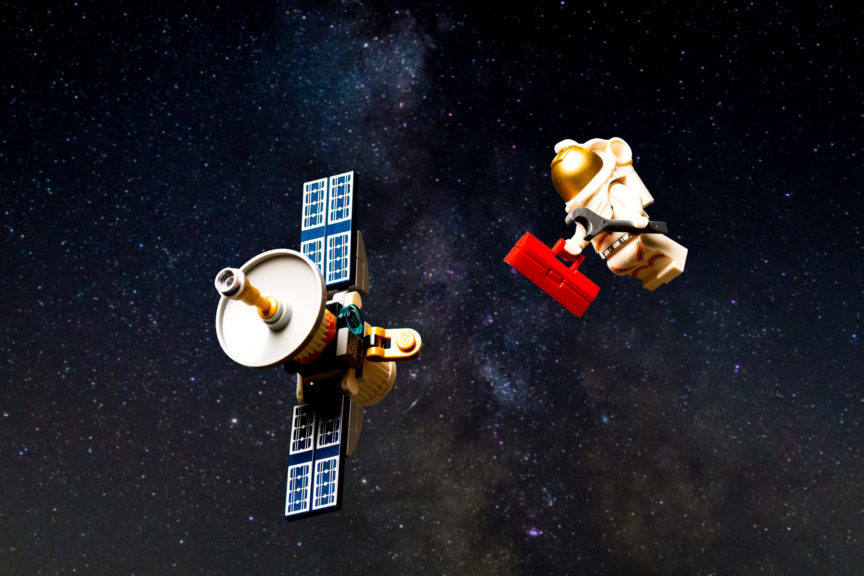
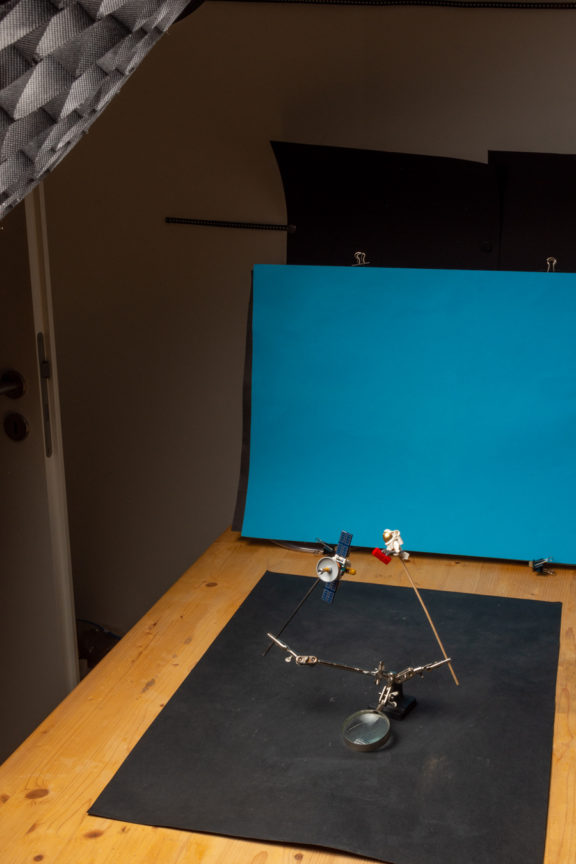
Probably the first thing that comes to mind, is green-/bluescreen as used in movies. The subject is photographed in front of a plain coloured background (mostly green or blue). In post-production, this coloured background is replaced with anything imaginable.
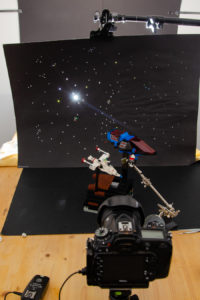
Since I want to emphasize practical effects (my Photoshop skills are just “ok” and there are much better tutorials on the web or on YouTube) I will not go into the technical details on how to do this right. Also YC_Solo did a great job explaining his workflow in the “Behind-the-scenes” section for his photos in the review of the 10283 Creator Expert NASA Space Shuttle Discovery.
So I will just show two small example for this with a behind-the-scenes picture and move on to the practical effects.
Practical Digital Background
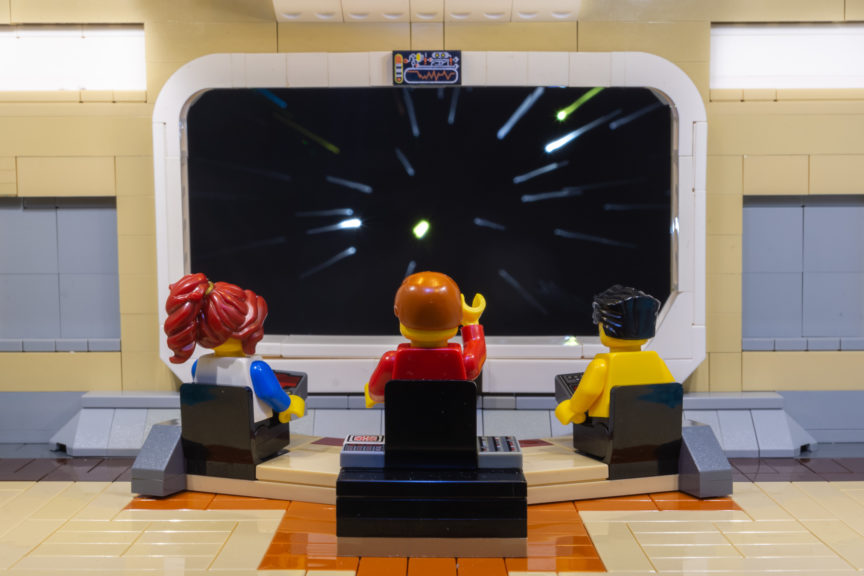
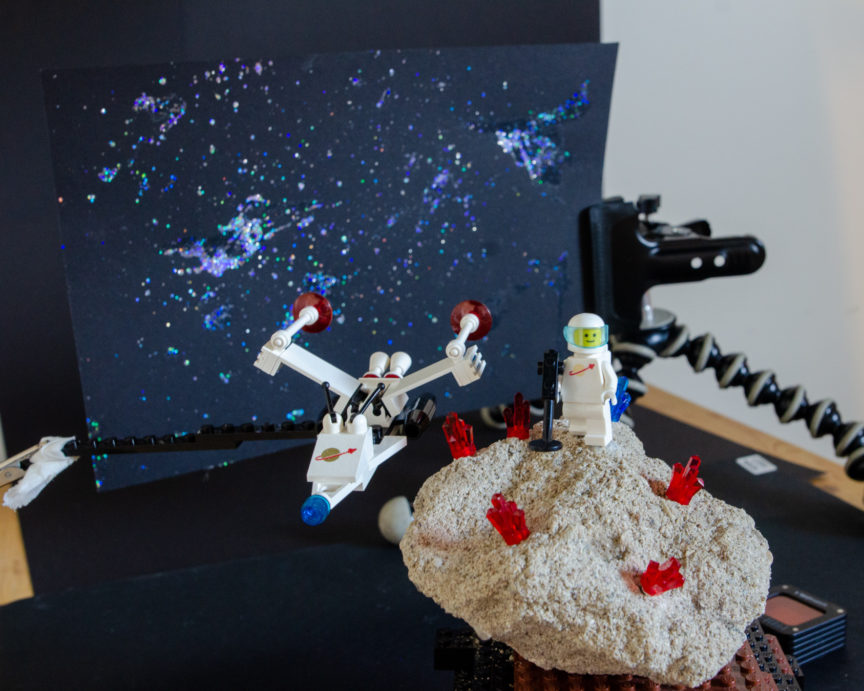
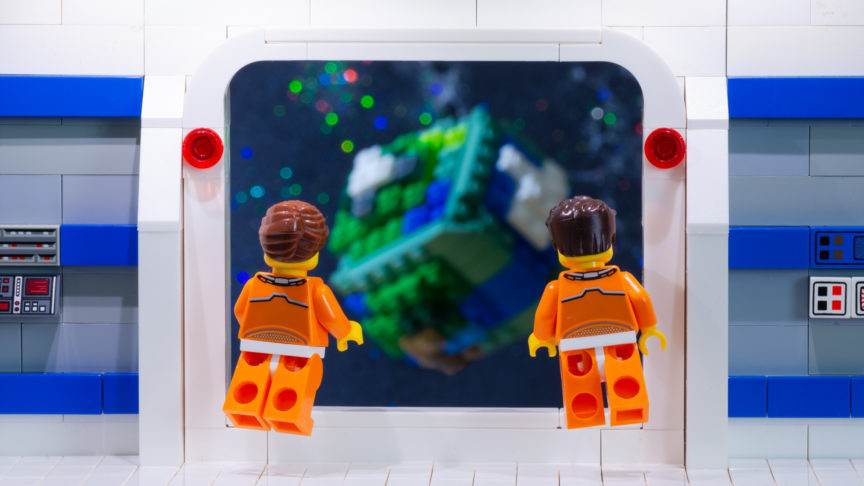
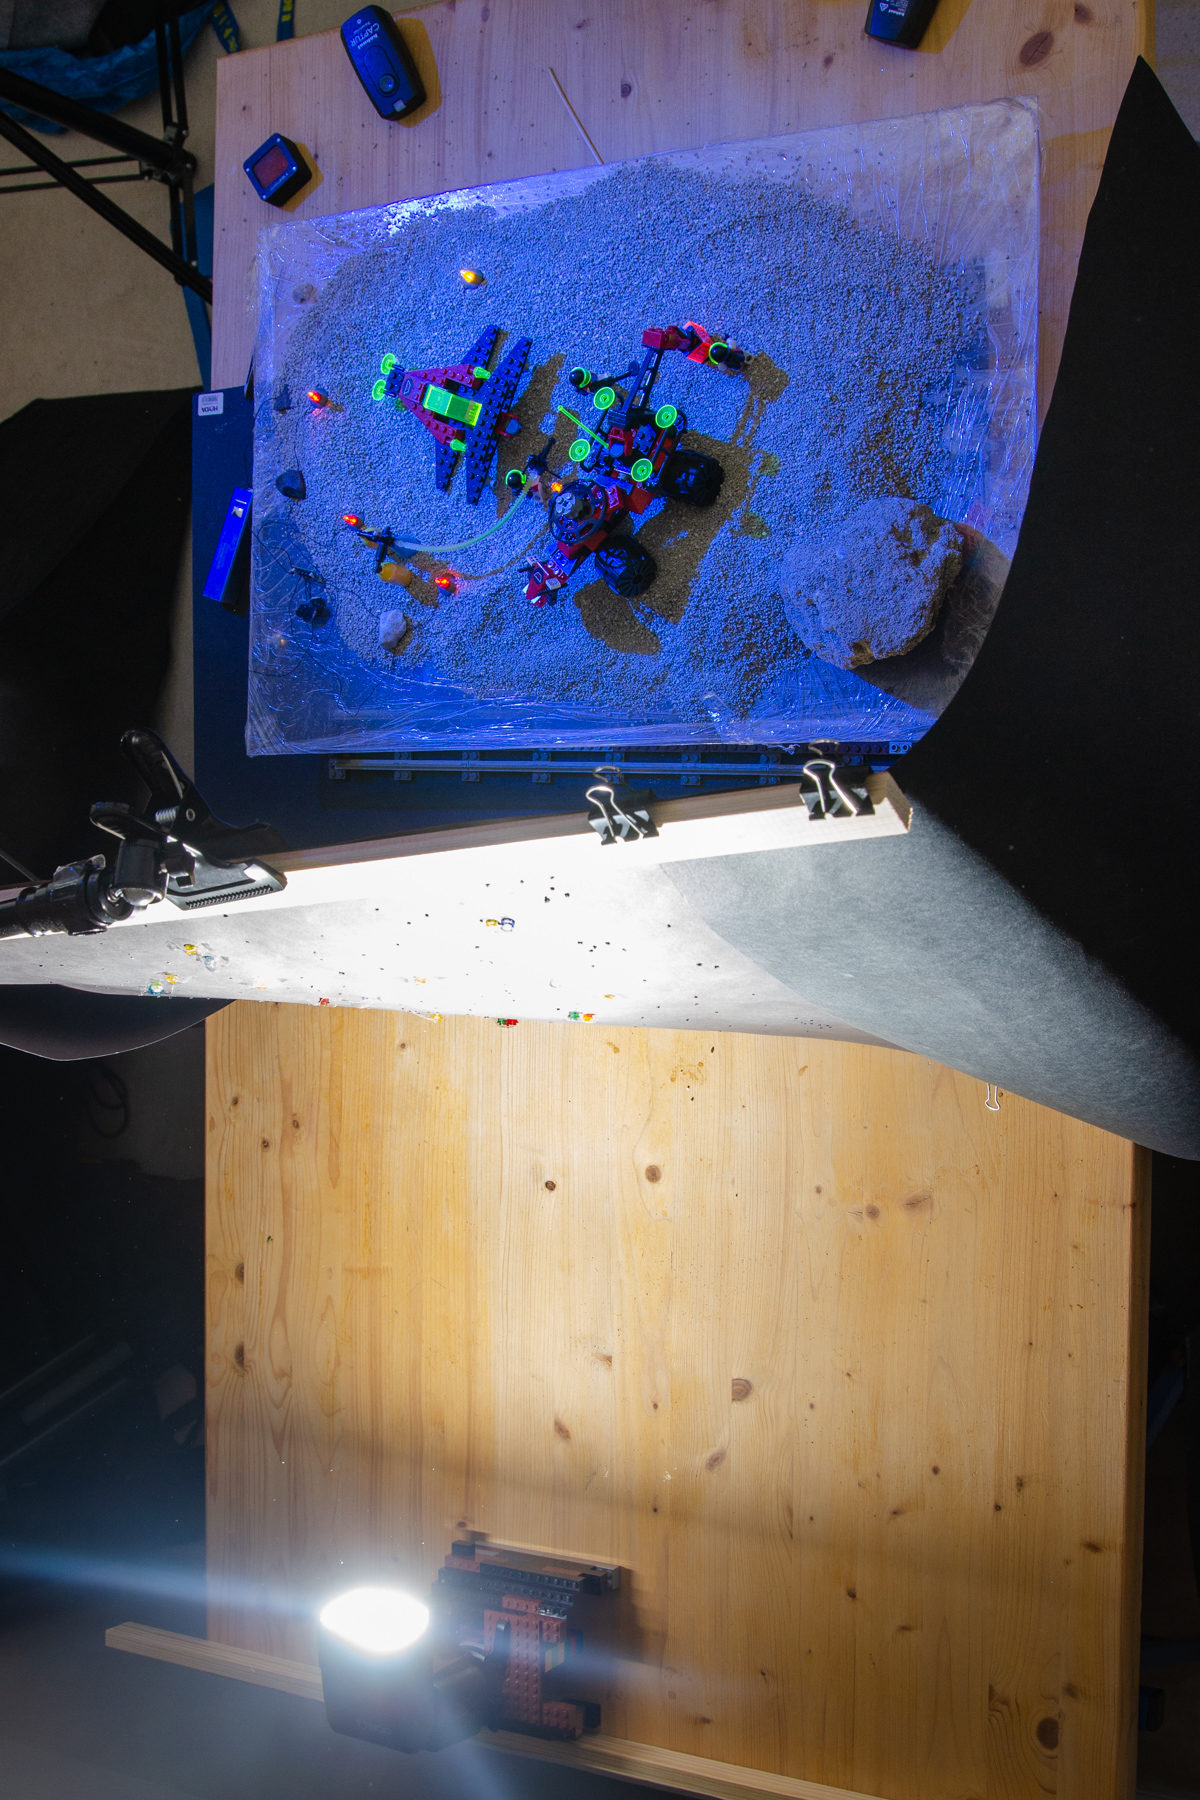
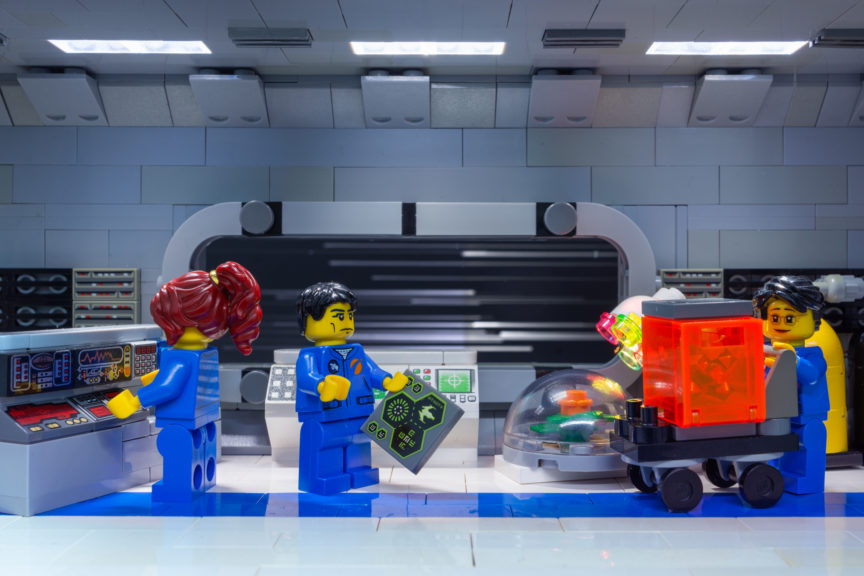
Since Hollywood now has “perfected” the digital background (see “The Volume”), why not use a similar technique on a smaller scale? The idea is to have a scene in a small practical foreground and a (big) digital screen behind the scene. The scene and background can be adjusted during the photoshoot since you get an instant feedback of the look during shooting. This reduces or eliminates the need for post-production and gives a better idea of the outcome.
Depending on the size of your scene, you could use a tablet, a computer screen or a TV as background. But be aware, as YC_Solo already wrote in his BTS description, there might be issues with the light coming from the screen illuminating your set, reflections on the screen or visible pixels.
As an example for this technique, I used a tablet to simulate the view out of a spaceship’s window.
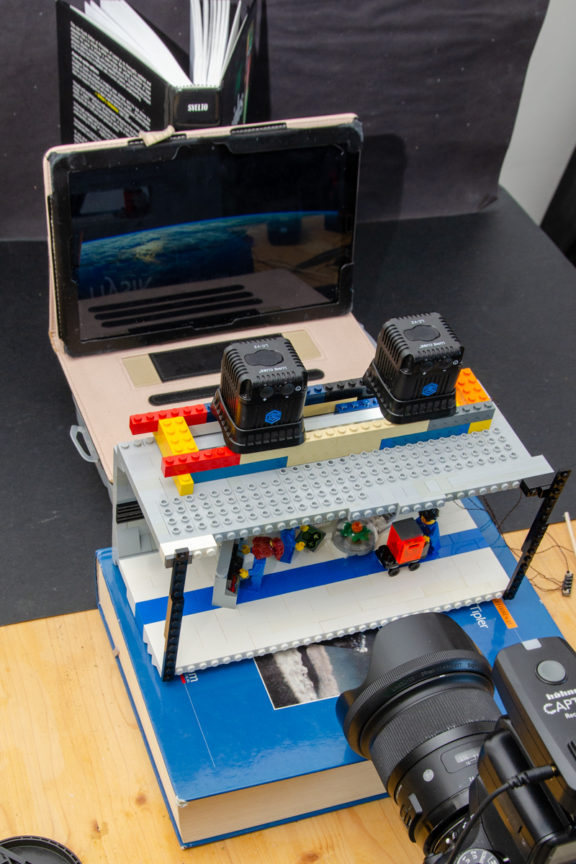
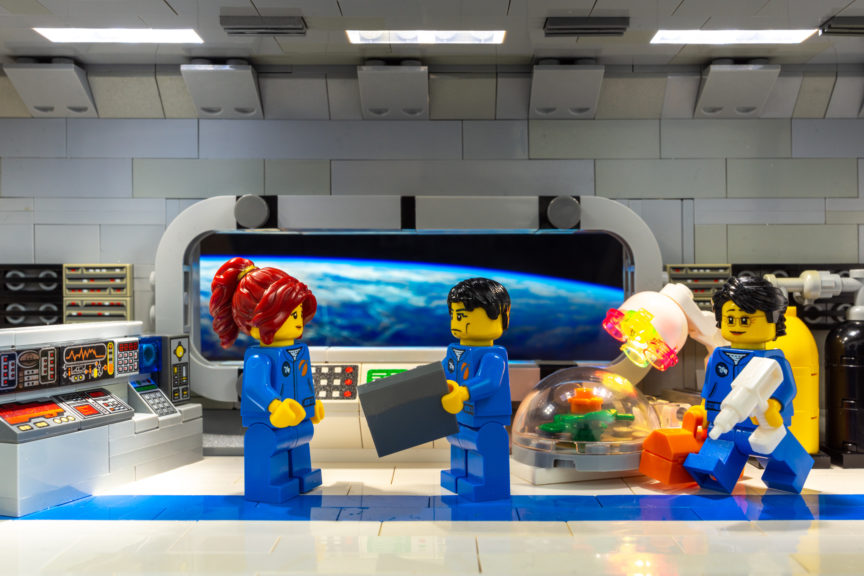
As you can see, there is some reflection of the Earth in the inner window frame. Depending on the scene you are shooting, this might be unwanted, but I think in this case it doesn’t disturb the scene.
The light coming from the background can also be a big advantage, as it illuminates the scene in the right colours of the background and doesn’t tint the scene like a greenscreen. Just make sure the illumination is “realistic” and not too bright.
If you are shooting a scene with only natural light illuminating the scene, make sure the lighting of the scene matches the background and comes from the right direction. Especially the direction of the shadows in the foreground and background should match. In space, the shadows are normally hard and come from only one big light source (queue the conspiracy theorists…)

Making your own stars
I have two techniques of making practical stars, which both involve black cardboard and simple lighting.
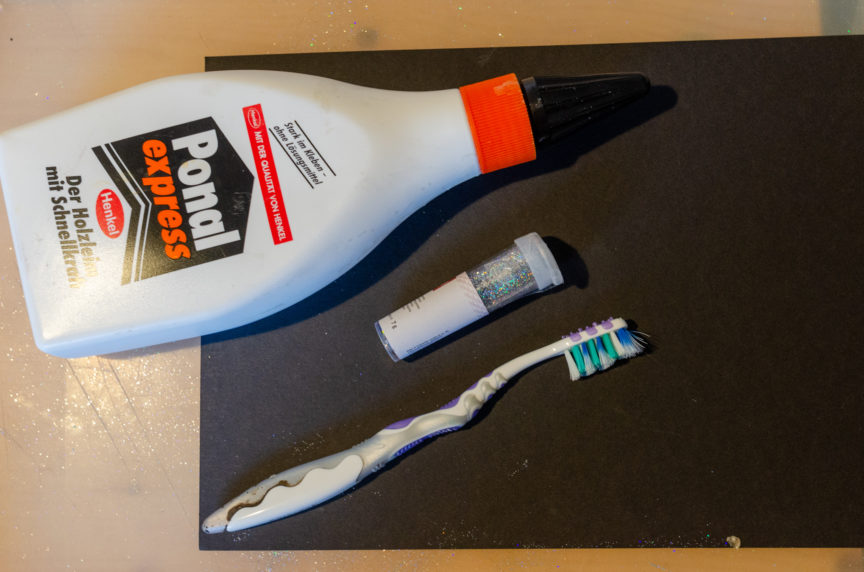
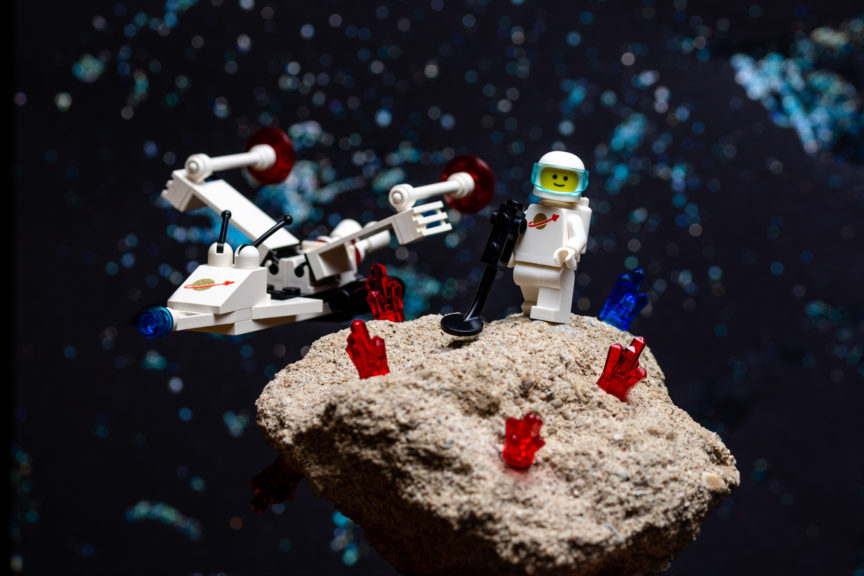
Sparkly Stars/Nebulas
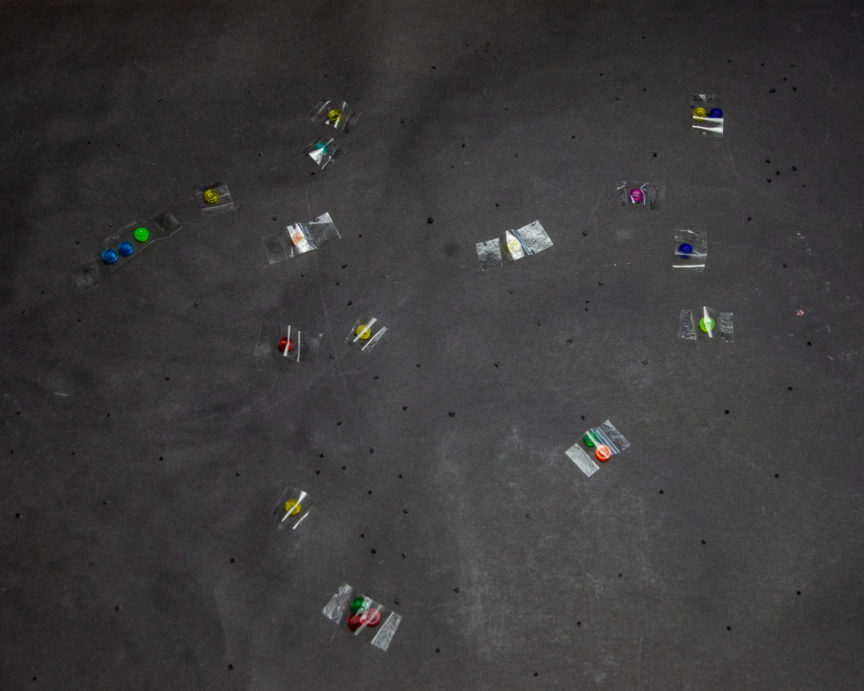
If you want a starry background with a little bit of sparkle or a touch of a nebular you could use some glitter. The starting point is a black cardboard. Since glitter gets everywhere, be mindful where you work and less is always more!
As a general idea, just put some glue on the cardboard and add glitter. I had this idea for a while, but the first tries resulted in way too much glue and therefore glitter on the cardboard. Even the use of sprayed glue gave me too big spots of glue.
Finally I found a better solution for a finer distribution of the glue. I mixed some wood glue with water and then used an old toothbrush to flick this mixture onto the cardboard – a technique used by painters to apply paint sprinkles to a painting. After that, I carefully added the glitter so it stuck to the glue spots. I added some bigger glue spots and smeared them to make nebular like areas with a higher glitter density.
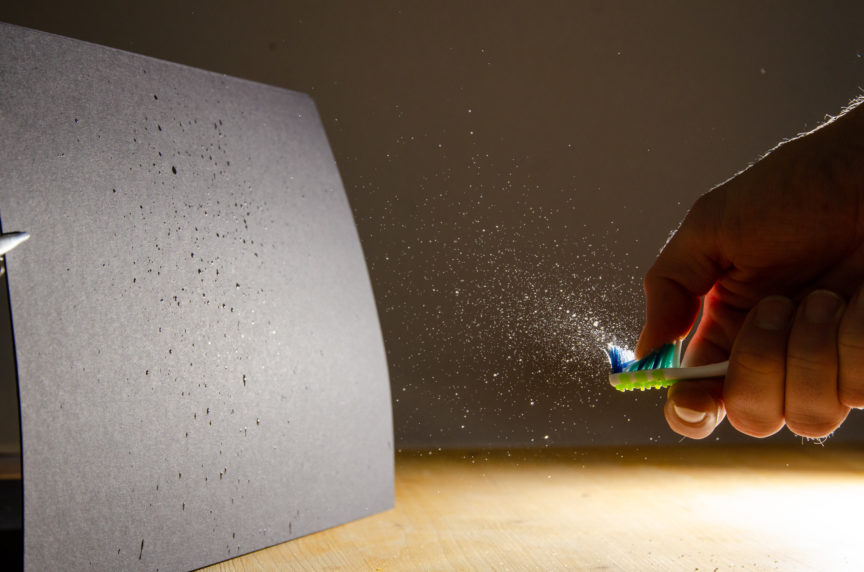
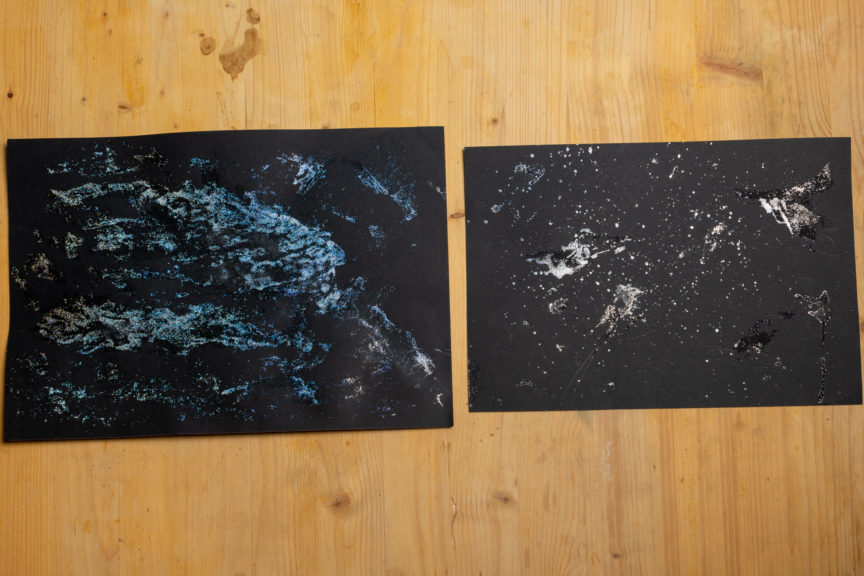
The tricky part with this is the lighting of the background. The light has to be strong enough to get the sparkle effect, but not so strong, that the black cardboard becomes visible in the picture.
I recommend using a separate light source just for the lighting of the background. By adjusting the direction of the light source, you can adjust the colours and the sparkle to your liking. It might take some tries, but you get some colourful space backgrounds.
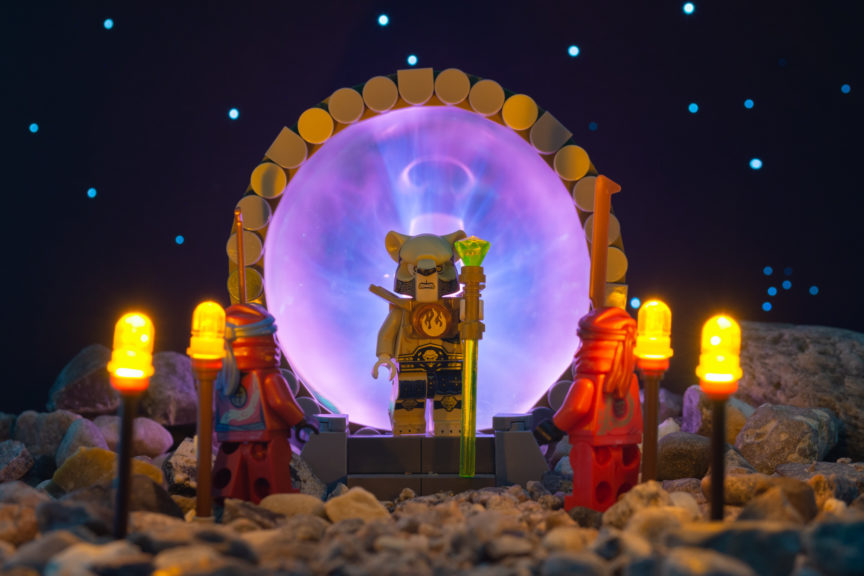
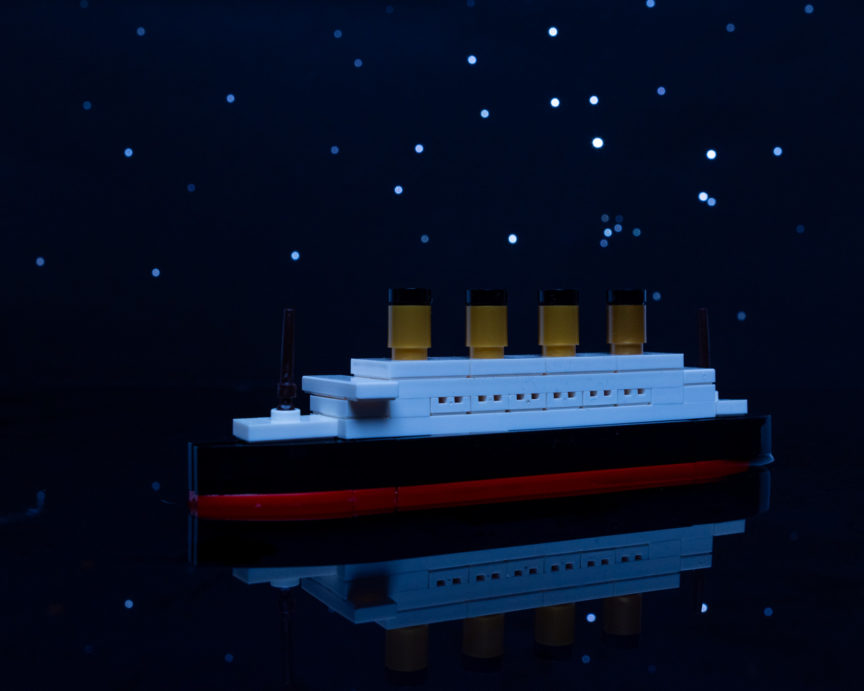
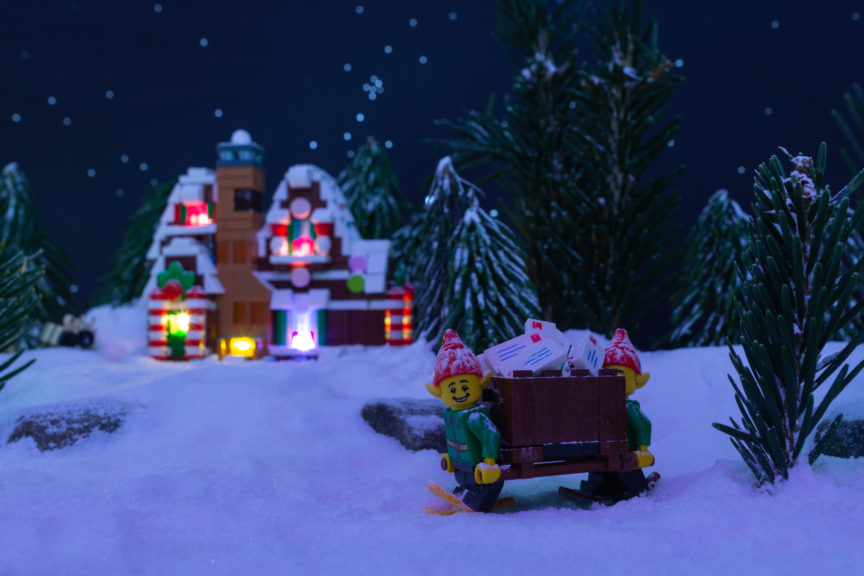
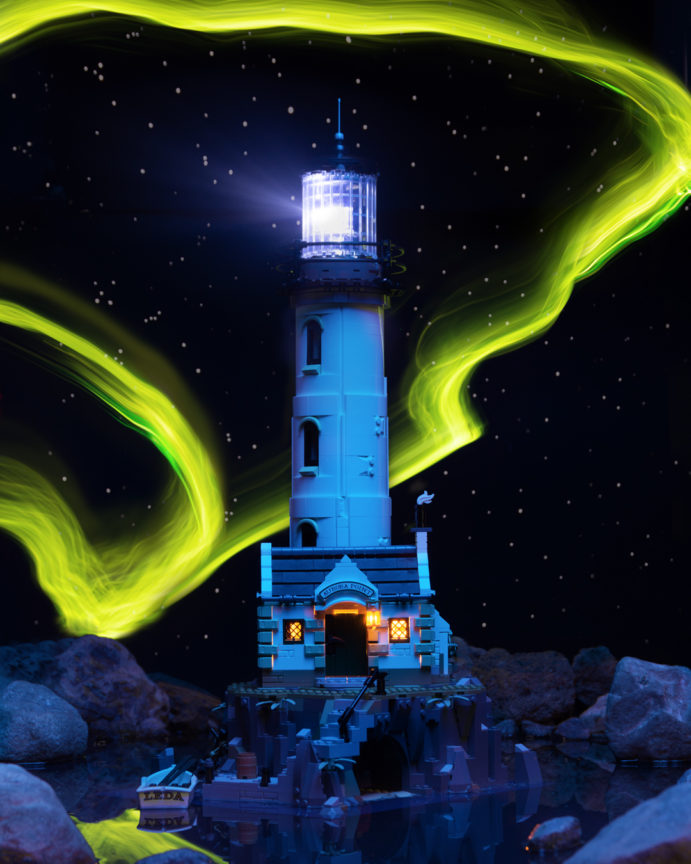
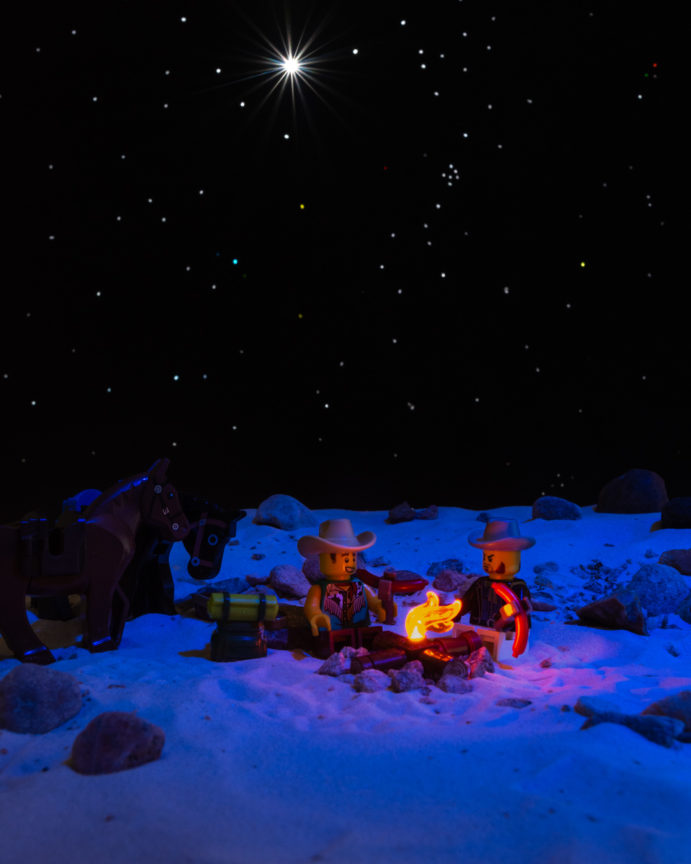
Simple Stars
The easiest and – in my opinion – most versatile option for a starry background, involves just a black cardboard, a pointy object, and a light source. With a sharp and pointy object like a skewer or screwdriver you poke holes into the cardboard. Ideally, they should be randomly placed and different sizes. You could even make some star constellations if you like. But don’t overdo it – depending on the scene, you might only see some stars and you can always add more holes to the cardboard later.
Since not all stars shine with the same colour, you can add some colour to the mix. Use transparent bricks in different colours or pieces of coloured transparent foil and tape them over some holes in the cardboard. (For a starry background on earth this isn’t really visible with the naked eye, but don’t let me restrict you in your creativity.)

Use the black cardboard as background and place a light source behind it. This can be a flash or a constant light source. The light shines through the holes and gives the impressions of stars. Depending on the aperture you are shooting with, you even get these star burst effect from the light that shines through bigger holes.
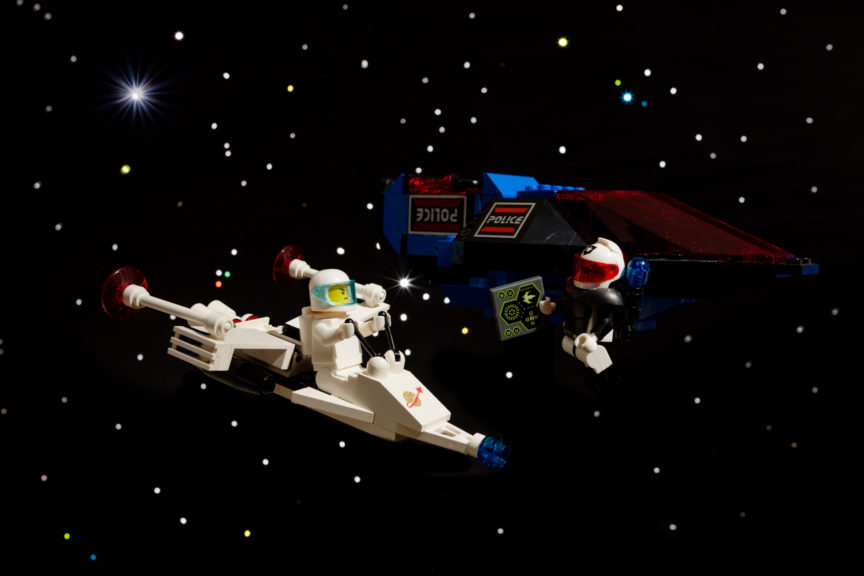
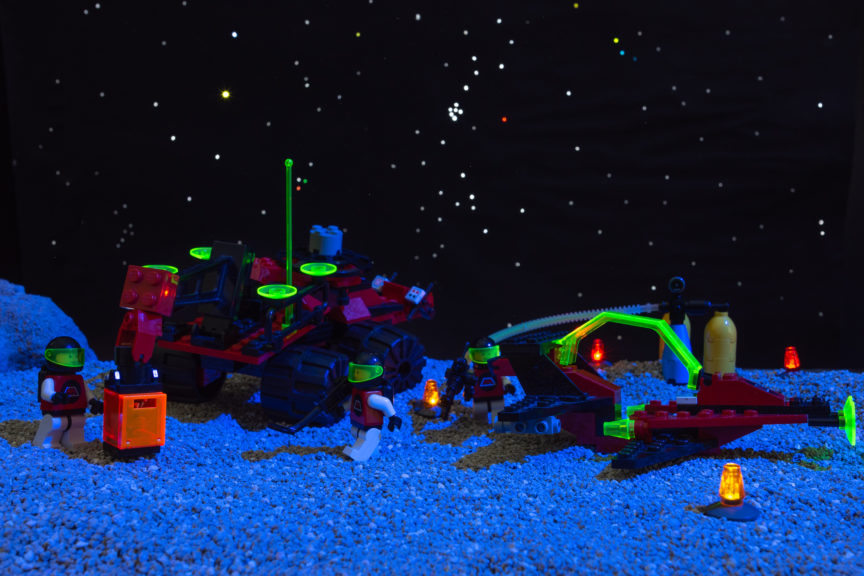
This technique is my favourite to add a night sky with stars to a scene. Here are some examples to show that you can not only use it to great effect for space pictures. And if you have a big scene, you just need a bigger cardboard ;-).
Going to warp/lightspeed/hyperspace
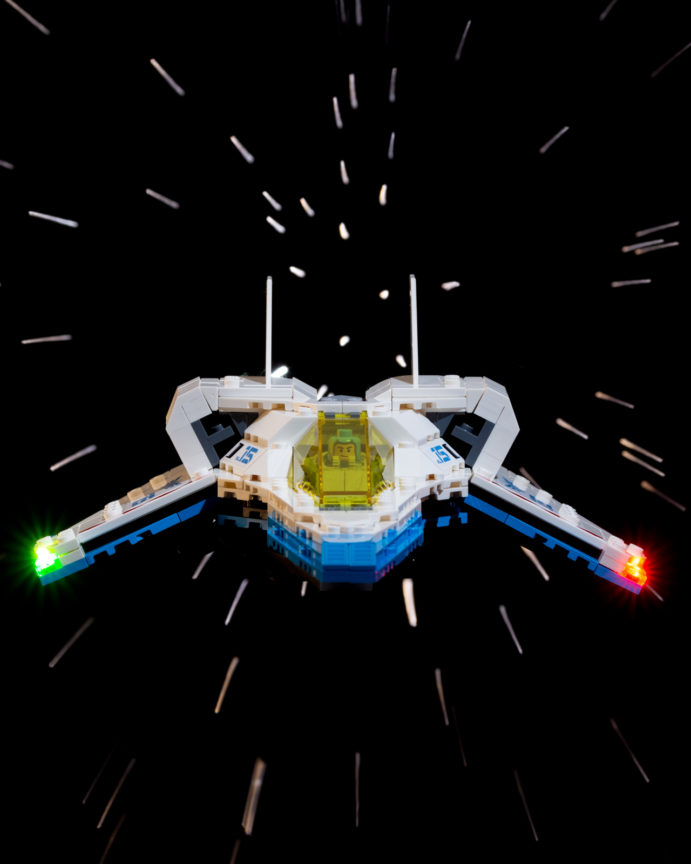
This is an “expert version” of the simple star background: maybe you want to add some dynamic and speed to your space pictures. To make light streaks like in most science fiction series seen during faster-than-light travel, you could use photoshop – or get your background moving.
There are two ways to make this with a practical effect using the black cardboard with holes. One requires a long exposure photo while moving the background and the other is a stop-motion technique using software for astrophotography.
In both cases, you need a steady movement of the background. I build (parallel) tracks with my old LEGO train tracks and wagon(s) with a frame to hold the black cardboard with holes. Depending on the movement you want to show, you can change the track direction in relation to the camera.
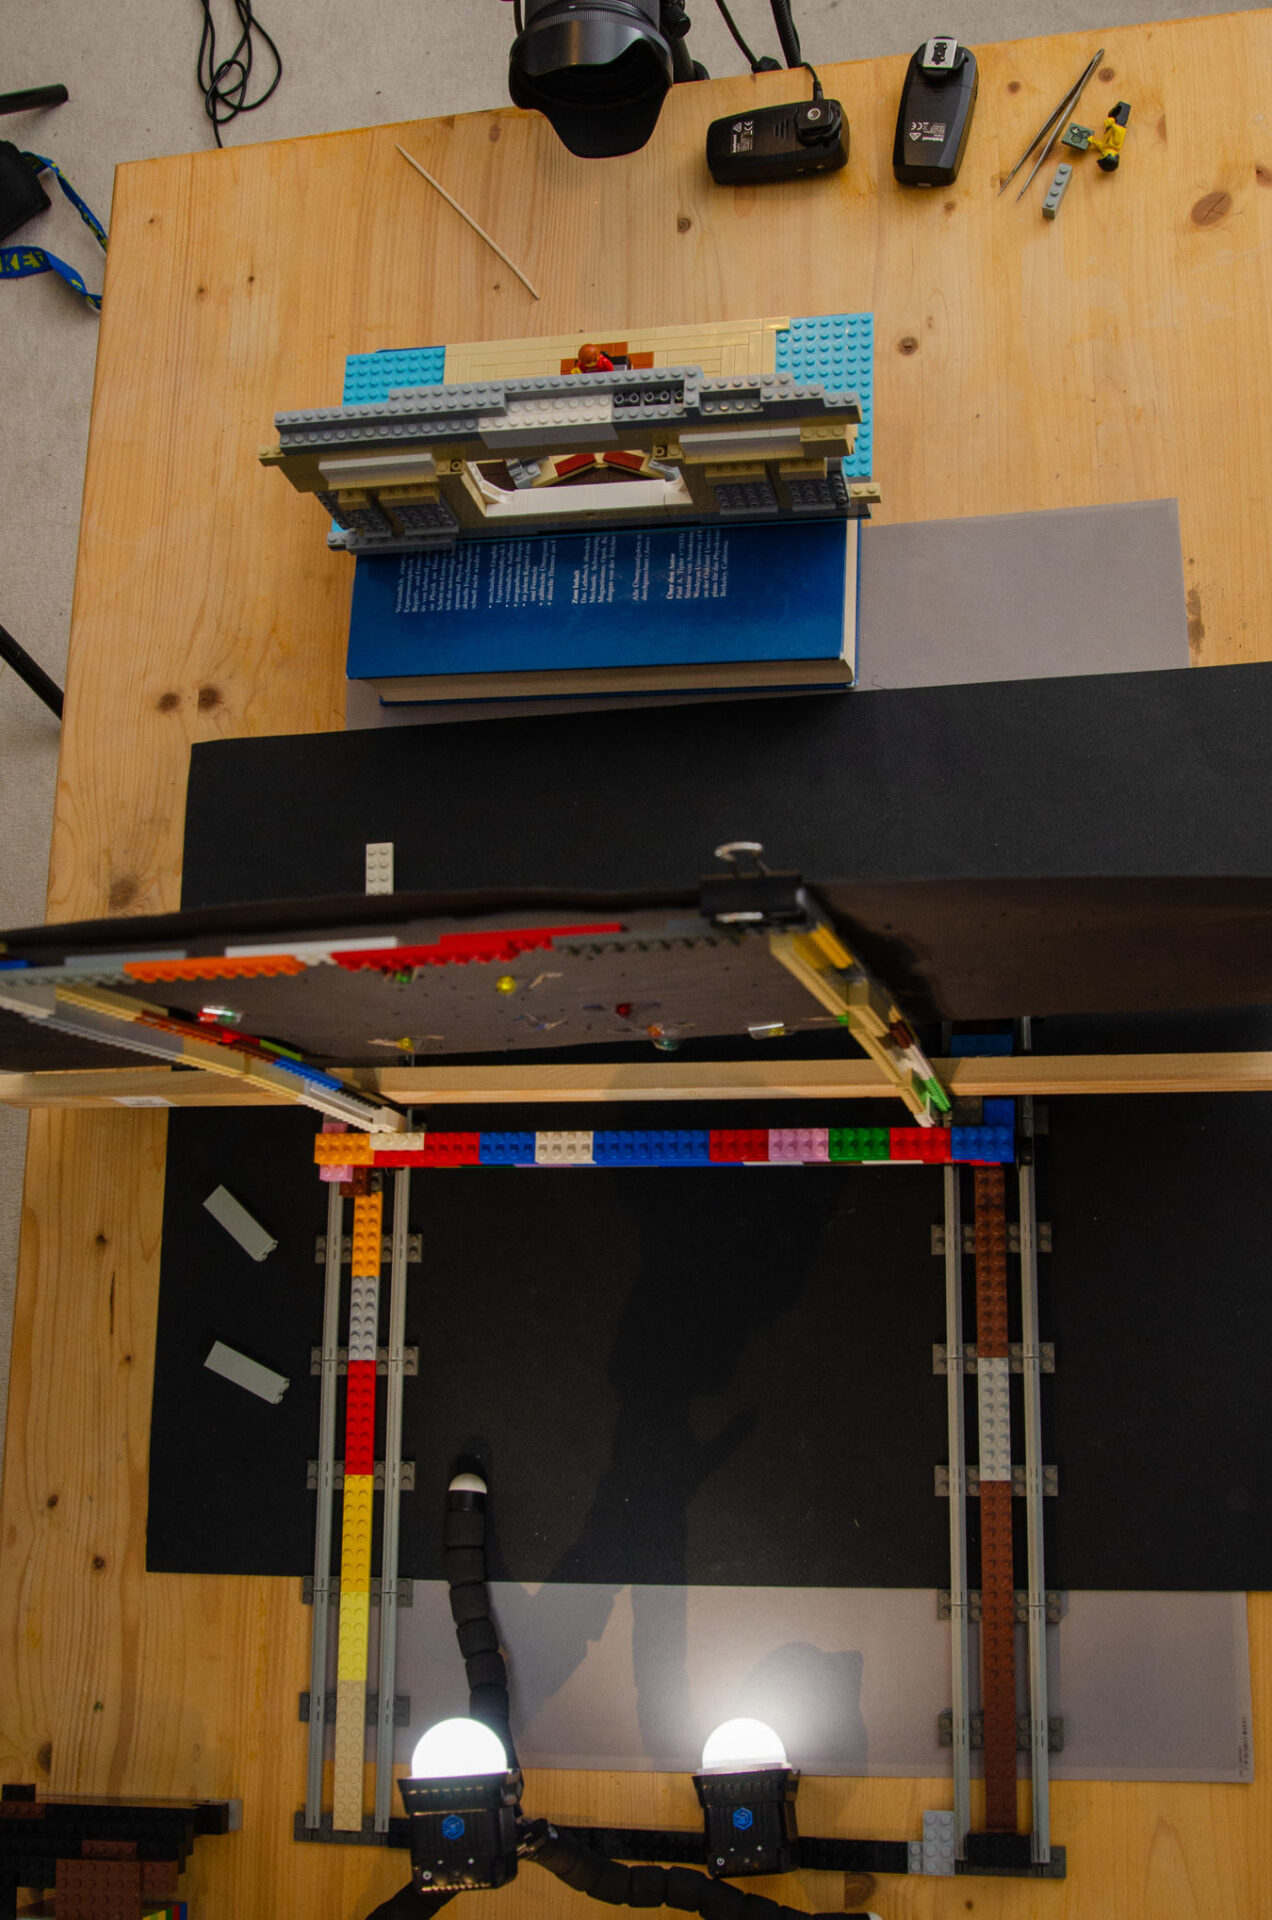
Movement towards/away from the camera
Movement perpendicular to the camera
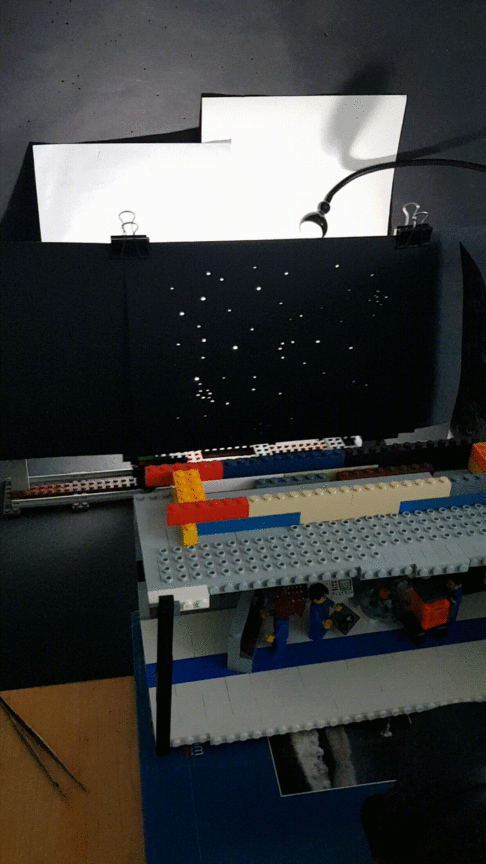
Lightpainting
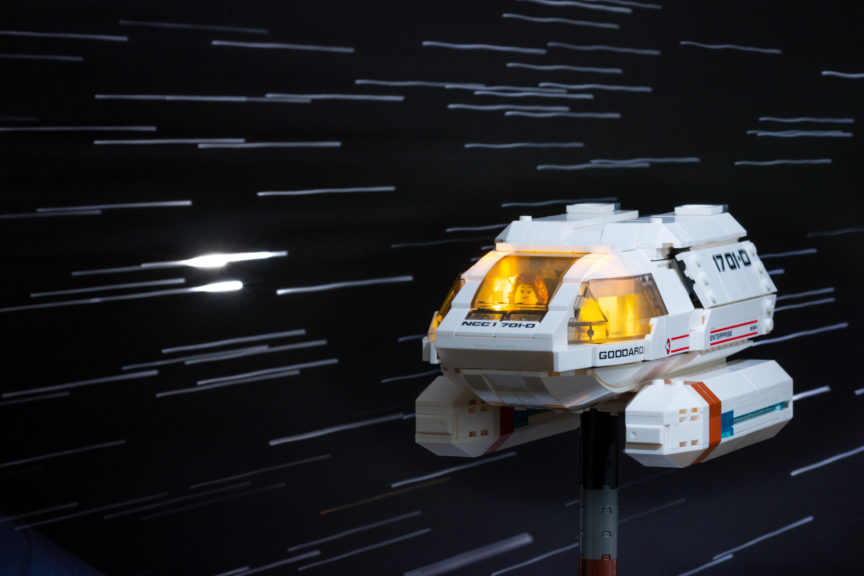
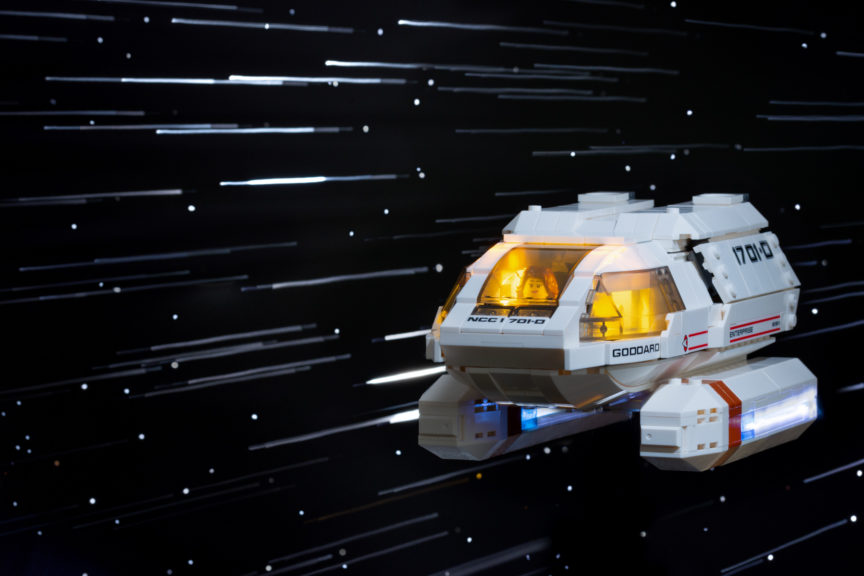
After this setup, for the first option, you make a long exposure and move your background during the exposure. This is like light painting and the exposure time depends on the distance you want to move your background, how bright your light source behind the background is and the lighting of your foreground scene (i.e. spacecraft). For these examples I used exposure times between two and five seconds.
The important part for moving the background is a steady movement with a constant (!) speed during the exposure. With this you get a nice view of the star trails out of the side window of a spacecraft during FTL travel.

If you move the background in any direction away/towards the camera, is it also very important, that your background doesn’t wobble. Otherwise the streaks will be wavy and have some “hot spots” like in the shuttle pictures below. For these, I wanted to go for another angle, so the tracks are positioned in an angular to the camera. For the extra stationary stars in the right picture, I simply turned the background 180°, so the holes are in different positions, took one picture in a fixed position and overlayed it in post-production.
“Stop-Motion Astrophotography”
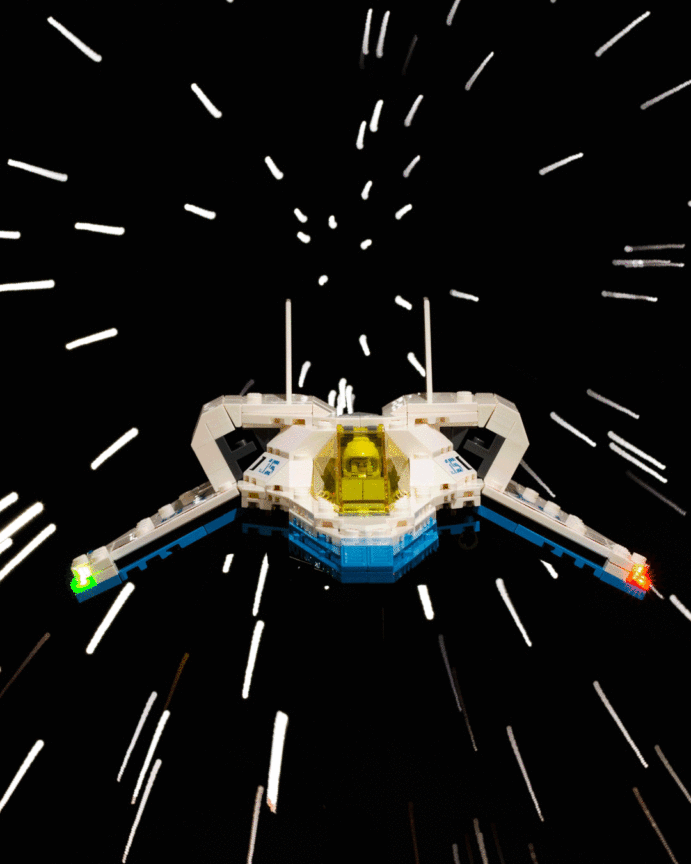
The other option to make the light trails is by making a “stop-motion” film and a technique from astrophotography to make star trails. Like in stop-motion, you take many photos with slight adjustments of the scene between them. In this case you move the background and keep your foreground fixed. For my setup with the LEGO train tracks, I put down plates between the tracks and used the studs as guide and step size. After making the initial corrections in post-production, all the pictures are exporting and then combined with a free software like StarStaX to make the star trails.
The important part for any kind of photo where you move the background away/towards the camera, is the eyeline of the camera and the position of your main subject. For a frontal shot, like above, the eyeline of the camera has to be parallel to the level of the tracks and the main subject has to be in the centre of the image. If you shoot your main subject downwards or upwards, the movement of the object suggested by the star trails could look very strange.
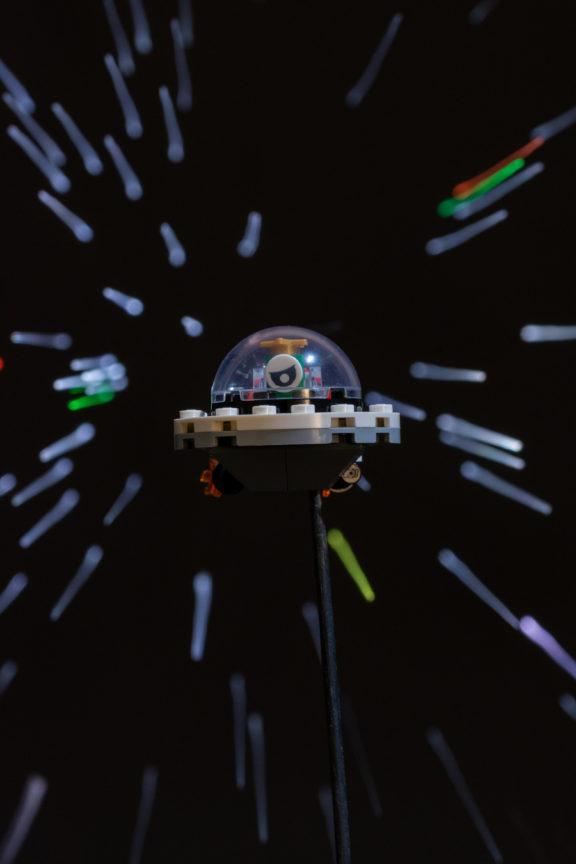
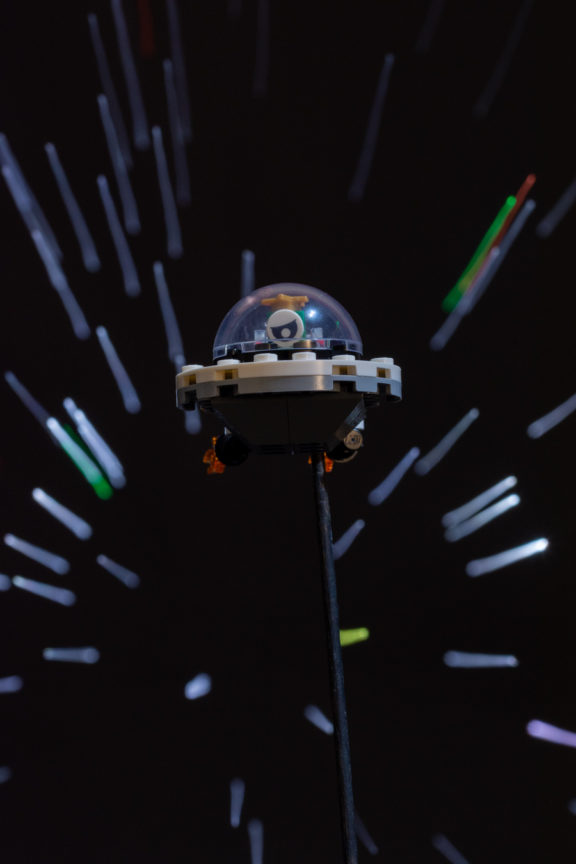
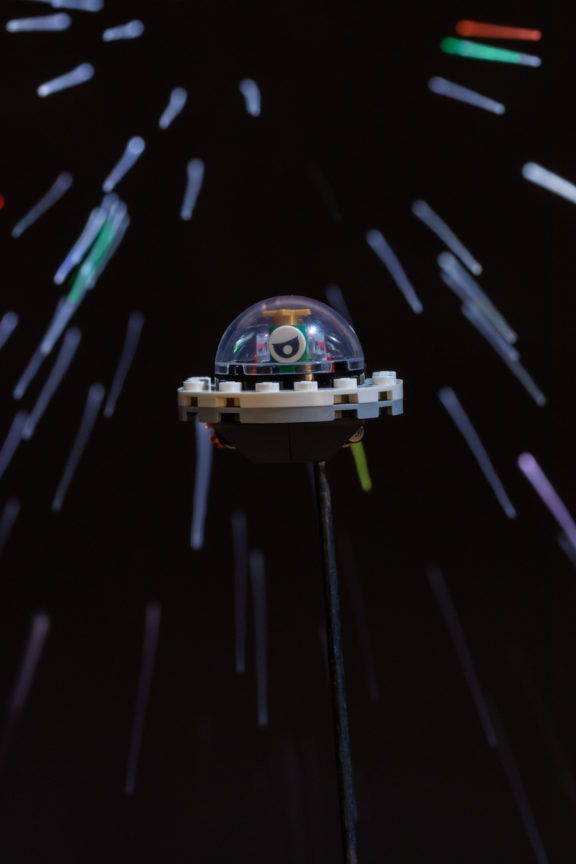
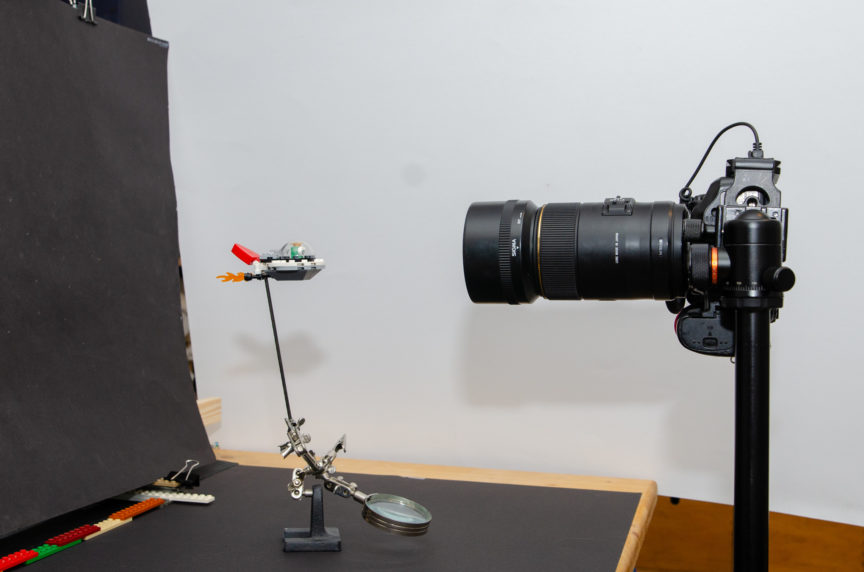
For illustration, I made three shots of a little alien in his UFO. The only difference between the images is the height of the camera on the tripod. I only moved the centre column of the tripod up or down to shoot downwards or upwards and tilted the camera to get the UFO in the centre. (Note: I just put the camera so close to the UFO to show the setup in the sideview. The distance to take the shoot is much greater due to the focal length of the lens. Also I intentionally didn’t edit the support out for an additional reference.)
If you look at the studs of the UFO, you can see, that the upwards/downwards angle can be relative small, but the star trails in the background could look very different.
Real movement
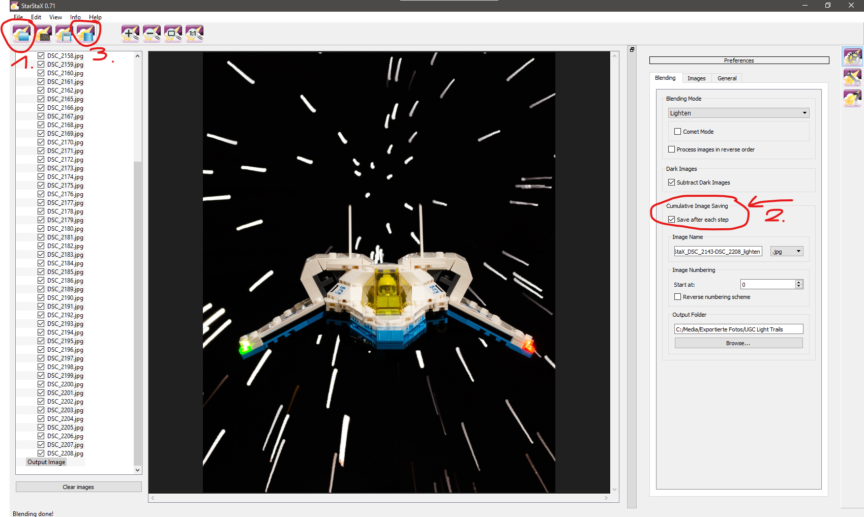
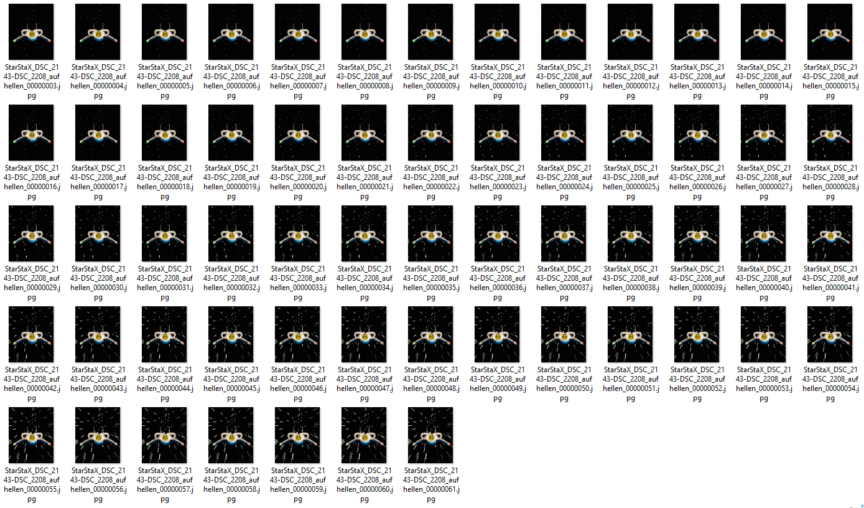
As a little bonus, I also want to mention the possibility to make something special from the “stop-motion” technique: StarStax has the option to save the resulting picture after each single picture added. (See the screenshot below). Once you added all your photos for the star trails, add the checkmark under “Save after each step” and then let the software work its magic. The result is a sequence of images, in which the star trails are getting longer with each image. Now you can make a video or a animated Gif out of this sequence with a video or photo editor. As a final result, you get a short animation of the acceleration or deceleration. (There is a loss of quality by converting the images into a Gif, but you should get the idea for the purpose of this tips and tricks.)

“Make it so.”
With the words of Jean-Luc Picard and these tips, I leave you to your imagination and wait curiously for the results of your space adventures.
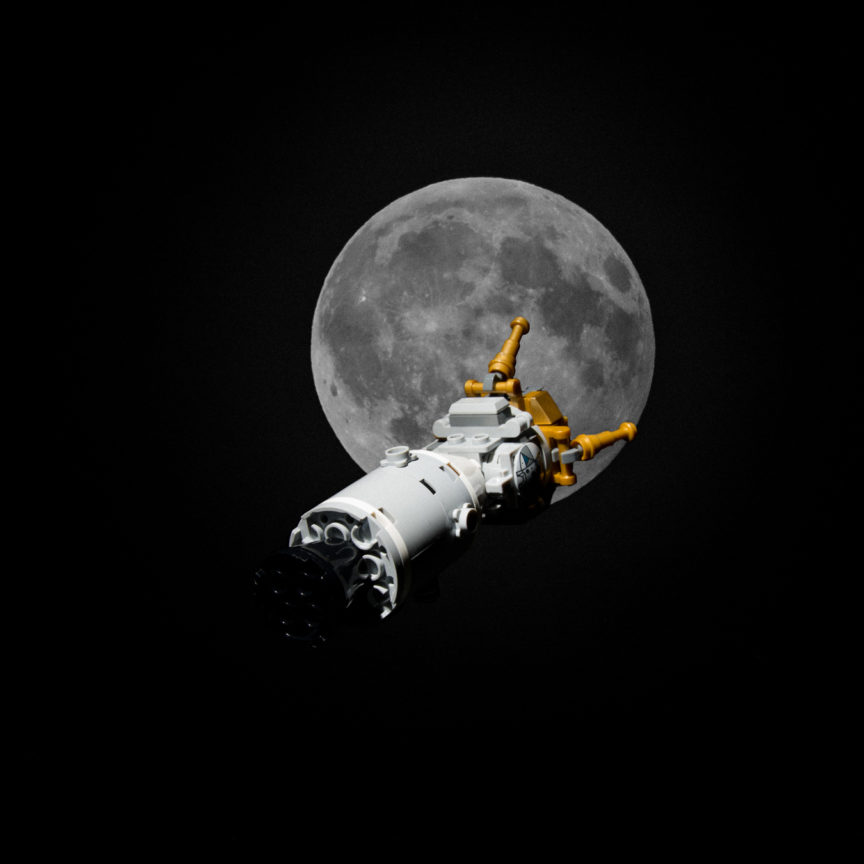
Note: The pictures of Earth used as background for these pictures are open access and public domain pictures available at the NASA image database.
The other background photos of the moon and the night sky are my own.