We often say that light is the basis of photography and this is absolutely true. The more light you have at your disposal, the better
But sometimes we need to limit the amount of light or direct it in a special way to create a certain atmosphere. In this situation, the so-called black flags come to the rescue – foam board and thick black paper. They are used to cut off excessive light, we will talk about this. I’ll start with the basic tips and will move on to something more creative.
Creating a black background

Sometimes I shoot scenes in which I need a solid black background. The simplest and most logical scenario is space-themed scenes. But how to highlight the model of the spaceship, while making sure that the light source does not enter the frame, and the background is really black?
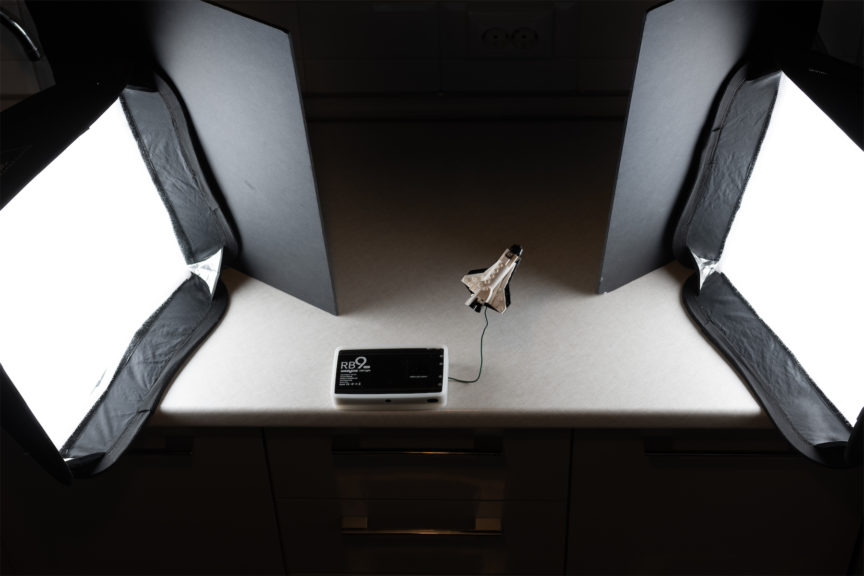
The answer lies in the correct direction of the light source. In this case, I used two flashes with 40×40 softboxes, which I rotated in such a way that they avoid hitting the white tiles, but at the same time they illuminate the shuttle from the left and right.
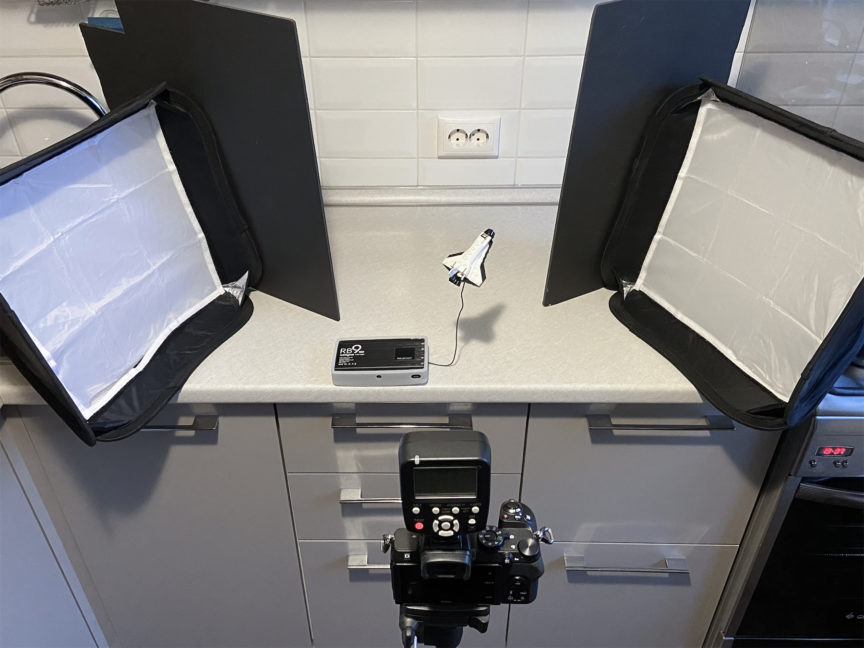
Since I’m working in a small room, the light somehow hits the background even with this flash position, so I put two pieces of black foam board right behind the softboxes, which prevent the light from spreading into the background.
In fact, if I were far enough away from the wall, I wouldn’t even need the black flags to correct the direction of the light, since the light wouldn’t hit the wall or bounce off it. But if you, like me, work in a small space, flags become indispensable helpers.
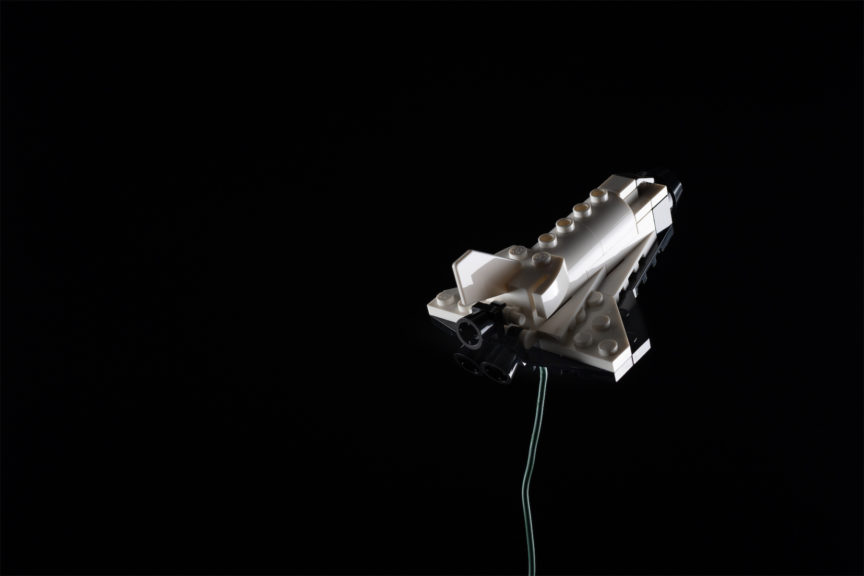
The shuttle on a solid black background is ready. In the end, I still use a photo editor to erase the wire, remove dust particles from the LEGO parts and slightly discolor the shuttle. This is all done in just a few minutes. If desired, you can add stars and planets, but I think that this is a topic for other tips.
Cutting the light
I rarely build full-fledged MOCs, as a rule, I just need to fill the frame with a brick-built environment, instead of spending time and resources on building an entire building and interior. This time my task is to create a dark room, but at the same time build only one wall with a doorway and tile a small piece of the floor. This is what will go into the frame.
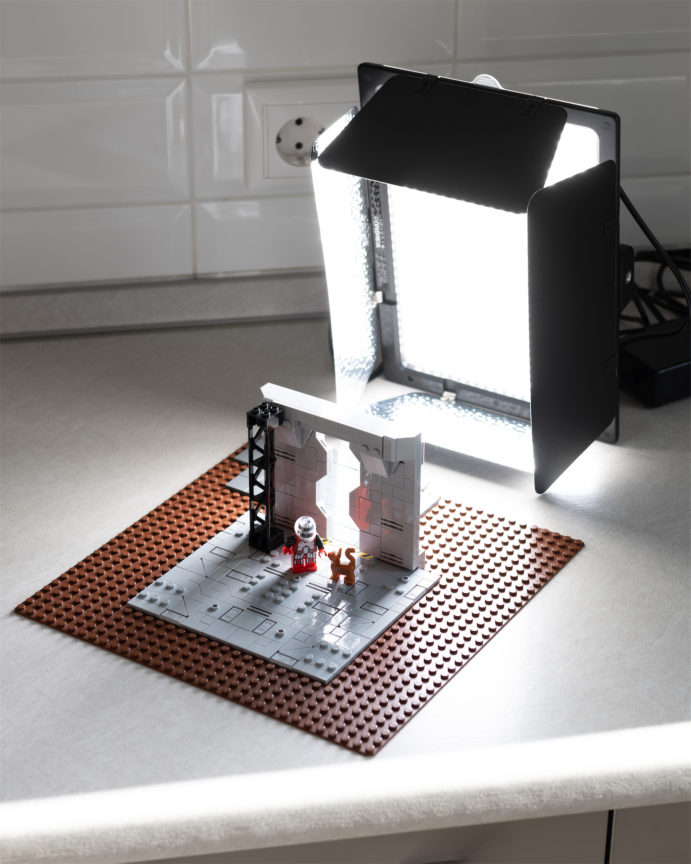
So, I built the composition and put a bright LED panel. To cut off excess light, I use a sheet of thick black paper. I make a cutout and set the sheet in such a way that the light passes only through a narrow doorway.
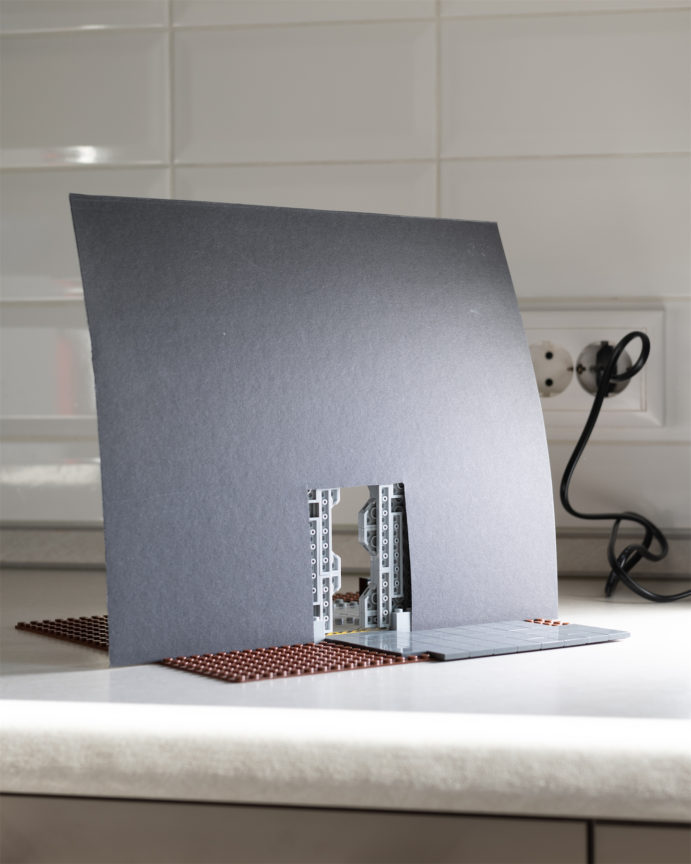
It would be possible to assemble a wall from LEGO, but the glossy plastic parts will give reflections, in addition, the light will penetrate through small gaps between the parts. You will have to deal with the boring elimination of unnecessary side effects in the photo editor. The matte black flag does not let light through and absorbs any possible reflections, which is exactly what I need.
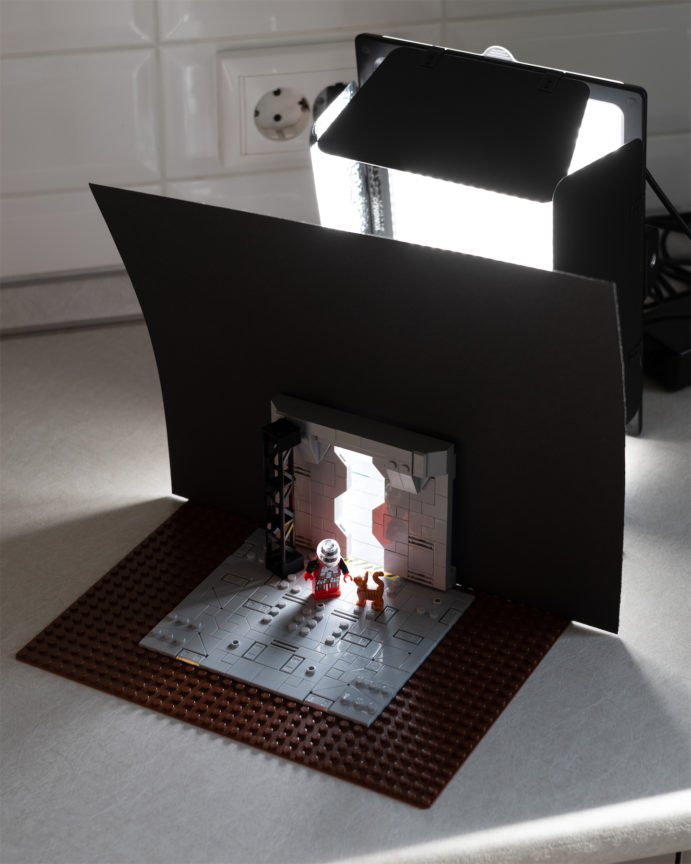
The backlight envelops the characters beautifully and provides high contrast in the final shot. I’ll add quite a bit of atmospheric effect with a portable facial humidifier.
In some situations, you may need a pair of flags on the left and right for additional light clipping to create a completely gloomy atmosphere, but in this case, I got by with one. I didn’t need a big set since I was shooting close-ups, so the black flag helped save time on the build.
Outlining with light

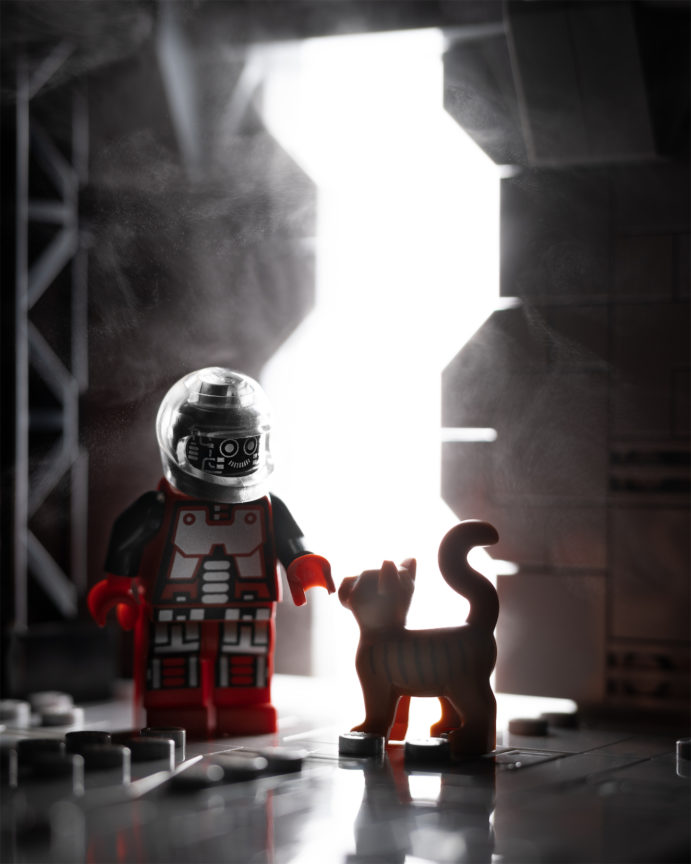
Outlining with light – shooting with backlight, using a blocking flag between the subject and the light source. This is a very interesting technique in photography that allows you to make conceptual images in which the light literally touches the edges of the object, drawing a glowing outline against a dark background.
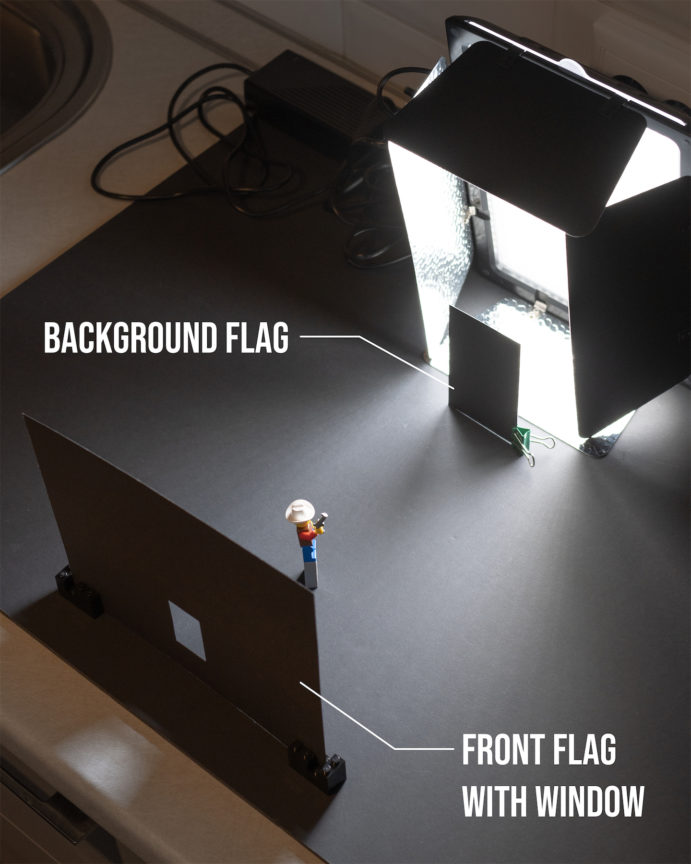
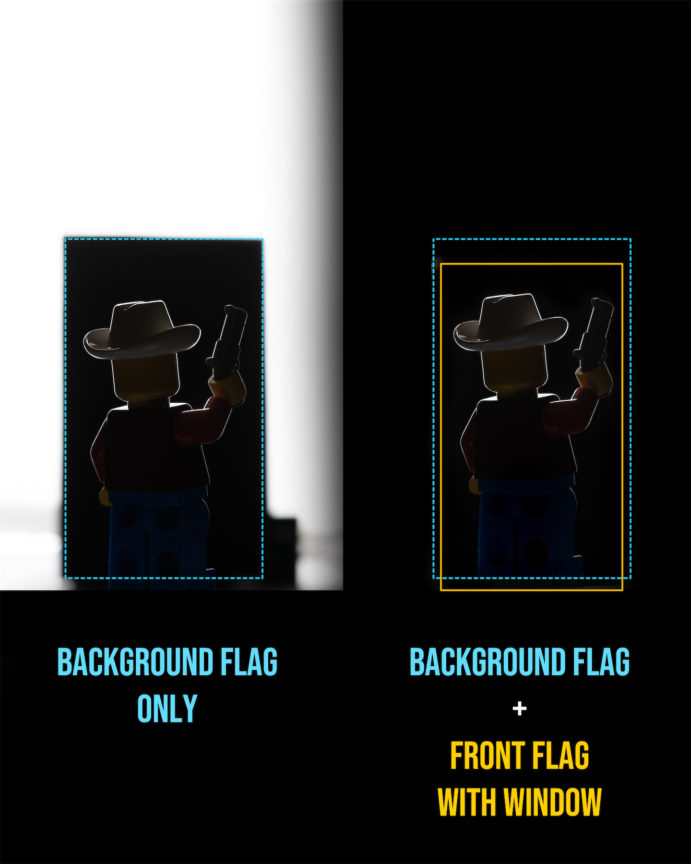
I will use two flags made of thick black paper. In one of them I cut out a small window through which I will shoot, and the second I will put between the minifigure and the light source. For convenience, hereinafter I will refer to them as follows: Background Flag (small) and Front Windowed Flag (large).

The layout looks like this: Right in front of the camera, I put a front windowed flag and a little further I put a minifigure. The flag completely blocks the light on the periphery of the frame, and through the window I can see the minifigure. Right in front of the light source, I put a small background flag, which actually prevents the light from entering the hole and is the backdrop for the minifigure. It is important to place all items on the same line.
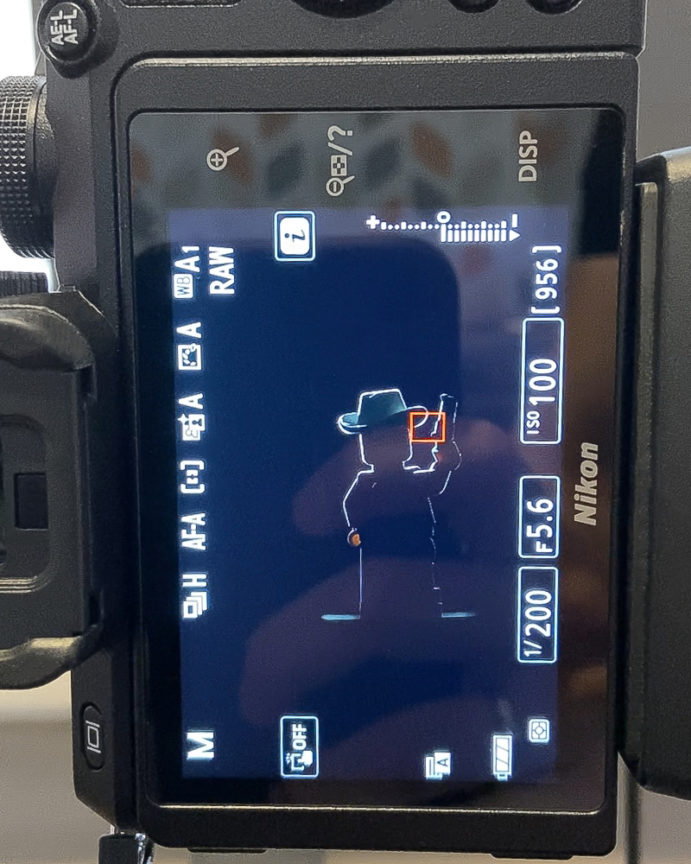
The result is highly dependent on the size of the background flag and the distance between it and the light source. It took me quite some time to find the best flag placement and get the minifigure’s light outlined properly. Here is what I saw on the display of my camera.
To make it a little easier for you to understand how it works, I took two pictures – one with only the background flag, and the second with both flags. Of course, you can only shoot with a background flag and then cut out the figure on a black background, but I think it’s much more interesting to do the maximum work in the process of shooting and the minimum in the photo editor.
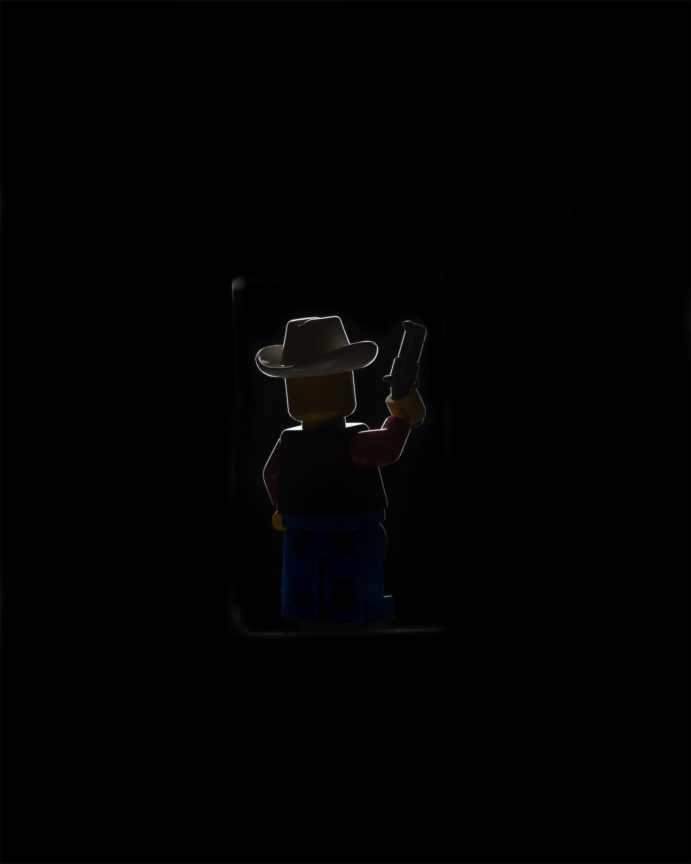
Here is the final image. The image looks almost perfect, but it was preceded by many attempts. In this case, I need to spend just a few seconds to erase the edges of the window in the photo editor, slightly adjust the contrast and brightness of certain parts of the minifigure.
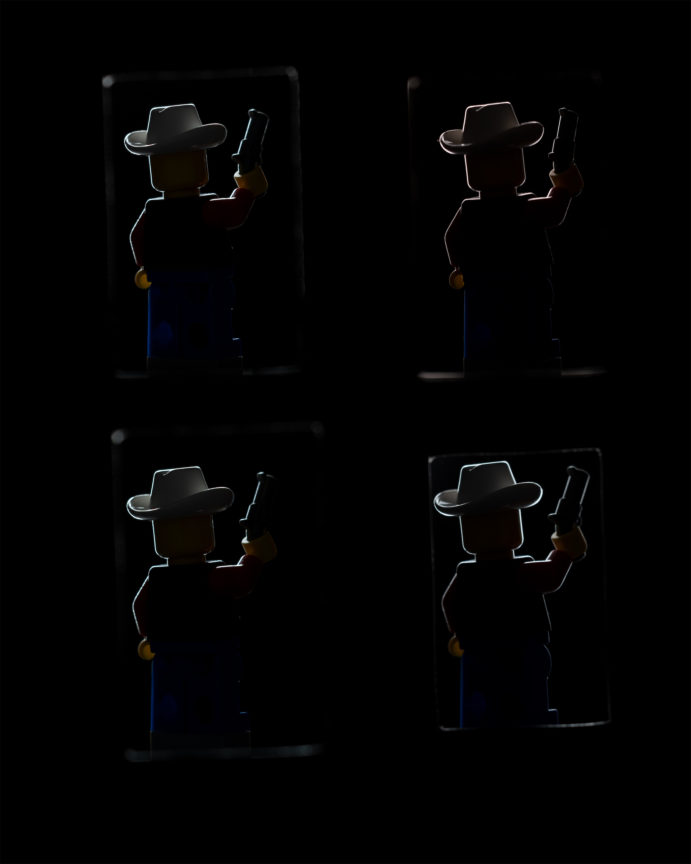
I want to say again that I did not get my final frame right away. Experiment with the arrangement of flags on your table and with the brightness of the light and everything will definitely work out.
One Comment
Comments are closed.