We’ve invited our community member m1brickcars to share some advices to take realistic LEGO cars pictures and this is what he came out with!

I have been a fan of LEGO and photography for a long time, but it was only a few years ago that I decided to combine the two passions and create a dedicated Instagram account page.
My LEGO collection is based a lot on vehicles, in particular cars, and that’s why I try to create scenes where these are the main subject.
BrickCentral gave me the opportunity to share with you a couple of tips and tricks on how to shoot vehicles in a sporty way.
My idea of photographing LEGO cars is to make them look as close to real scenes as possible, so very often I have to create objects with the right scale to trick the eye.
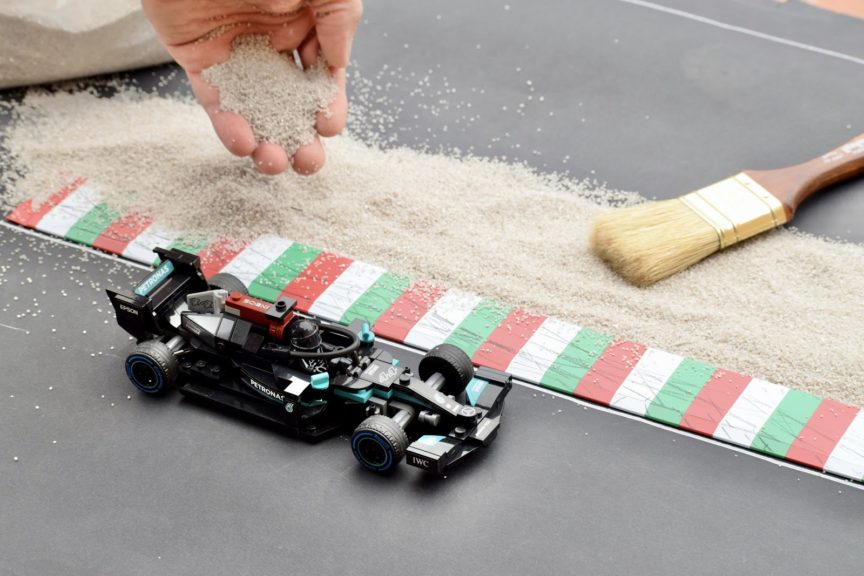
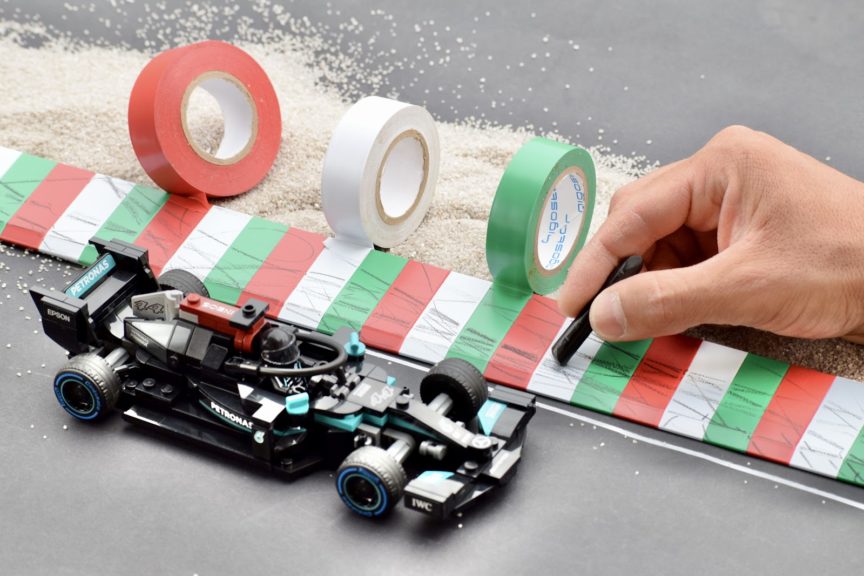
If you want to shoot F1 racing cars, one of the things that is better to include in the frame is the curb.
I liked the idea of having a multi-colored curb and so I used a simple adhesive tape of different colors and very carefully placed them in order to recall the colors of the Italian flag. Here you can also have fun with other colors such as green and yellow or simply with a classic red and white color.
To shape the curb I’ve used a simple ruler. Then I used grainy white sand to make the escape route right after the curb.
In real circuits, this trick is used to slow down the cars in the event of an accident.
Then, with a black crayon or wax color, I drew some marks that recall those of the tires, so as to give an extra touch of reality to the photo. These burnt rubber marks are visible in almost every car race and are caused by the tires which reach temperatures so high that they melt on the road.
This is an example of small detail that can’t be overseen in a racing car picture!

All of this is placed on a sheet of black cardboard (sometimes I use the gray one) that acts as asphalt in all my photos.
The tilted camera gives that dynamic look almost mandatory for this kind of picture.
Special effects and posing
These are very important factors for LEGO photos, especially if you want to photograph a vehicle and make it look like it is moving.
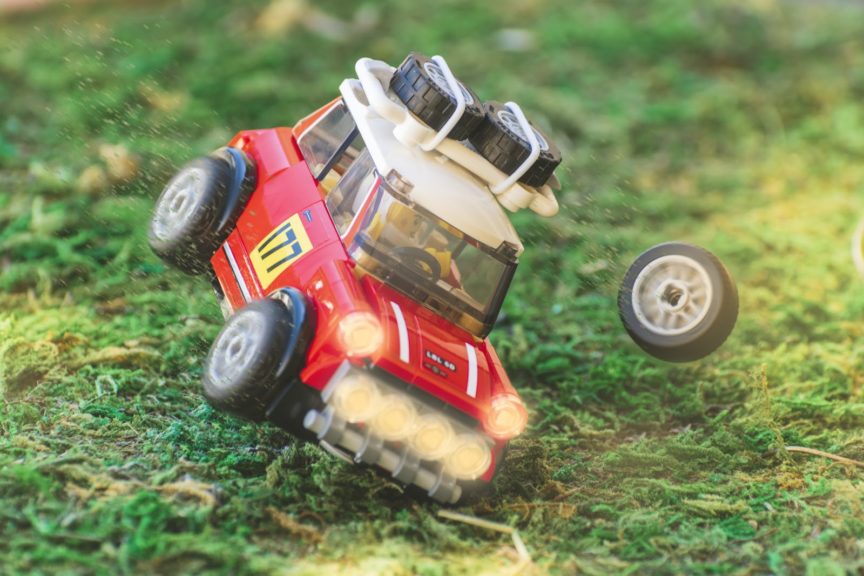
Most of the time, to recreate a moving effect you need to work in post-production. I’m not saying is impossible to make it on camera but I prefer to work on it in post-production, especially to make the wheels spin and the roads flow.
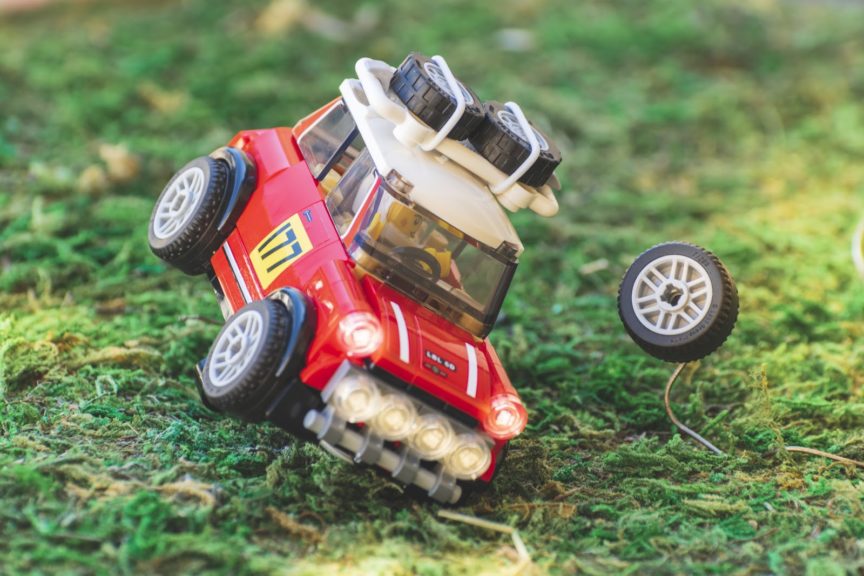
But sometimes this effect alone is not enough to give the illusion of movement, you have to rely also on posing.

The vehicle must point in the direction of movement. If you don’t know which could be the best pose, try to play with it a little bit then stop when you find the “cool” position you were searching for.
Don’t forget that every car has its pilot, so pay attention to their expression and where they are looking.
If you want to recreate a drift, for example, making the figure look toward the spinning wheel could strengthen the illusion.

If you are into details, like me, you can add the burnt marks, useful as indicators for the direction.

The smoke is another essential part if you want to give a touch of realism to your picture. For this I suggest using a well-known trick with a nebulizer, paying attention to the direction of the smoke, which should go against the car.

In this scene taken from the movie “The Batman” I had to use real flames to reproduce the scene of the film as faithfully as possible.
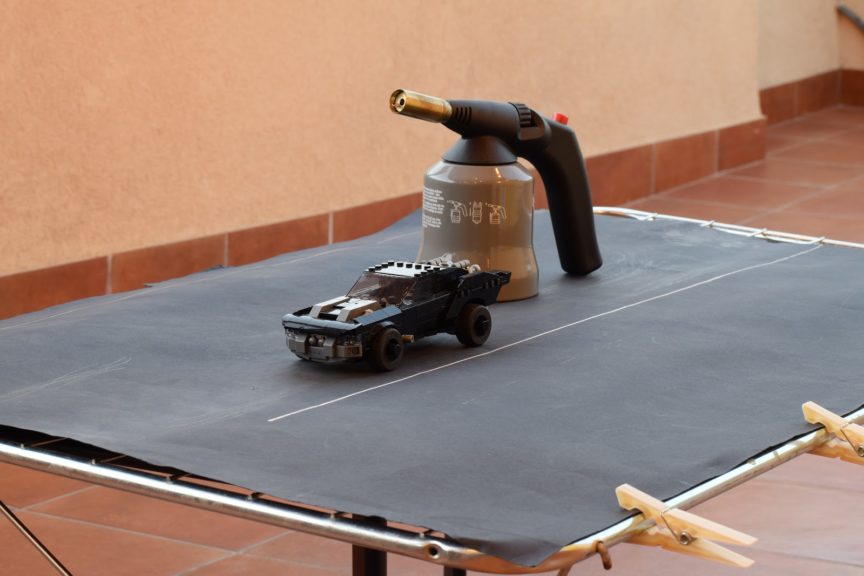
You can see the flames in the background but also the warm reflected light created by the flame itself.

These effects give the photo a unique look, very complicated to recreate in post-production. For this type of photo, however, pay a lot of attention when using fire and remember not to use it indoors!