Want to light your LEGO scenes with a light source you already have? Use your phone flashlight.
I shared how I used my phone LED to light a LEGO photo on my blog several weeks ago but I made a few more photos using the same technique since then.
Not all light is the same, and you should know when to use what kind of light for your own photos. Most beginners stick with cloudy daylight which is soft light, because it’s much easier to work with. Reflections are easier to manage and lighting is even.
A phone LED is a hard light source. It’s small, so it outputs light that creates shadows with a very clear definition. There’s a hard edge, no transition. It’s the kind of shadow that you also get on a cloudless day. The sun, while massive, is a just tiny point of light to us because of the distance.
There are a lot of different ways you can use a hard light source even as a beginner and I’ll show you how in these next photos.
If you’re keen to learn about other kinds of light, here’s my Characteristics of Light video on YouTube that will show you the fundamentals.
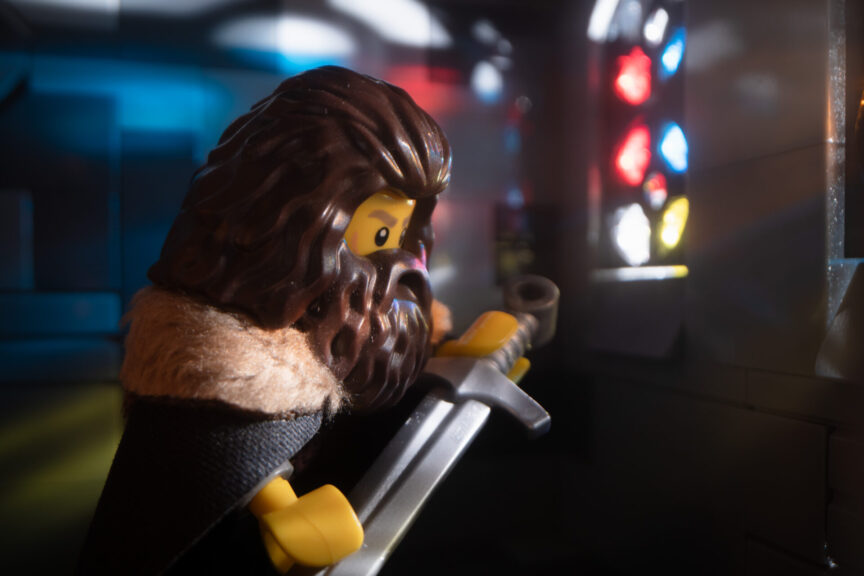
Create shapes
Hard light is great for creating shapes, which add some visual interest to your scene.
In this photo, I shone the phone flashlight through the LEGO windows to create shapes on the minifigure.
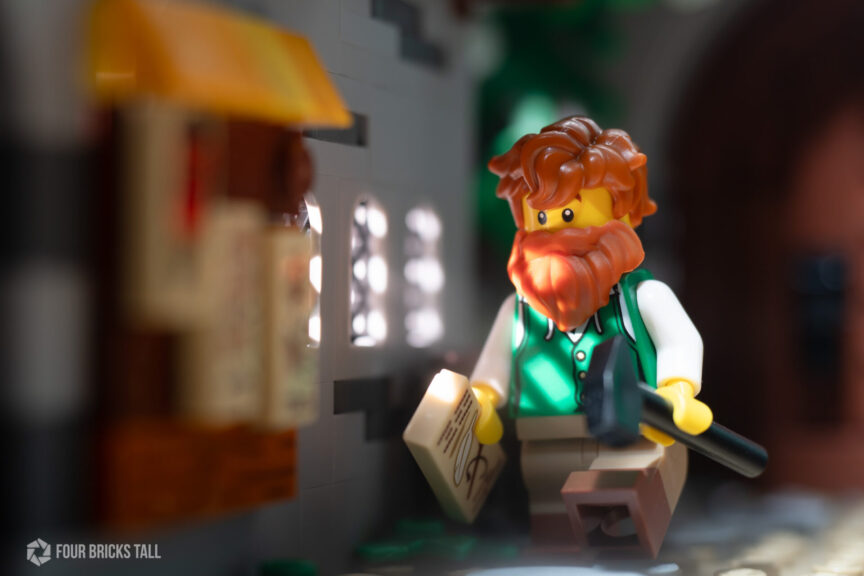
This is part of my Galen’s Row MOC which is a series of entirely brick-built facades with a medieval theme, but you can use official LEGO sets, cardboard with cutouts, or whatever materials you can craft with. Be creative with what you own!
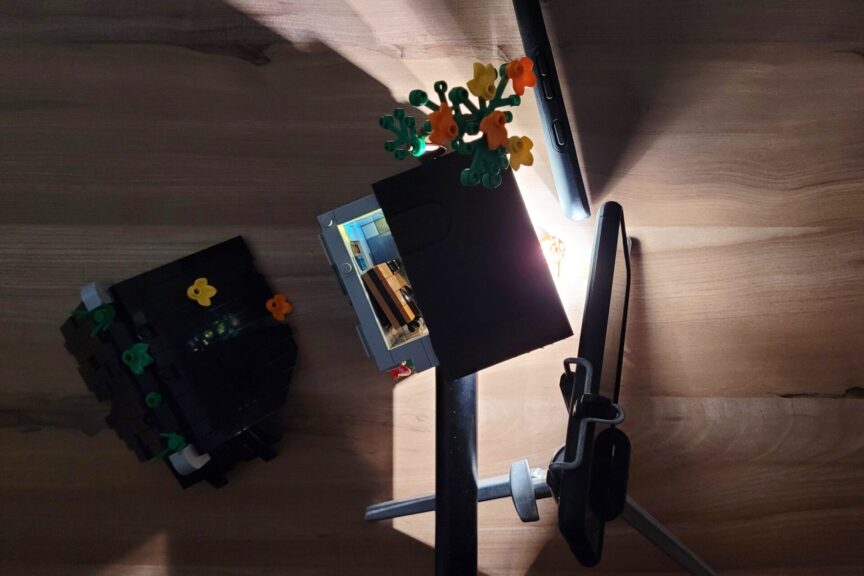
Create light rays
Here’s another example of using a phone LED to light a LEGO photo: light rays!
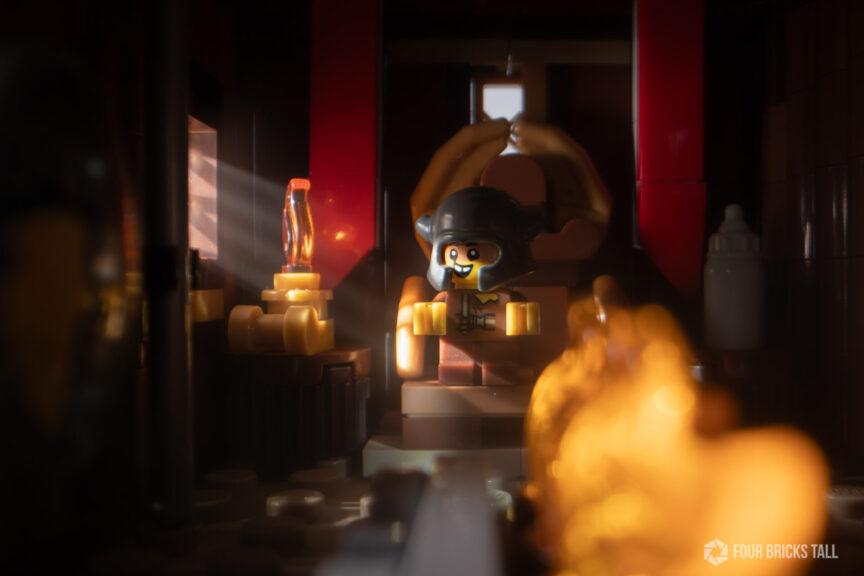
In this example, I shot inside a fully enclosed LEGO model. It’s much darker in there so it’s a great way to get light rays to show up.
Similar to the shot in Galen’s Row, I shone the phone LED in the window closest to the baby Viking with the goal of lighting its face, and then sprayed a little mist from my super-popular facial mister (you’re welcome everyone lol).
Cast color
In this third photo, I used the phone LED to light up some transparent plates in a window to cast some of the colors onto the background.
I used two phones for this one: to cast colors on the wall and to light the subject.
I placed a piece of black foam sheet over the top to block any stray light.
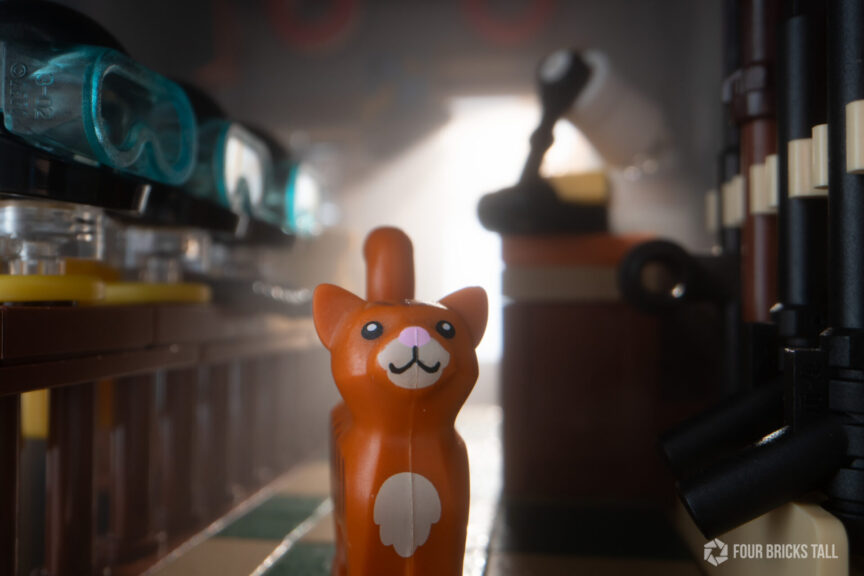
Backlight the subject
For the last photo, I simply placed the phone behind the Old Fishing Store set and shone the light through the open door to backlight. For fill, I had an LED panel on the left side. Check the reflection on the left side of the cat to see where the reflection from the fill.
Hard light is great light
Four ways to use a light you already own to light your LEGO photos in a more interesting way. If you’re using your phone to take LEGO photos, you can use any other small light like a flashlight or even a keychain. Any tiny light will create hard light.
The weaker the light source, the longer you’ll have to set your shutter speed so make sure you have your camera on a stable surface or on a tripod.
For a detailed walkthrough of how I created these shots, check out my YouTube video: