I’ve been doing LEGO photography for a while and like many people, my collection consists of built and displayed sets as well as bulk pieces to make the MOCs for my photos.
Who hasn’t dreamed of making large LEGO sets, which take up a lot of space in the photo? But unfortunately, we’re confronted with two problems: the lack of LEGO parts and/or the lack of space because of a small table or little space to make the pictures.
This month, I propose a solution to solve these 2 problems!
For a very small budget of less than 5€ (or 10€ if you want to do something crazy), the solution is… MIRRORS!
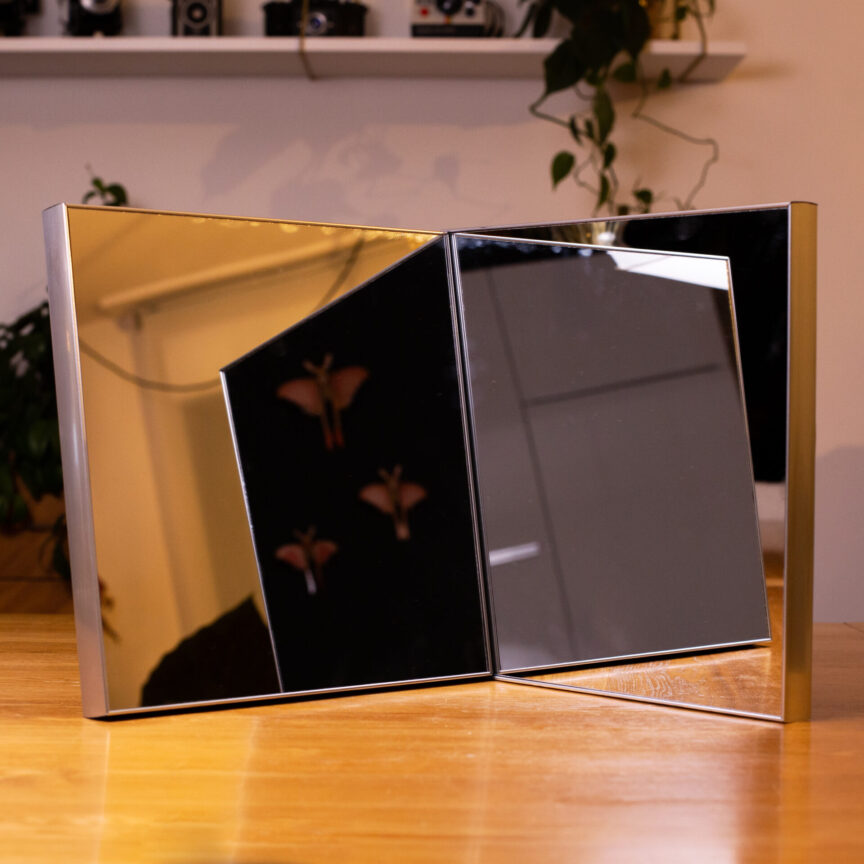
You can find them for a few euros in DIY stores. I found 2 for 8€. The solution is very simple to implement and the effect is guaranteed.
To illustrate this, I propose 3 different universes: adventure, medieval, and space.
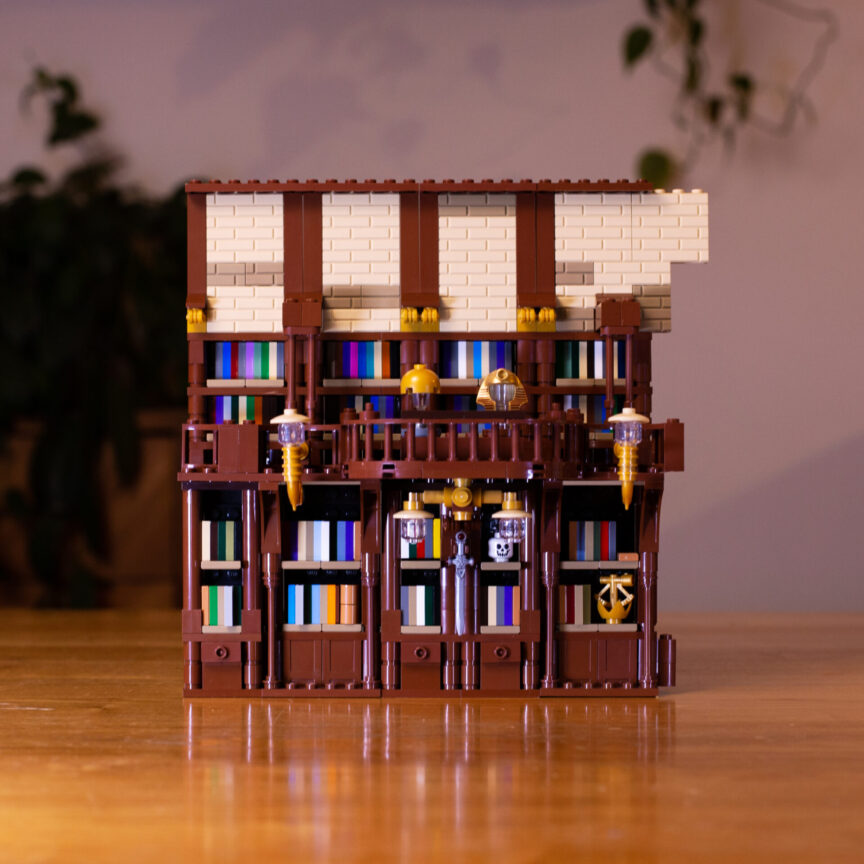
The library
Let’s start with a monumental library, inspired by Indiana Jones-type adventure movies.
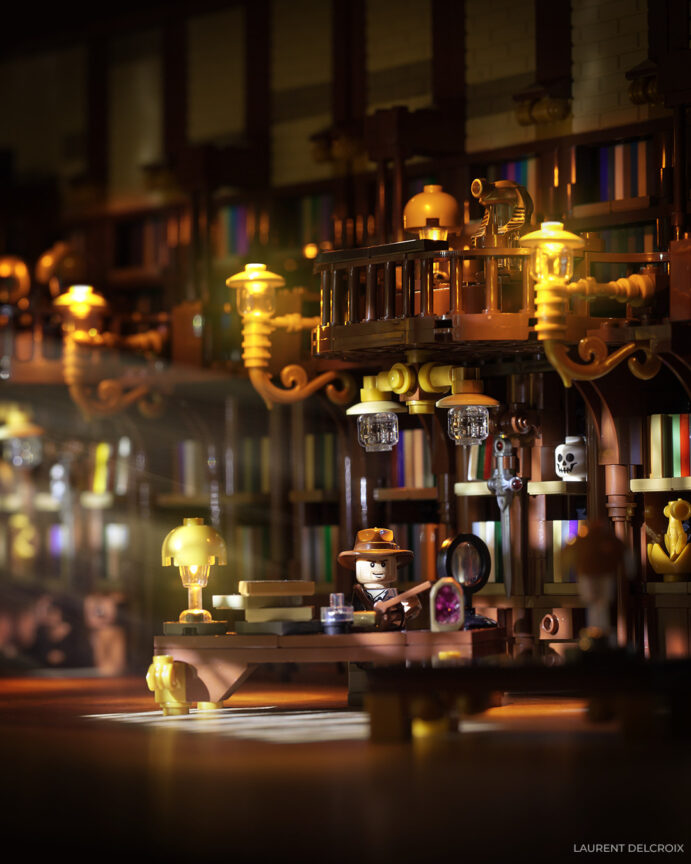
Without the mirror, I would have had to use many more LEGO pieces.
Here is the area created with this one:
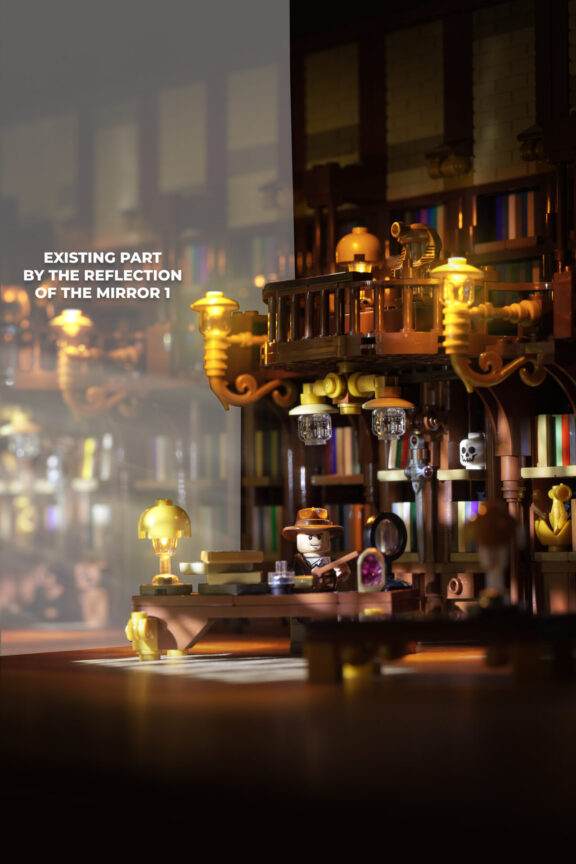
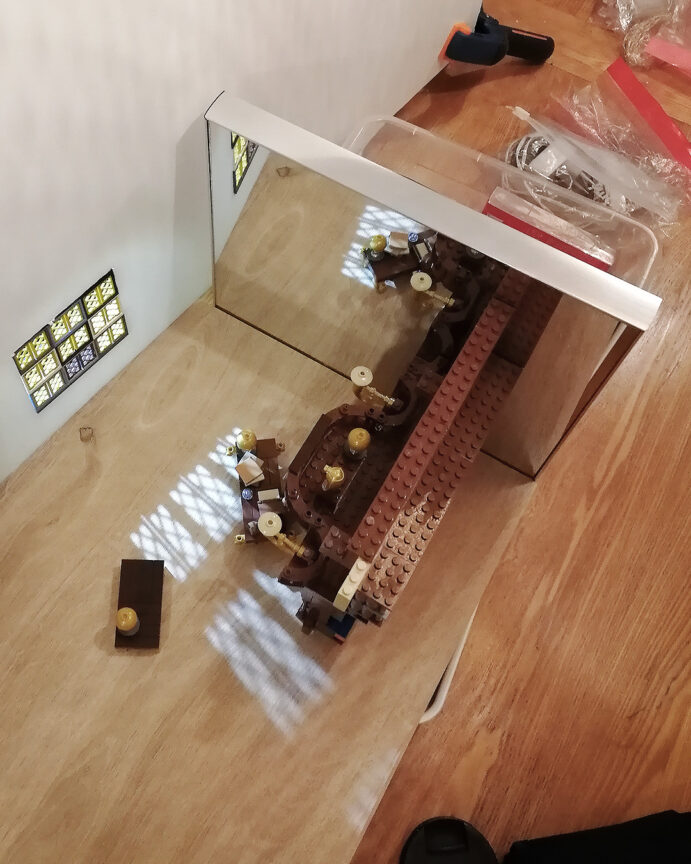
While building your MOC, check the consistency of the reflection by occasionally putting the mirror to the side.
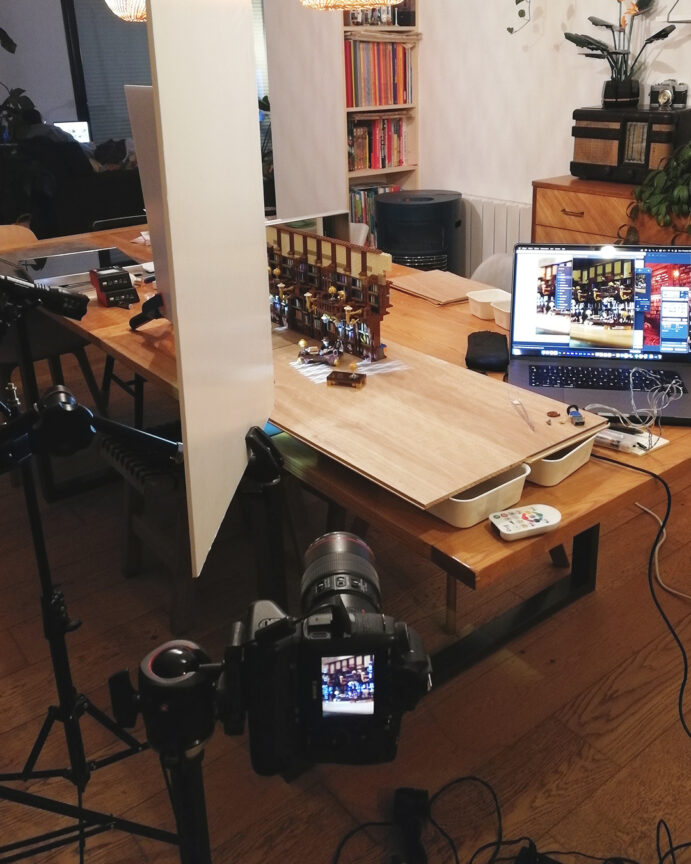
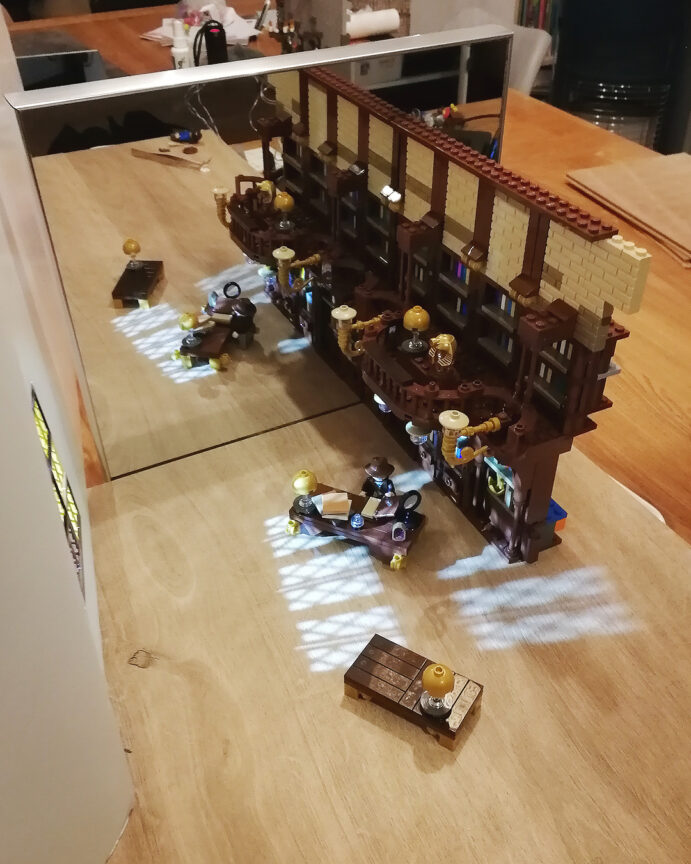
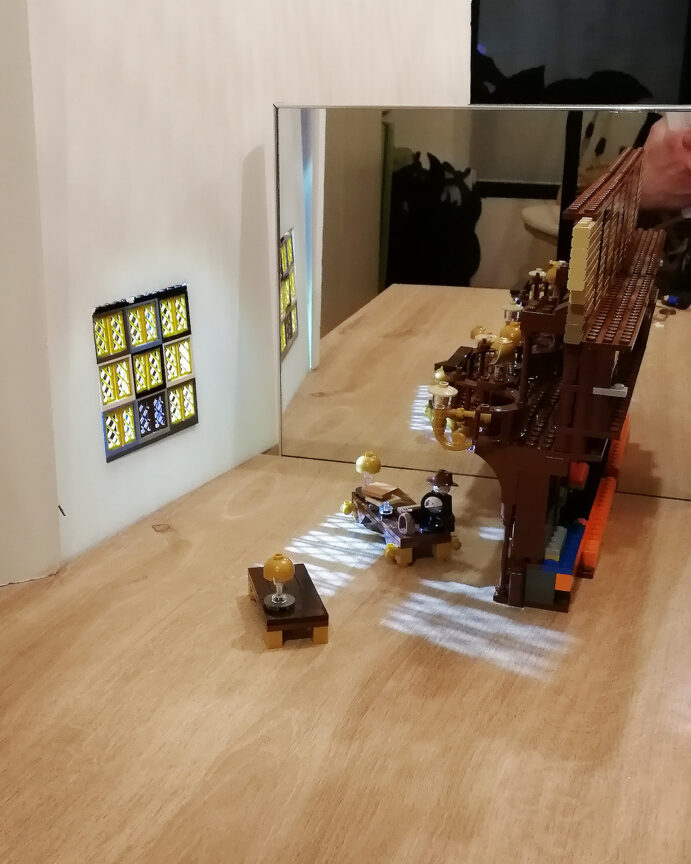
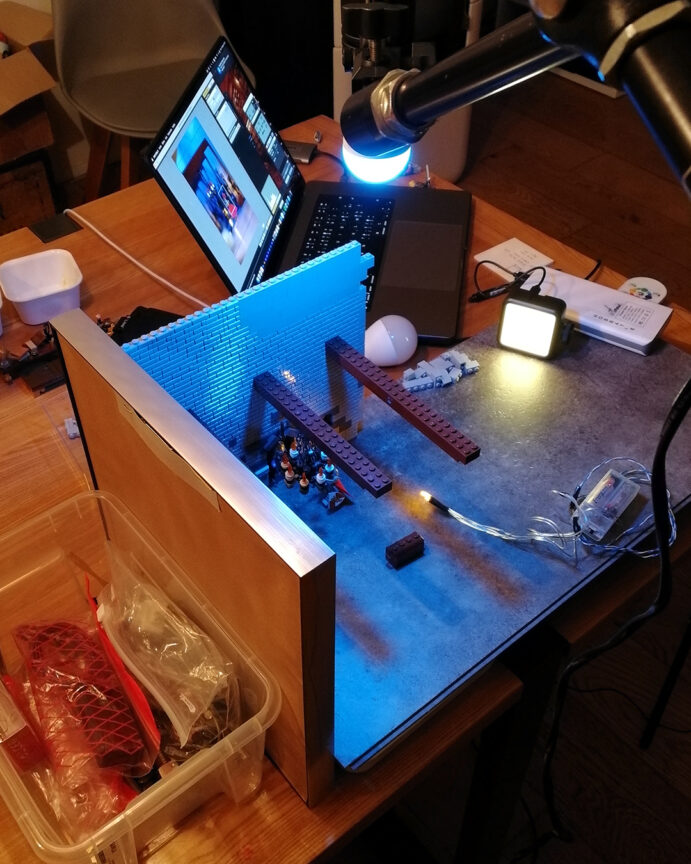
Here is the setup for the shot. Make sure to set up the camera at an ideal angle to get a good reflection of the set without seeing the camera in it.
Here are a few more pictures to see the layout of the mirror:
Little bonus tip for this photo: to add more mystery and atmosphere, there’s nothing like adding a bright light coming from a large window. For this nothing could be easier than a bit of cardboard with a hole in it the size of the windows and a flashlight well placed behind.

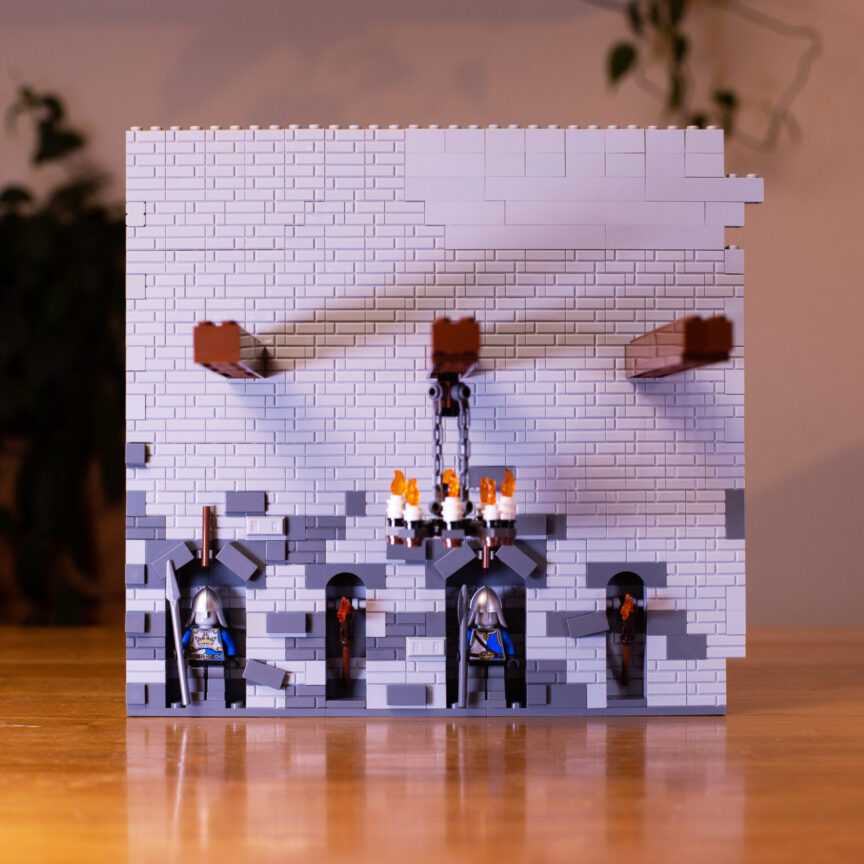
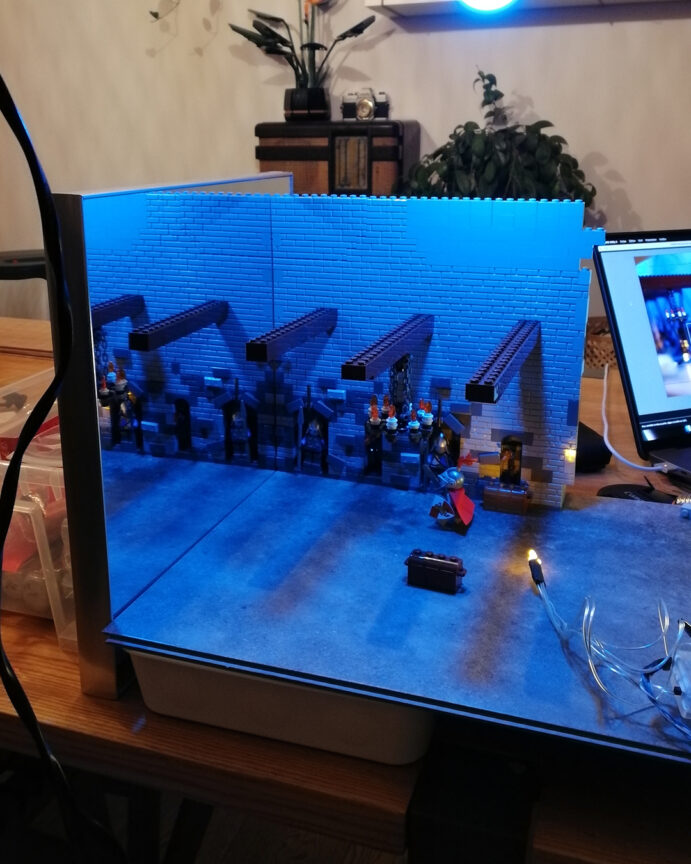
The corridor of the dungeon
A dungeon without a hallway is not a good dungeon, but even for a simple hallway, it takes a lot of pieces to make a great wall. Again, we use the mirror.
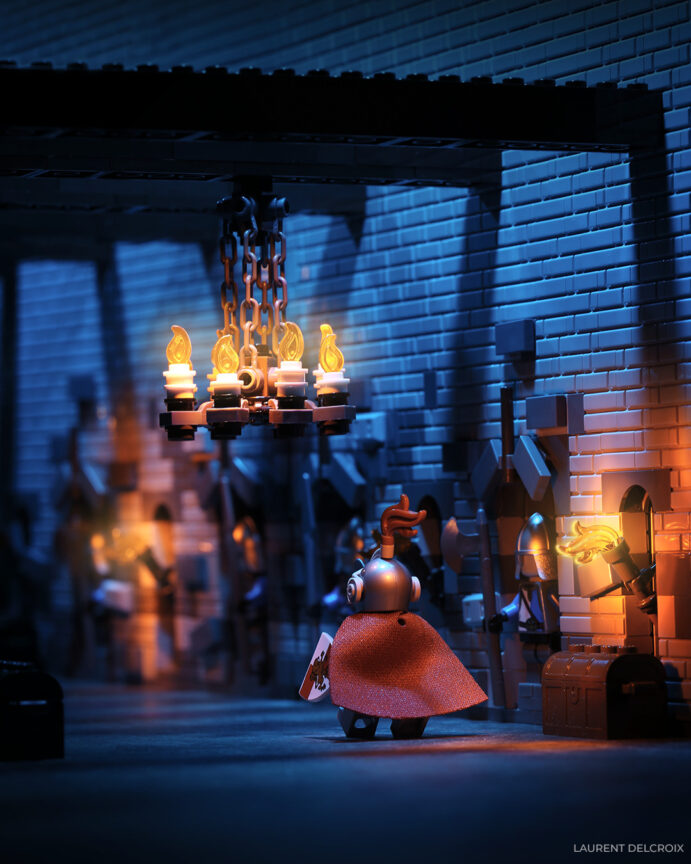
Here is my area created with the mirror:
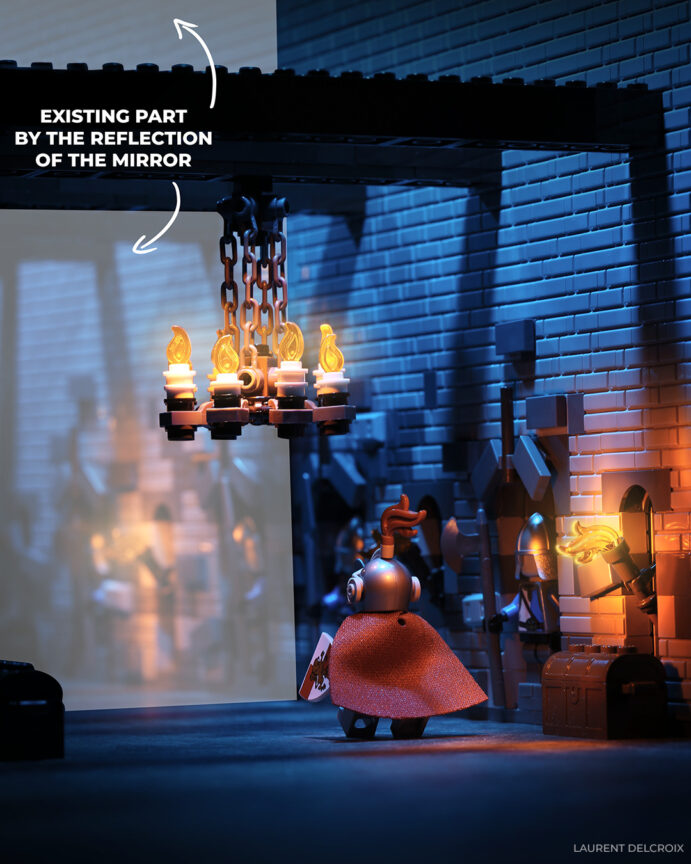
As before, place the mirror at 90° to your MOC and position the camera so that you don’t see it in the mirror.
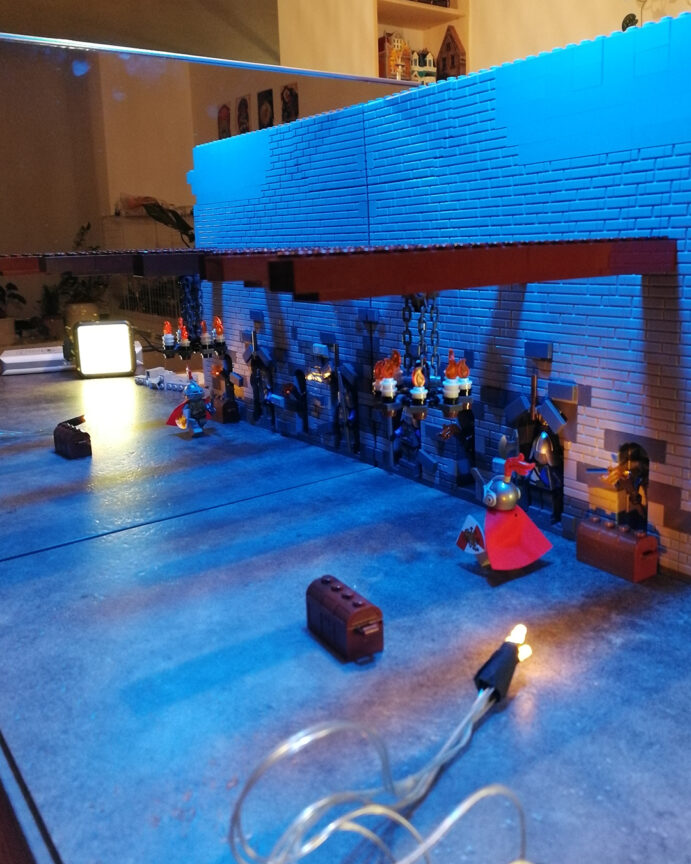
Lighting tip: Since I don’t have a micro LED to add to my MOC, I compile several photos for my lighting. One photo with my main lighting in blue tones and several photos with spot lighting on each area where I need orange light for the flames.
It’s easy to composite in Photoshop: superimpose the photos of the spot lights on top of the main photo and switch them to “lighten” blend mode.

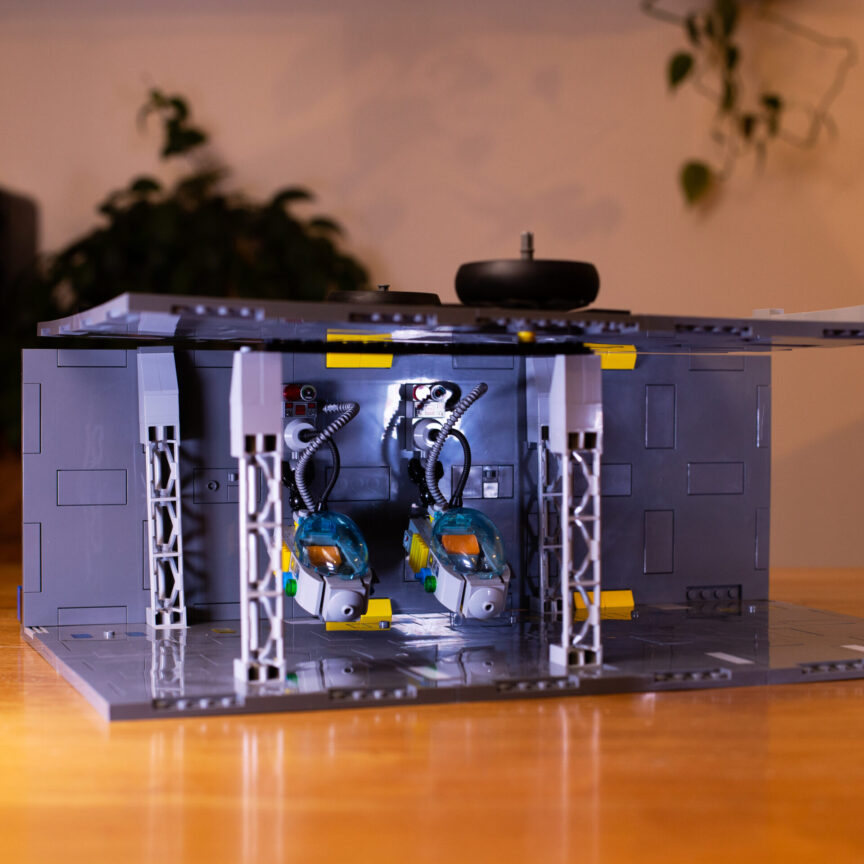
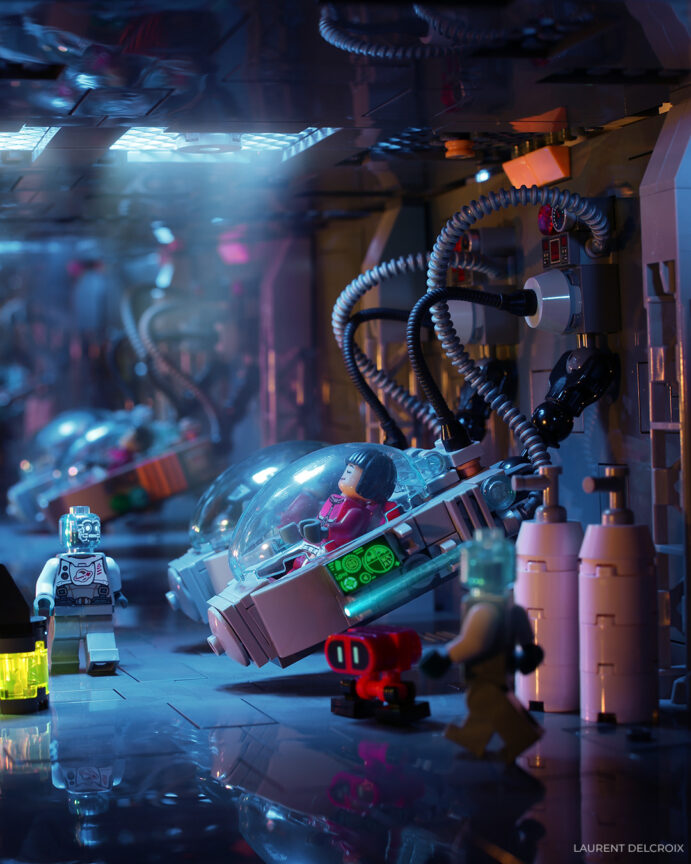
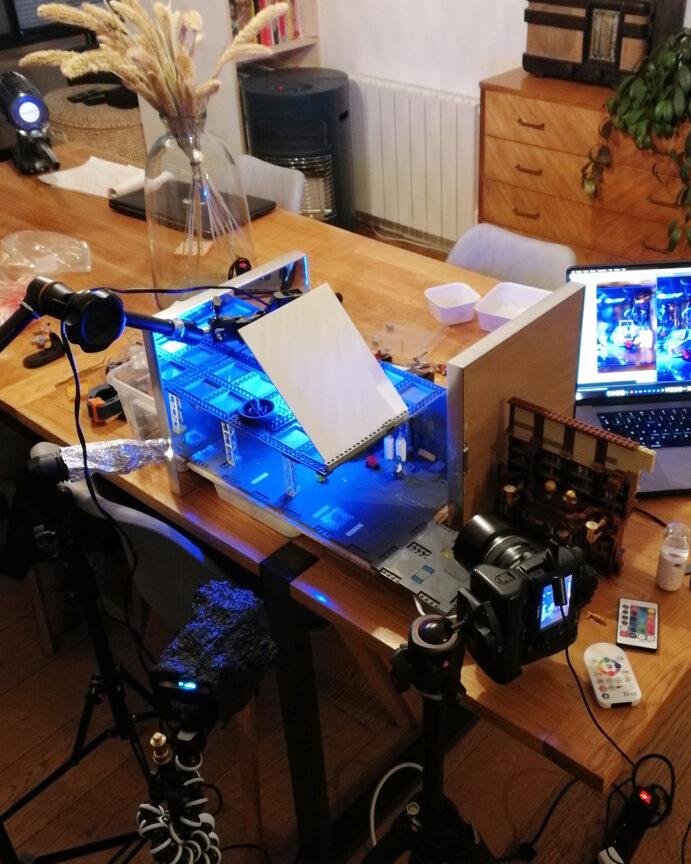
The great room of artificial sleep
Here is the last example, where the idea is to create an artificial sleeping room. This time, we’ll use 2 mirrors to add even more depth to the image.
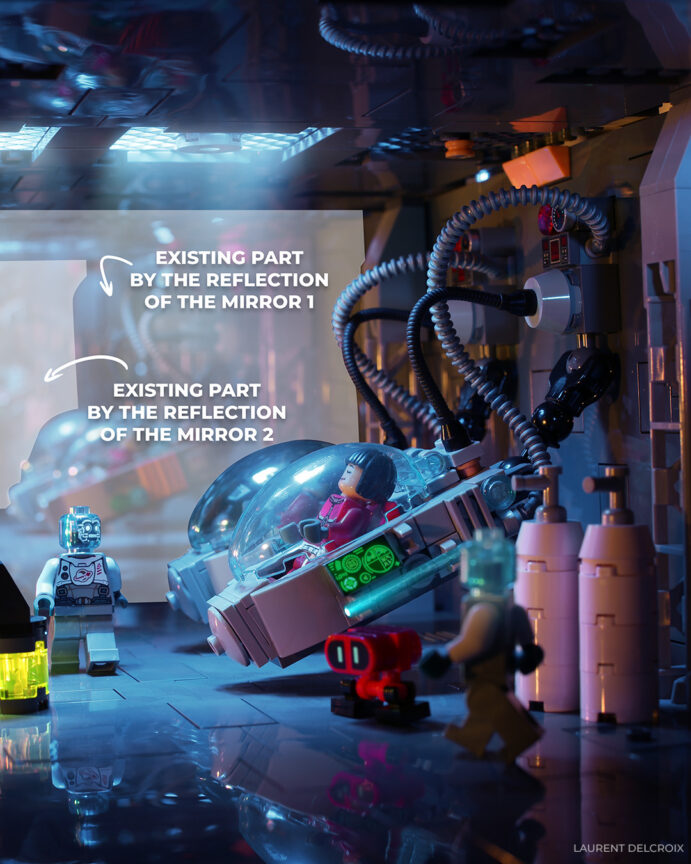
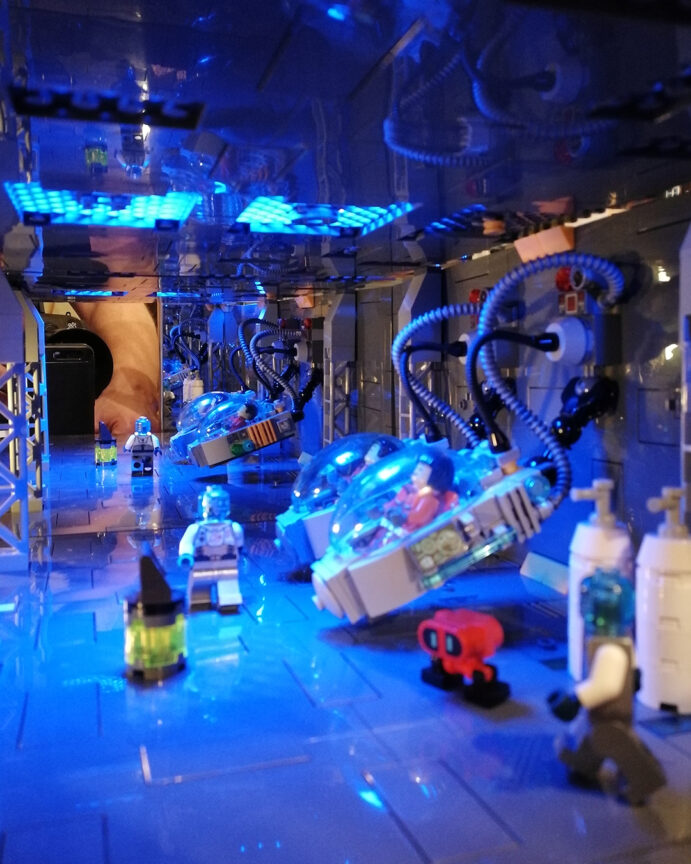
The advantage of the second mirror is that it reflects the image of the first. Here are the 2 zones of the image created by the mirrors.
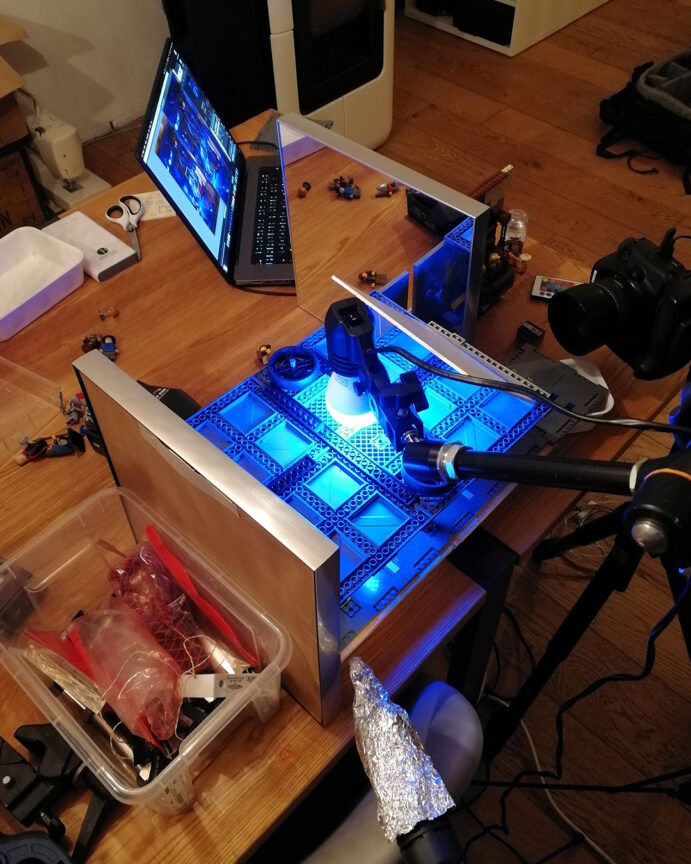
For the installation, you must once again put the mirrors at 90° to the MOC by slightly shifting the second mirror to make room for the camera.
And that’s it! I hope you learned some things in my tips! I can’t wait to see your photos with the use of mirrors!
Don’t hesitate if you have any questions.
Fantastic use of mirrors and I tried it! It takes some work, but it was fun to do. Lots of great tips here.
Very cool that you tried it and got a great result!