I wanted to go back to basics with some tips on how to shoot interiors of standard sets. This will include several tips on how to set up the scene, where to put lights, and how to edit to achieve a certain style.
I divided my sets into four themes, Creator 3-in-1, Friends, TV sets, and Christmas sets.
Creator 3-in-1
First, I will focus on the Creator 3-in-1 series, and for that, I chose two recent sets, the 31139 Cozy House and the 31131 Noodle Shop.
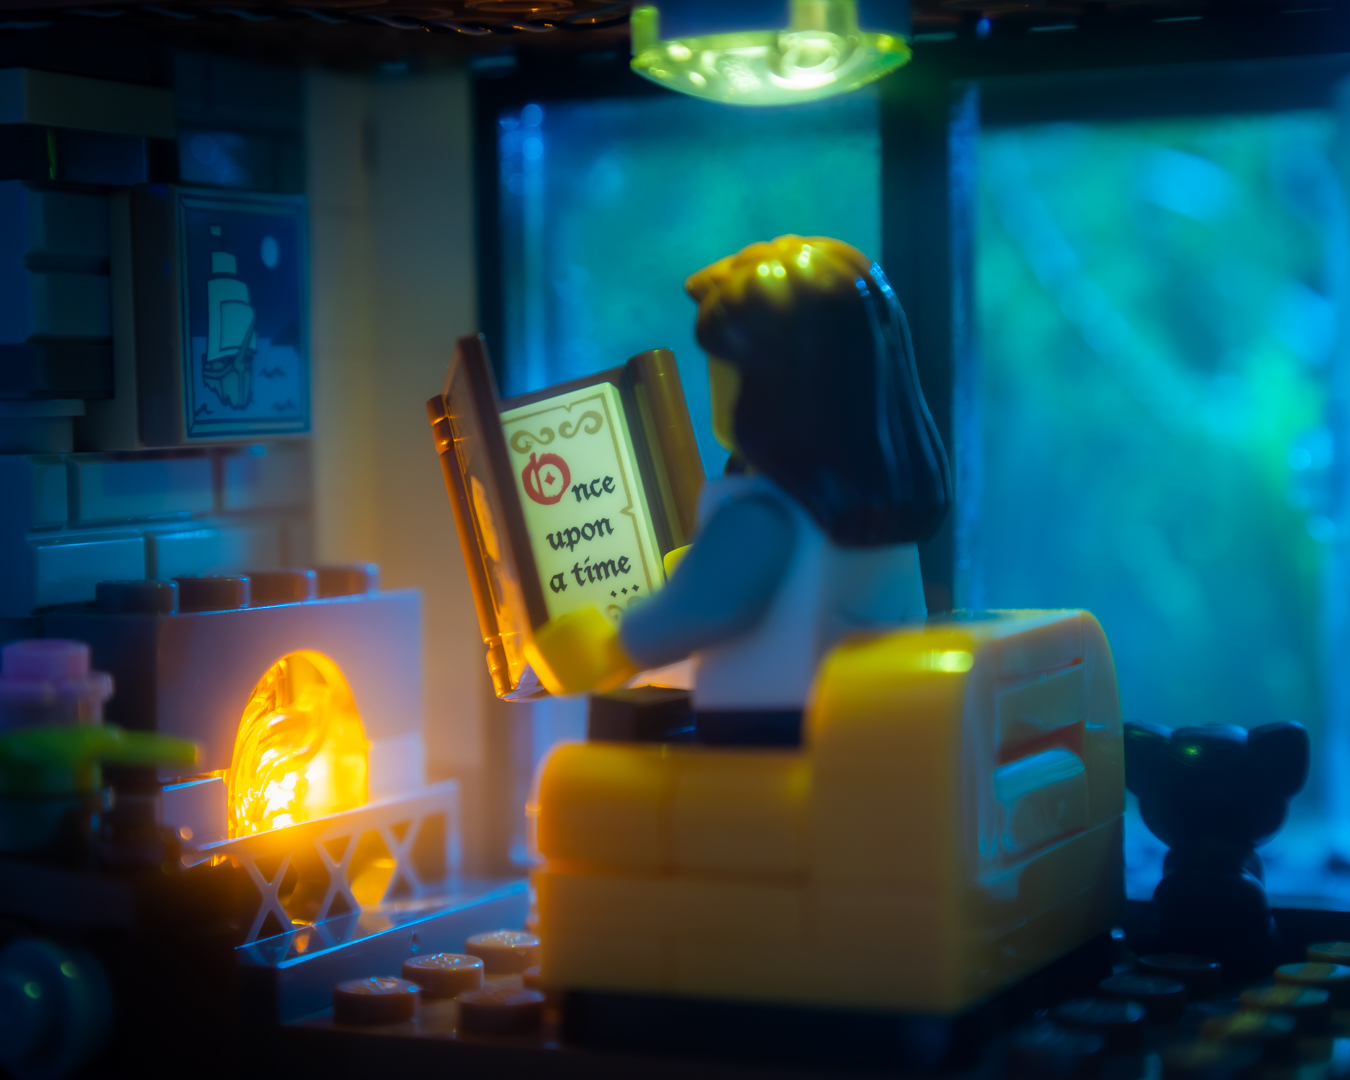
There are a few common topics in most interior pictures. First and most important, pick your subject, ideally only one. It can be a minifigure, a build detail, an animal… In this case, it was the cook (and not the customers) and the book (and not the reader). The subject must be in focus.

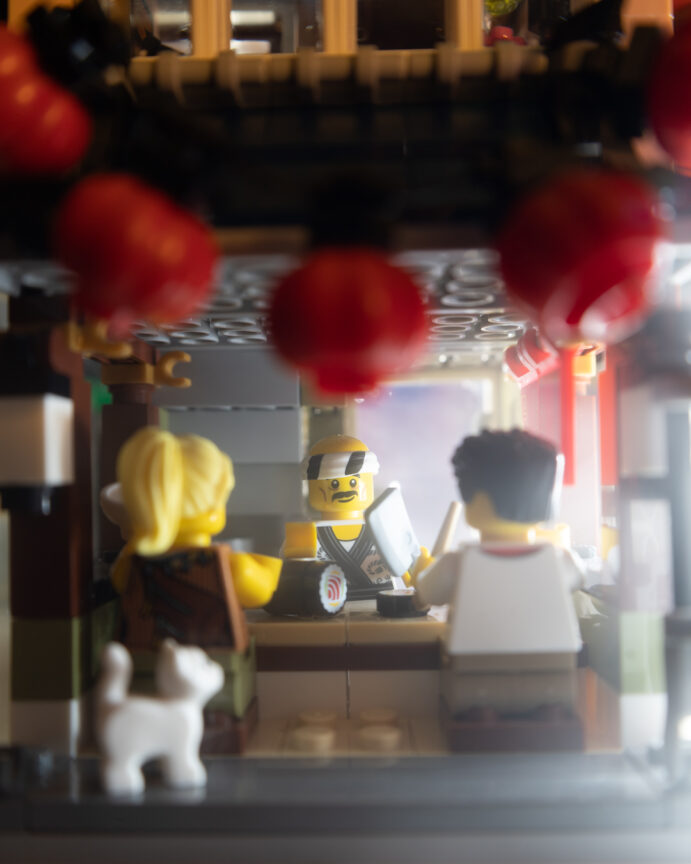
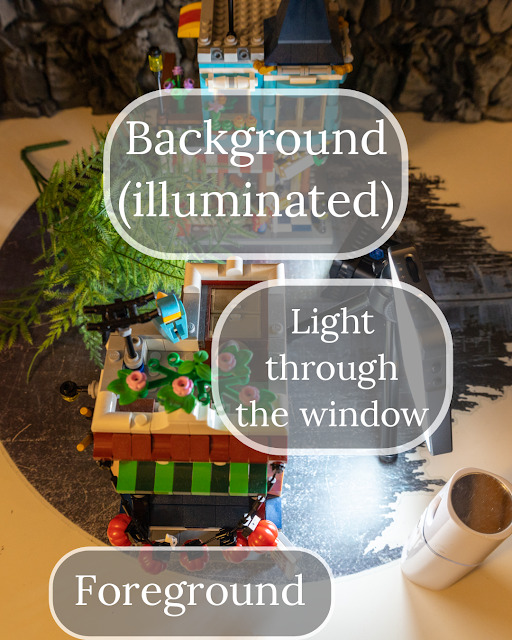
Indoor Lego shots are photos of very small spaces, so it’s important to try to give them depth by moving things around in front of our subject and behind. It does not matter if in real life the room looks weird (in my case I have plants or decorations outside the building). Place them from the camera’s perspective, not your own eyes.

Use the natural light sources from the build, i.e. windows, doors, lamps, candles, fireplace. They will give you a more natural feeling than using a flat light at the front of the building. Small LEDs can be put into lamps or fireplaces like in the house, big lights or flashes can be shone through the doors and windows, like in the noodle house. A face mister will give the lights a beautiful softness too.
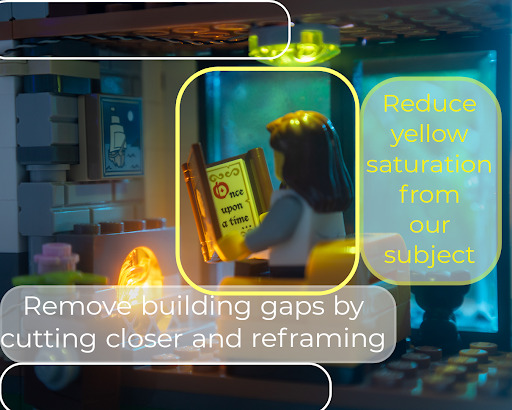
Editing has also a special role. For these rooms, there are a few things to look at. My first step is reframing the shot, to delete all the gaps of the build and focus on the room. I also play with the saturation and temperature, since they are nighttime and indoors, I made them colder and I used a vignette.


Lego Friends
Next, I want to show you how to use small corners of the latest Friends bedrooms sets (41739 Liann’s Room and 41754 Leos Room). I love these new friends sets, they have bright colors and are tiny and cute. The first thing I do is to remove the minidolls.
The Friends sets are more colourful and bright than other sets, so they tend to work great with day scenes and bright lights. They also allow more color combinations and let you play with different tones and contrasts. The good thing about using a set is that the color matching has already been done for you, so you can learn what color goes well with what and use it. For example, white and blue or orange and teal.
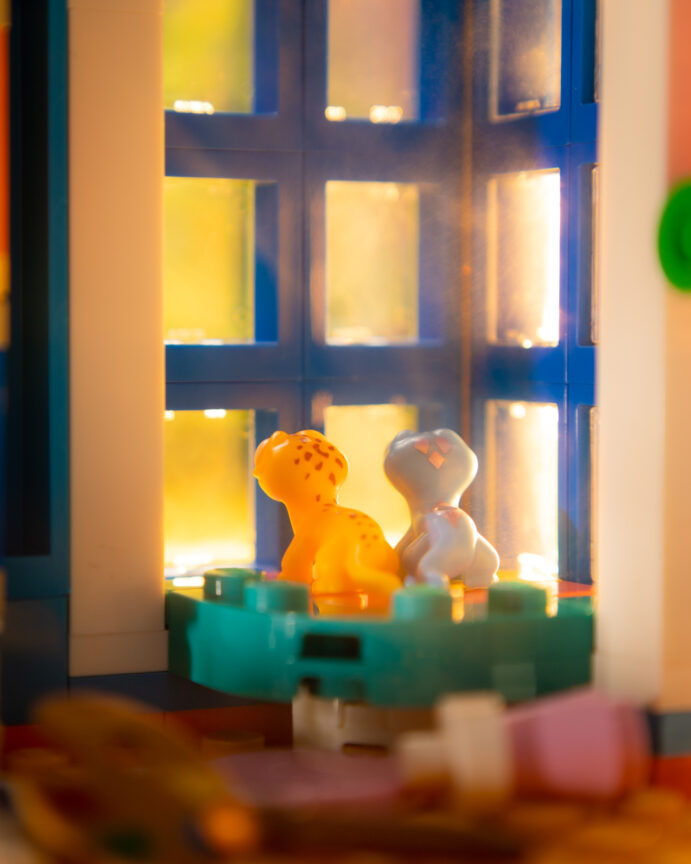
The first step is to figure out what is going on in that room. We can use them to tell a story. It can be a story it’s already prepared to tell, like the Vlogger recording a cooking video, or a totally new story that you create, like two salamanders watching the sunset together. Have your character interact with the room, not just standing there.
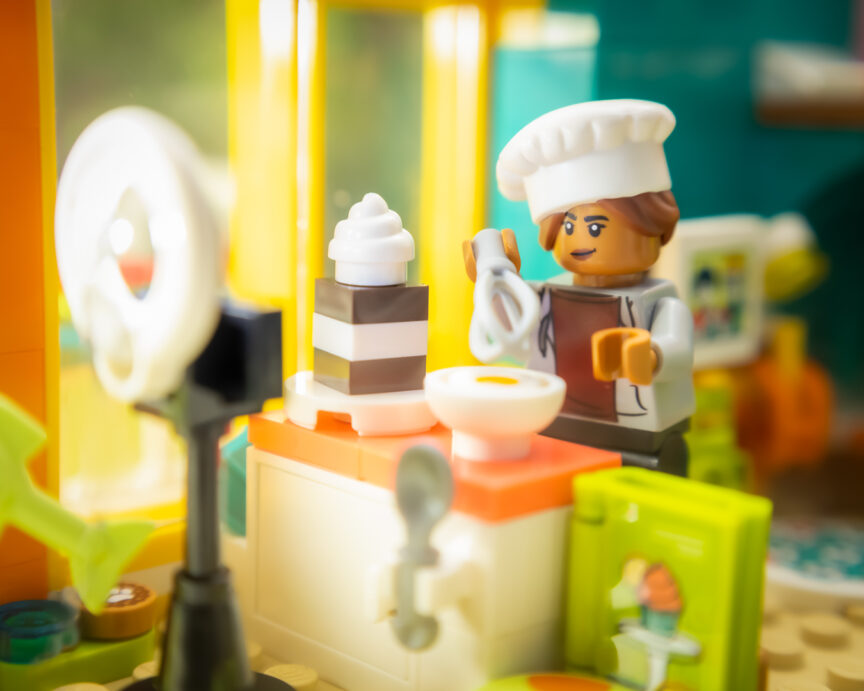
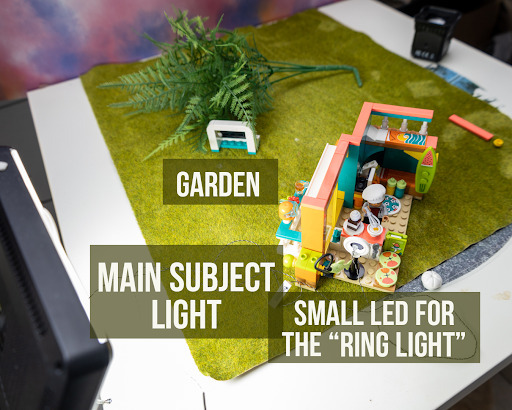
Because these are day scenes, the rooms will be well-lit. This is why there are two lights, one in the front and one through the window, or in the case of the cook, I use one light for both by positioning the set perpendicular to the light. Having small LEDs in the rooms is not necessary (you won’t normally have the light on during the day), but I wanted to emphasize the ring light from the Vlogger.

Editing again is important even if it’s minimal. My first step is to balance the lights and make sure the highlights are not saturated. I made the temperature slightly warmer to suggest sunlight through the window. I also increased the vibrance to make those bright colors pop.


Television sets
Another popular theme that is now on the rise is the sets based on television sets and I want to show you how you can photograph the sets from your favourite shows. In this section, I have the Queer Eye (10291) and the Central Perk (21319).
These types of sets contain a room that is larger than in other types of sets, with a lot more details. They are great to shoot several angles and scenes. They do have another common feature that makes them hard to shoot: they have a group of people as main characters.
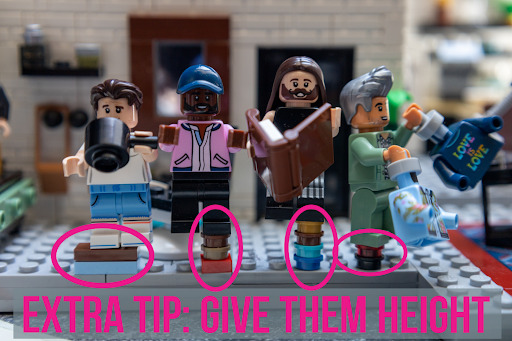
The first thing I want to point out is that you don’t have to have them all as your main character. It is very difficult to have them all in focus unless you have a large Depth of Field. For example in the Queer Eye Loft, my main character is Tan with the Love is Love shirt, but not the other members of the group. I used a shallow Depth of Field and I put them all in different lengths up to a point where Antoni is not even visible in the kitchen.

An interesting trick I use here that I often use is to add height using studs in their feet, otherwise, their heads will barely come up over the furniture.
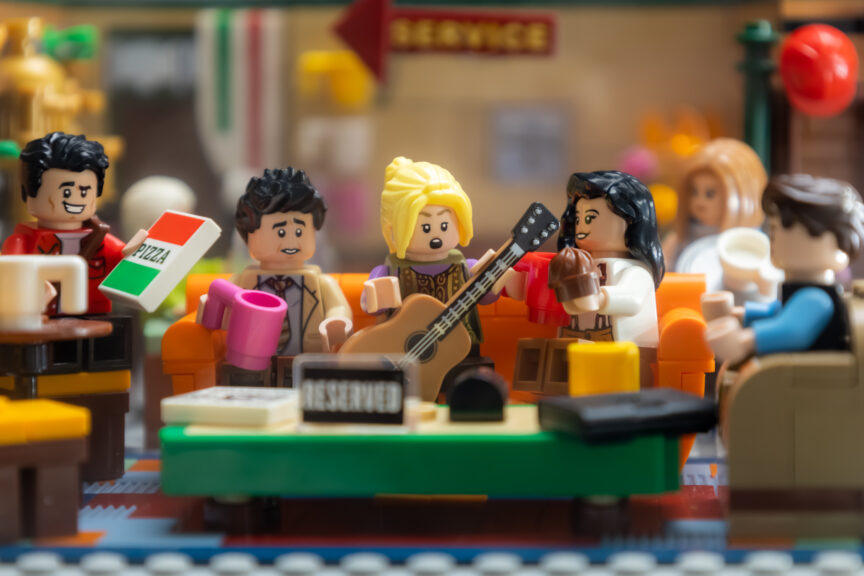
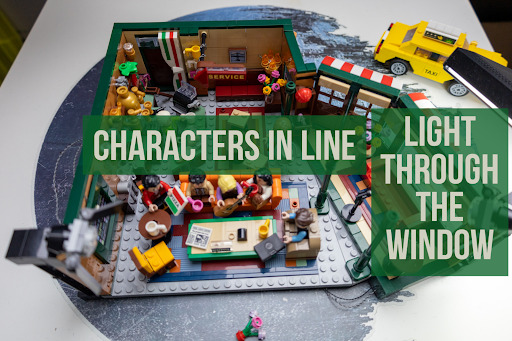
If you do want to have several characters in focus, another tip is to put them in a line, like Phoebe, Monica, Ross, and Joey on the couch in the cafe. The main character, however, is still only one, Phoebe playing the guitar, this is why I placed her in the center with everyone around her looking at her.
Since these are TV sets they are very open to the top. I added some extra light through the windows and the main fill light was the natural light from my window. I did not use any complicated setup, I only used the window natural light and a LED panel through the windows of the sets.

These images were almost ready from the camera, with minimal editing. I reframed a little bit and I made them slightly warmer with a tiny bit of extra softness and vibrance. Below are the raw images from the camera. As you can see they are not that far from the final result.


Christmas
For the final example, I’m going to give you some tips on how to shoot Christmas sets. I’m using this time the Gingerbread House (10267) and Santa’s Visit (10293).
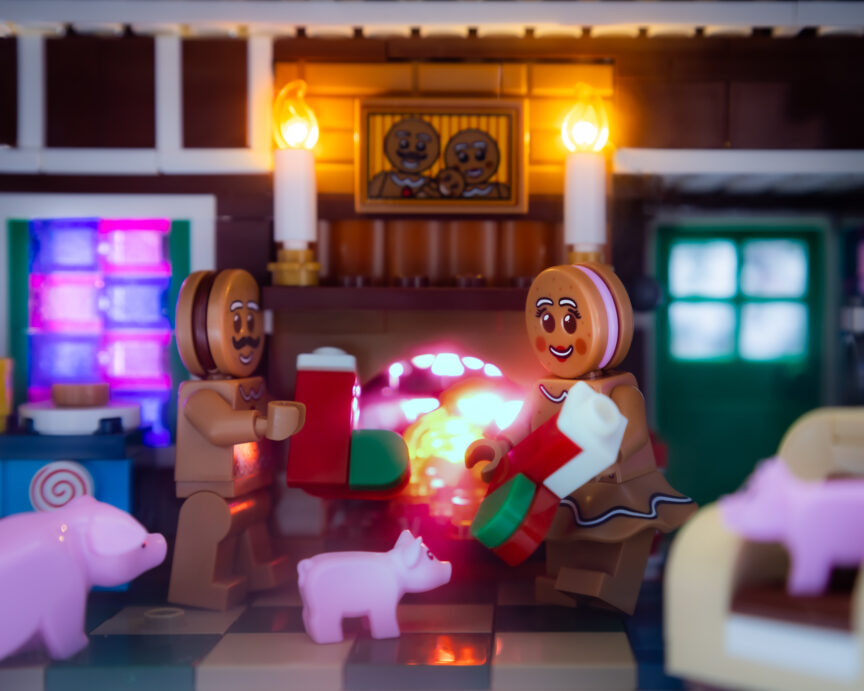
Christmas asks for warmth. It needs candles, fireplaces, and sweets. So LED into candles and the chimney are key for these images. Small LEDs with a bit of haze from the face mister will give a soft glow around the lights.
It’s also time for sharing and family, preparing for a big event. These are all ideas to use in the story you want to tell. You can even add silly details, like pigs in the house.

But just because these are Christmas themes does not mean you cannot use them for other scenes. There are places and corners that you can use to tell other stories, like the little girl’s room the day after Christmas building her new toy.
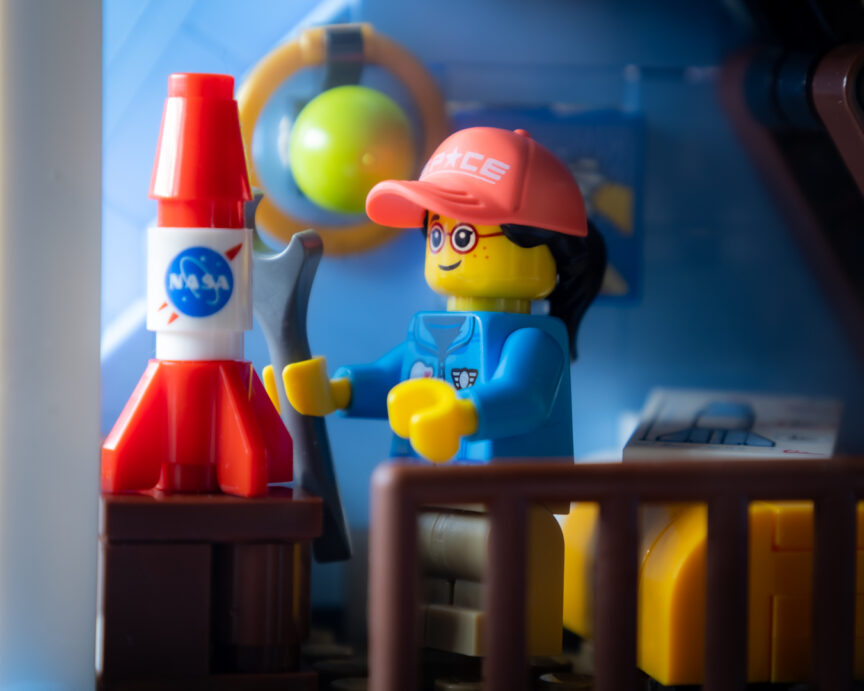
Because that corner does not have a full wall, I took some of the pieces from other parts of the house and add them in that area to fill in with the same tones as the rest of the house.

For the editing, I have emphasised the warmth and the softeness of both images, and I have increased the vibrance to add a colour pop.


In the little girl photograph, I reduced the highlights of the LED and window light to not overpower the rest of the image. I have also used a healing tool to reduce the reflections on the little girl’s face, which I couldn’t avoid with the front window light.


And this is all! I hope you all learn useful tricks and tips for shooting some of the most popular Lego set themes.
@taskera