This month I will share some of the things I’ve learned, often through trial and error, about photographing lego outdoors, all year round, in all weather.
Finding a spot to shoot in
First things first, you need to find a place where to take your picture. There are different approaches you can take to this, depending on whether you already have a pretty clear idea of what picture you want or if you are feeling more spontaneous.
What I mean is that sometimes you may just walk around in the surroundings until you find a spot that you like, and perhaps the idea for the picture will come to you then and there.
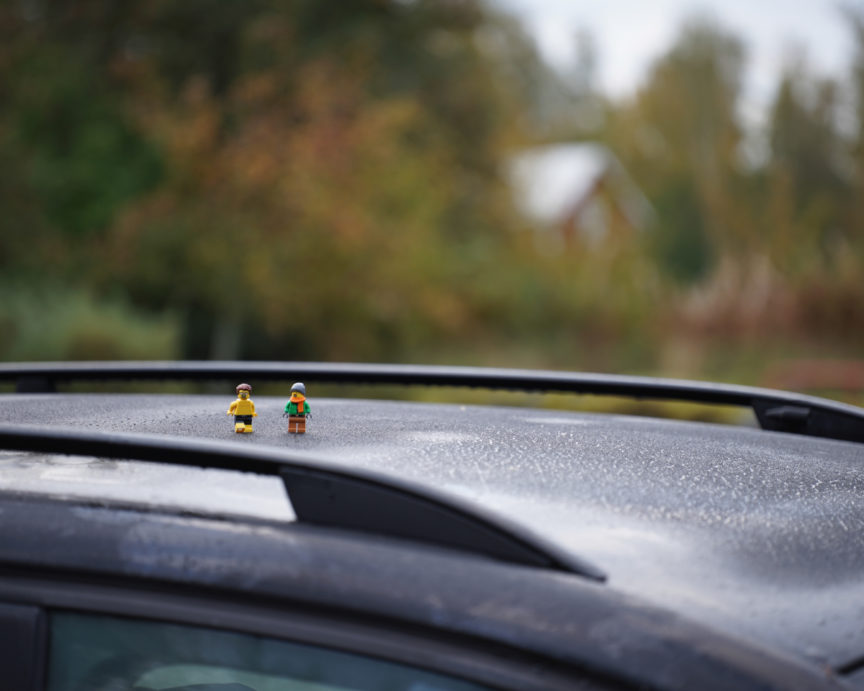
The roof of my car is a spot I have used more than once to take such pictures. As the sun rises and the first rays of light hit the frosty roof, I often get inspired to take a picture. Sometimes it’s frost, sometimes morning dew, once it was a swarm of flying ants. Or it can be a thin layer of snow.

But if you have a specific image in mind that you want to create it’s usually more difficult, unless you are very familiar with the area you’re in.
This is the case with the picture below for example. I had an idea of how it should look and so I took the minifigures and other things that I needed with me to the coast to try and find a suitable spot.
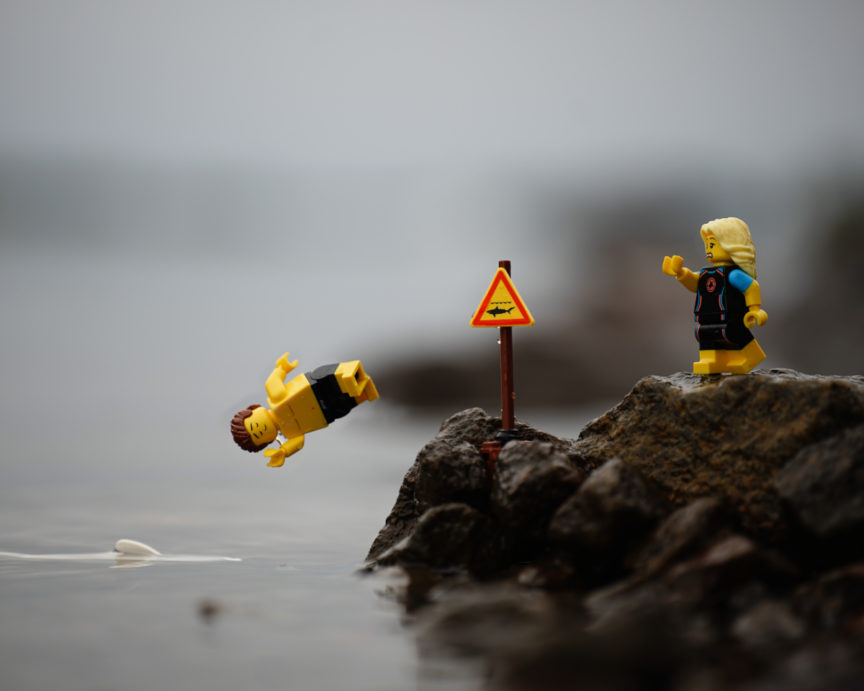
The first thing to consider is the weather. It was overcast, which is often a good thing as shooting in direct sunlight is almost always a bad idea. It was also a very calm day and that is good when you plan to take pictures by the sea as even small waves will make it difficult or impossible to take your picture.
Waves could be used to make cool effects as well, but that’s something we will have to leave for another time.
Often you might try out a few places before you find one that suits your vision best. Sometimes you have to accept that there is no place that works as you had planned and you might even have to make some changes to your plans.
Taking several exposures is always a good idea. Trying slightly different angles can make quite a large impact on how the picture turns out.
The light
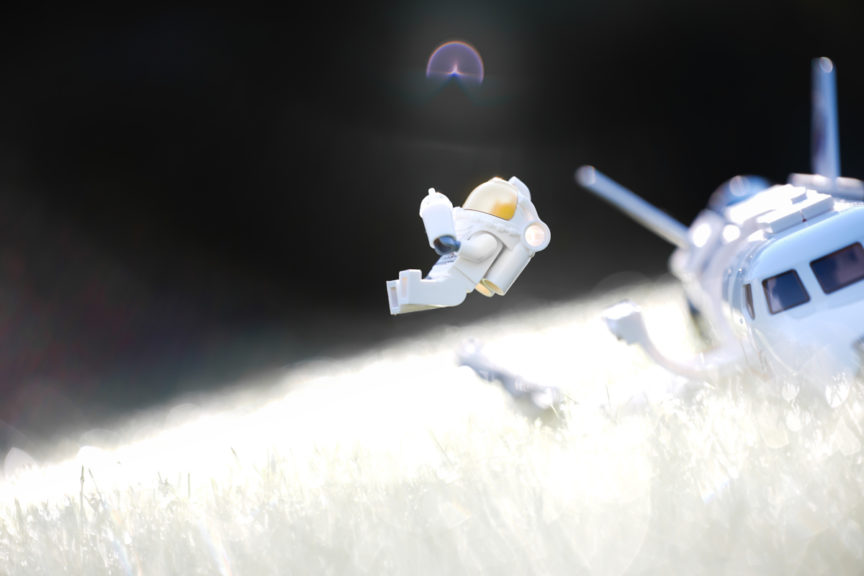
As I said earlier taking pictures in direct sunlight is almost never a good idea. But when the sun is low, at sunrise or sunset, that’s where you can find magic places to take your pictures. I would say even more so when taking pictures on a macro level, like with LEGO.
So perhaps my most important tips would be to go out during sunrise or sunset and look for those magic spots. Like I mentioned earlier, the weather is important here. Dew, frost, snow, mist. The same tiny spot in nature can look very different depending on the weather and the season.
The picture below is taken early morning as the light illuminated the waterdrops on the lawn. By aiming the lens against the sun you get this effect that I find otherwordly. To enhance this effect you might try to place the camera as low as possible.
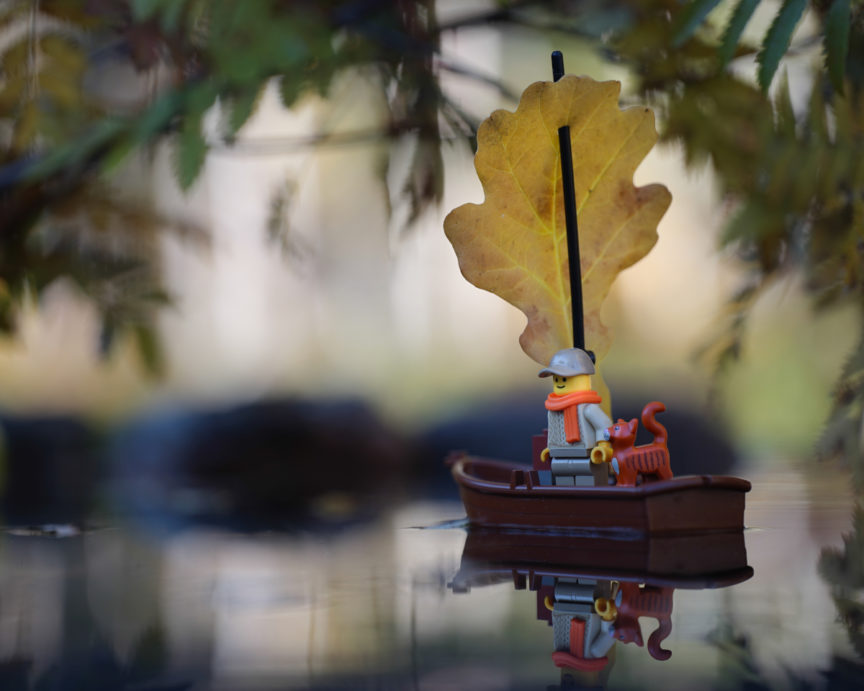
Photographing LEGO on water
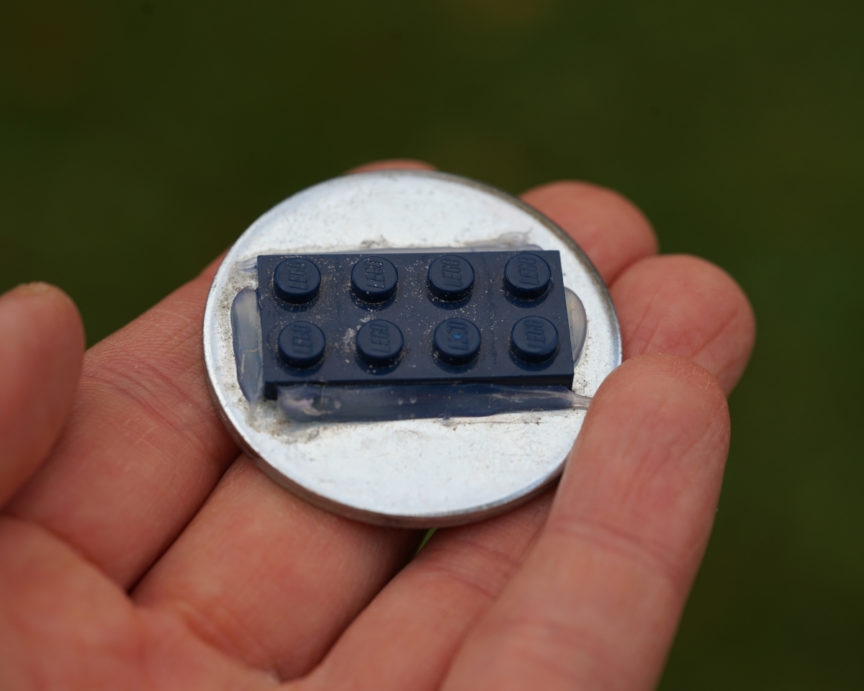
The best way to shoot LEGO on the water is to attach it to the bottom somehow. That way it will stay still and don’t float away. This might be very obvious but when I first started out I just placed down my LEGO rowboat to make it float, it worked but it was very difficult.
There are several ways this can be done. One way I’ve done is to glue a LEGO brick to a metal spacer, you can then attach whatever you want to that brick. The weight of the metal will hold the LEGO in place.


Create your own environment
By taking things you find in nature or at home you can create or enhance your own place to shoot pictures at. This might be small things like placing rocks or twigs or it might be something bigger like I’ve done here.

Throw or blow things at your LEGO
This is a popular way to create cool effects in your pictures. It’s common to see people using compressed air to blow sand and dirt around their setup. The most important thing to think about when doing this is to protect your camera and other gear you might have with you, especially if it’s sand, water, dirt, and such.
After putting your LEGO through this it is often a good idea to clean it.
With this technique, you can really experiment a lot. Here are some things that I’ve tried throwing or blowing on my LEGO: Snow, water, sand, ash, coffee, flour, and like here, small leaves.

Wow, these tips are fantastic! I never thought about using natural light and different angles to enhance my LEGO photography. I can’t wait to try out the suggestions for using the environment as a backdrop. Thanks for sharing these insights!
Loved the tips shared in this post! I never thought about using natural light to enhance the colors of my LEGO bricks. Can’t wait to try out the suggestions for framing my shots in outdoor settings. Thanks for the inspiration!
hi. this good
Great tips! I love how you emphasized the importance of natural lighting and the different angles to capture the LEGO sets. Can’t wait to try these out on my next outdoor shoot!
Great tips! I love taking my LEGO sets outdoors, and these photography suggestions will definitely help improve my shots. Can’t wait to try the lighting techniques mentioned! Thanks for sharing!
Great tips! I especially loved the suggestion about using natural light for outdoor LEGO shots. I’ll definitely try incorporating some of these techniques for my next photography session. Thanks, BrickCentral!
These tips are fantastic! I never thought about using natural light to enhance the colors in my LEGO photos. Can’t wait to try out the shallow depth of field technique too. Thanks for sharing these insights!
I loved this post! The tips on lighting and angles really helped me improve my outdoor LEGO shots. Can’t wait to try out the ideas for my next photoshoot—especially the use of natural elements as backgrounds! Keep sharing such great insights!
Great tips! I love how you highlighted the importance of natural light and different backgrounds. Can’t wait to try these techniques on my next outdoor shoot!
Im glad we could help! We can’t wait to see your photos!