For this month of April, I was in charge of presenting you with the monthly tips.
I have chosen to show you some tips for making small realistic decors within everyone’s reach to improve your photographic work.
Indeed, it may happen that you want to take a picture in a winter environment but we are in the middle of summer. Or you want a forest setting but you live in the city center.
Nature, on a human scale, is often disproportionate so we generally have an unsuitable decor.
The idea is therefore to show you how to remedy this by quickly creating a reusable decor and with a small budget.
Forest Decor
I will start by showing you how to make a forest decor. A decor that I really like and that can be modeled endlessly.
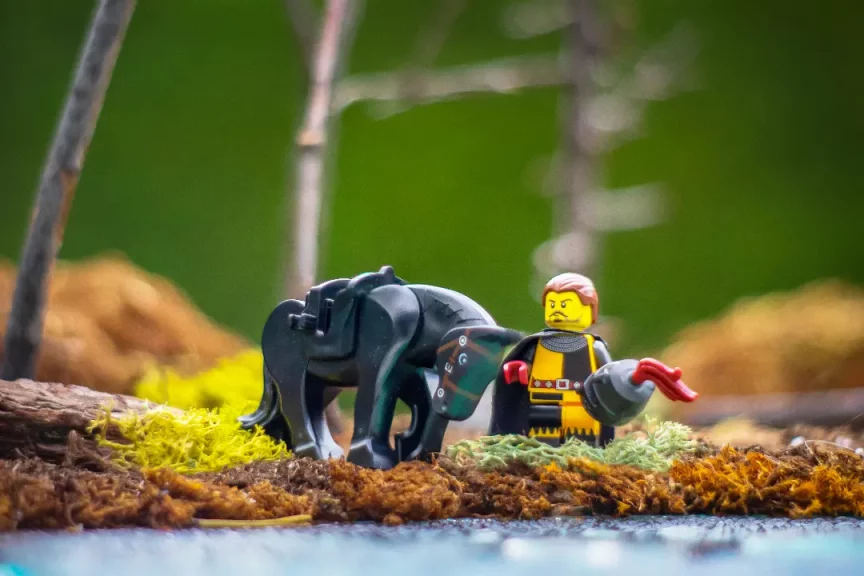
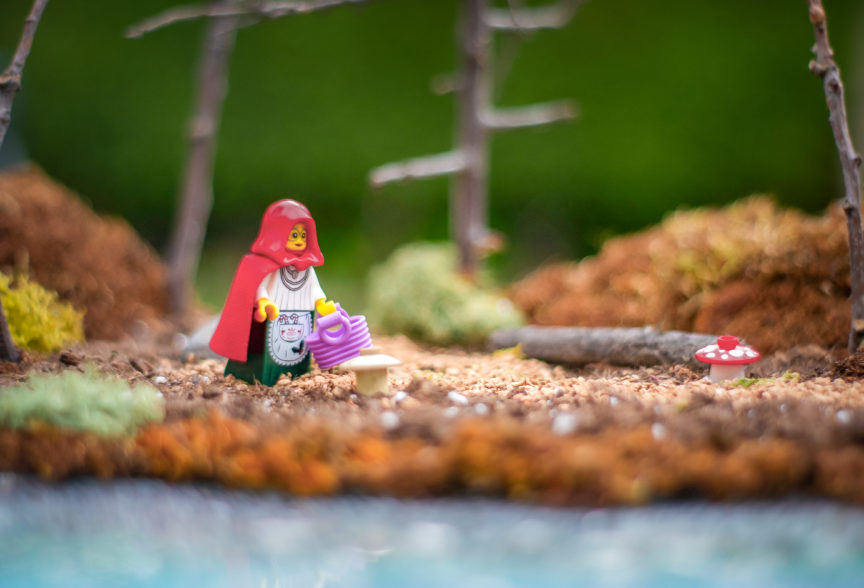
For this I need:
- A piece of extruded polystyrene (DIY store)
- A few dried tree branches
- Natural moss
- 1 piece of plexiglass (photo frame)
- Gouache
- Decorative soil and lichen (model and miniature train shop)
- Seed compost

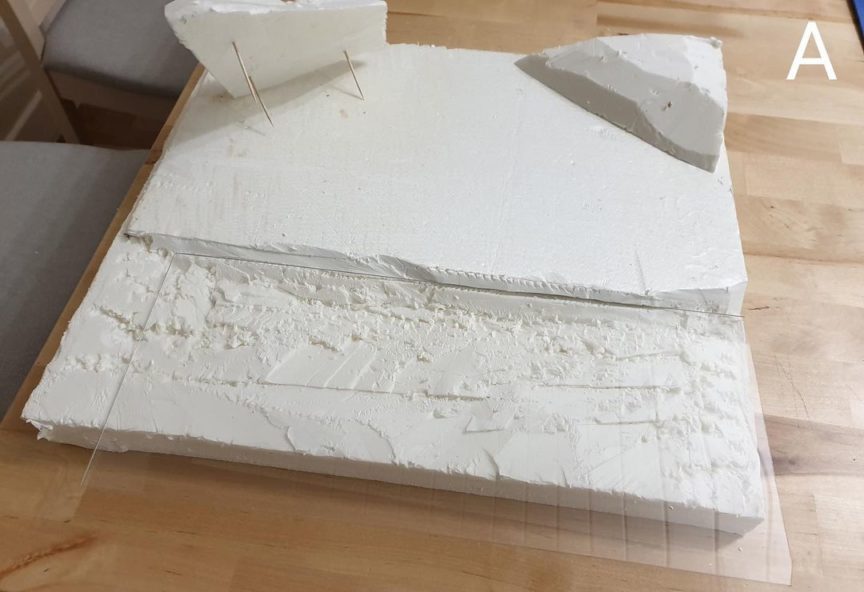
A / I started by cutting my piece of polystyrene in order to create relief, especially for the river. I also cut small blocks to allow me to make small hills and thus break the linearity of my scene. I pricked them with toothpicks to allow me to be able to reposition them at will afterwards and thus easily modify my decor.
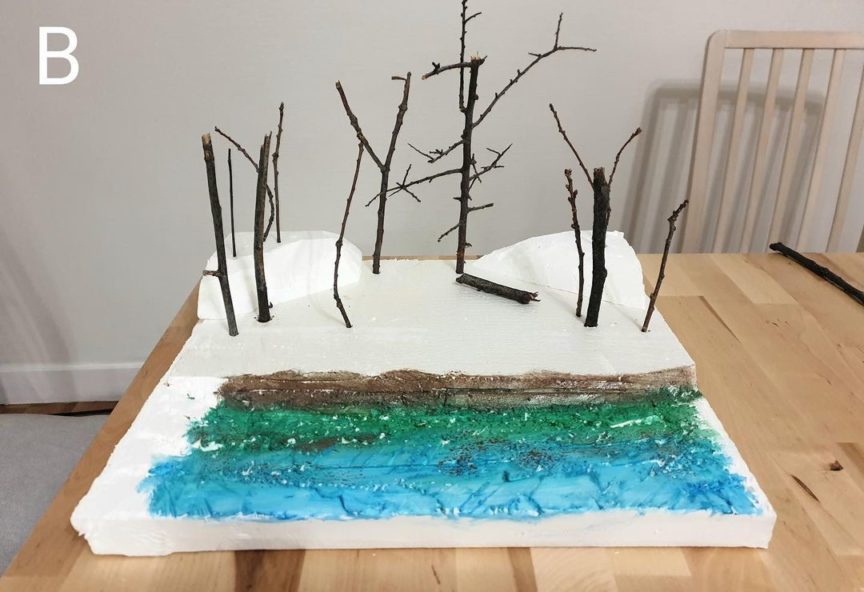
B / Then I painted the river with gouache. Indeed, since I will later position a sheet of transparent plexiglass, painting underneath will create a colored reflection accentuating the river effect. I also planted my dried tree branches thus creating a semblance of a forest.
C / Finally, I positioned my natural moss on the small hills. I covered the soil with seed compost and sprinkled a few pebbles and pieces of lichen to accentuate the forest effect. I also applied decorative soil to create a path. All I have to do is position the plexiglass and spray water on it to give texture and reflection to my river. Here is my forest decor ready.

Winter Decor
For this second part, I wanted to show you how to make a winter decor. I love the vibe that a setting with snow can give off. I don’t often have the opportunity to photograph in the snow even though I have a lot of ideas on the subject. So to remedy this, let’s create a decor that will give the illusion… less cold!


For this I need:
- A sheet of rhodoid (culinary store) and a sheet of tracing paper
- Plumber’s tow
- Tree branches
- Florist’s foam
- Fake Christmas Trees
- Baking Soda
- Glycerine suppositories and blue gouache
- A few small stones

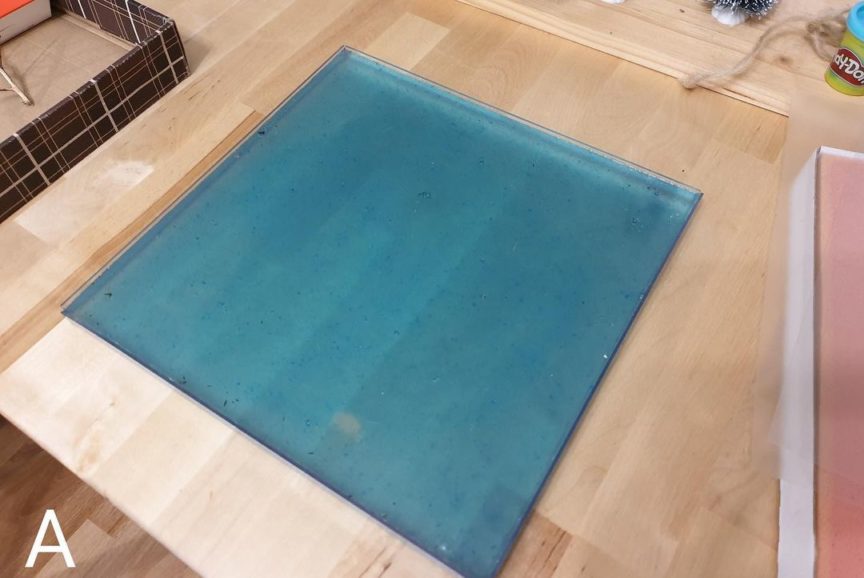
A / I started by creating the base of my lake. For this, I melt the glycerin suppositories in a saucepan. I add a few drops of paint to tint the liquid and pour the result into a square tub. As it cools, the mixture will resolidify. This gives us a nice expanse of water.
B / I then placed on my lake, a sheet of tracing paper between 2 pieces of rhodoid to give an effect of ice and therefore of a frozen lake. I then positioned my pieces of foam that I textured to give relief and make my shore.

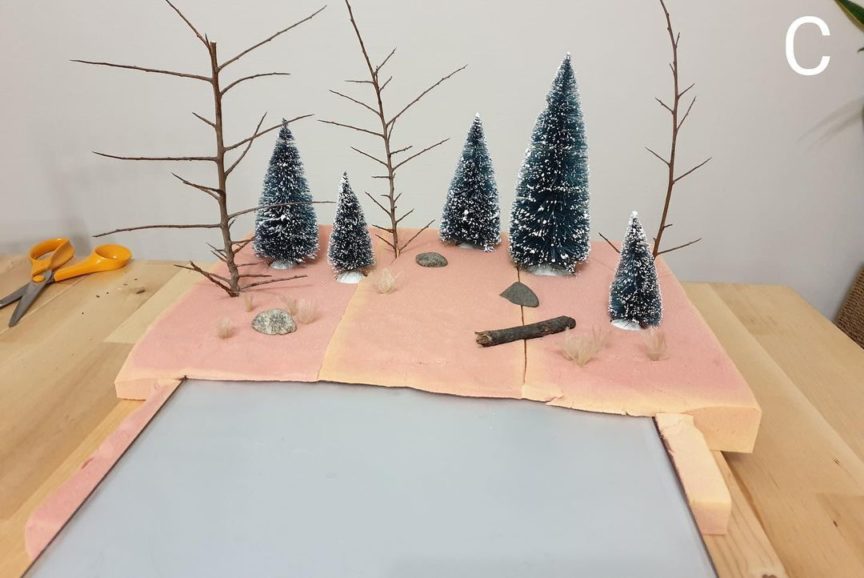
C / We now position a few tree branches, fake Christmas trees and pebbles so that it looks like a winter lakeside setting.
I also cut out sections of plumber’s tow that I plant in the moss with a toothpick to represent clumps of grass burned by the freezing cold.
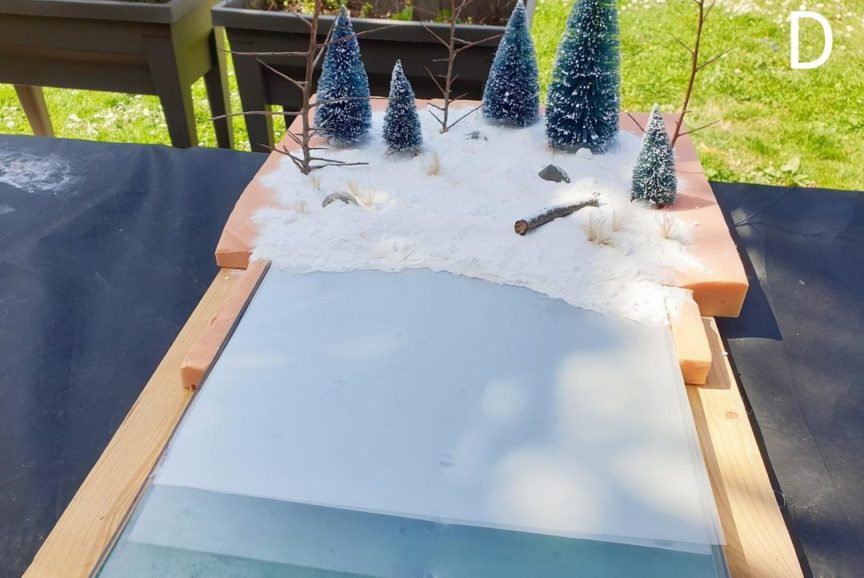
D / To finish, I sprinkle my decor with baking soda. It’s the only good compromise to represent snow on this scale from my point of view and I love the result.
To give shine to my lake and accentuate the effect of the frozen lake, I wipe it down with a damp sponge. But you could totally use some hairspray too.
Interior Decor
For the third week, I showed you how to make an interior decoration. Of course, it is easy to achieve all this with Lego bricks but here I wanted to address people who do not have enough bulk to be able to create a complete interior. But also to people who would like to push the personalization of their interior to the maximum. Indeed if you want to represent a wallpapered wall for a bedroom, it will be difficult to have a convincing rendering with bricks.


For my decor I need :
- 1 Foam Board
- Gouache and brushes
- Coffee stirrers
- Gray felt
- A set of sheets for scapbooking
- Wooden board for my base

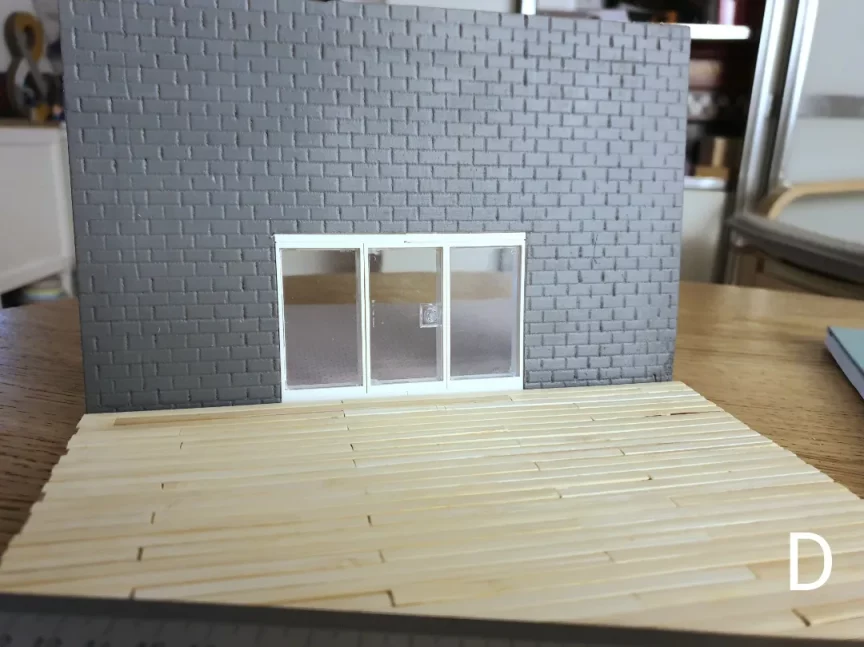
A / I started by making a parquet floor. For this, I cut and glued pieces of coffee stirrers on my wooden support with wood glue. To give the effect of parquet, you have to start with sections of different sizes and then fill in the gaps.

B / I wanted to make a brick wall. So I cut out a piece of foam board. I removed the layer of paper that covers it by moistening it to be able to access the internal foam layer. I then traced the bricks with a ruler and a pen. The advantage of foam is that it will give texture and relief to your wall. Just paint it afterwards.
C / I made several walls in this way, either by painting them or by sticking a scrapbooking sheet on them to give a tapestry effect. So I have several possible combinations with interchangeable walls


D / We can absolutely add doors or windows to our compositions as desired. Just cut the foam board to the right size with a cutter, like here with this bay window.
E / With the piece of felt, we can go from a living room floor to a bedroom carpet in the blink of an eye.

Desert Decor
Finally, to finish, I explain how to make a desert decor quickly and effortlessly. Of course it is possible to use real sand but the installation will be tedious in my opinion. In addition, it will be difficult to obtain different levels of tint and relief or to represent a body of water.
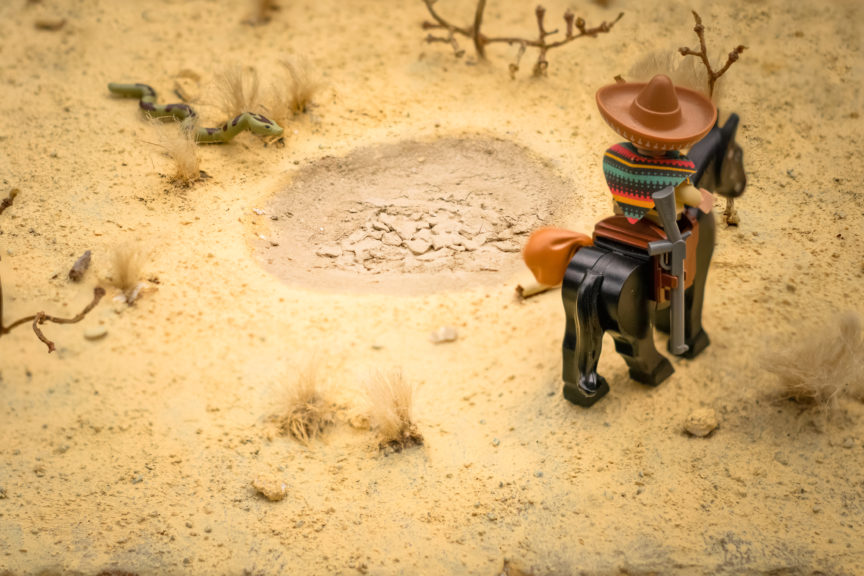
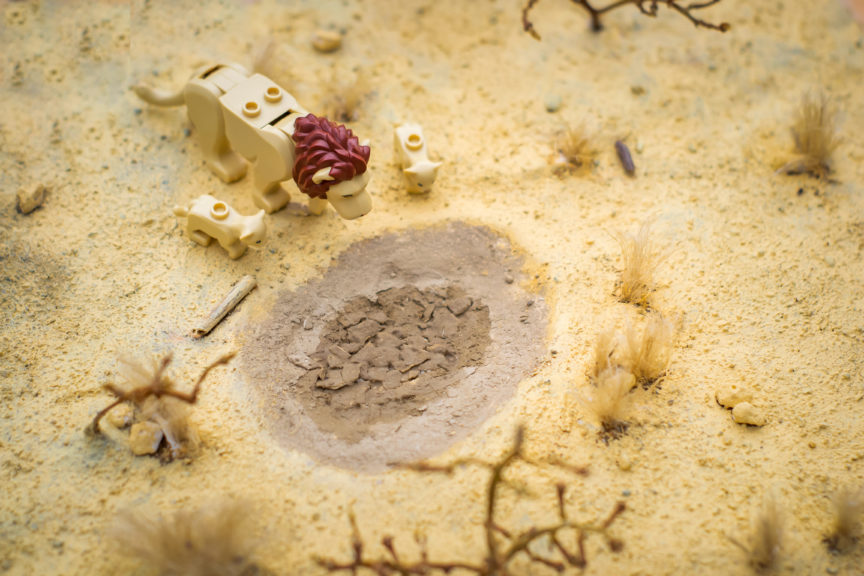
I need for my decor :
- 1 piece of extruded polystyrene
- Plumber’s tow
- Pigment powder (DIY Store)
- Dry pastels (Art Store)
- A few grains of cat litter
- Bunches of grapes
- Coarse sand
- Self-hardening modeling clay

A / I started by texturing my polystyrene with a tennis ball to give it some relief. The goal being above all to create a hollow because I had the idea of creating a small expanse of dry water. I then cut several sections of plumber’s tow that I placed on my decor by drilling holes with a skewer.
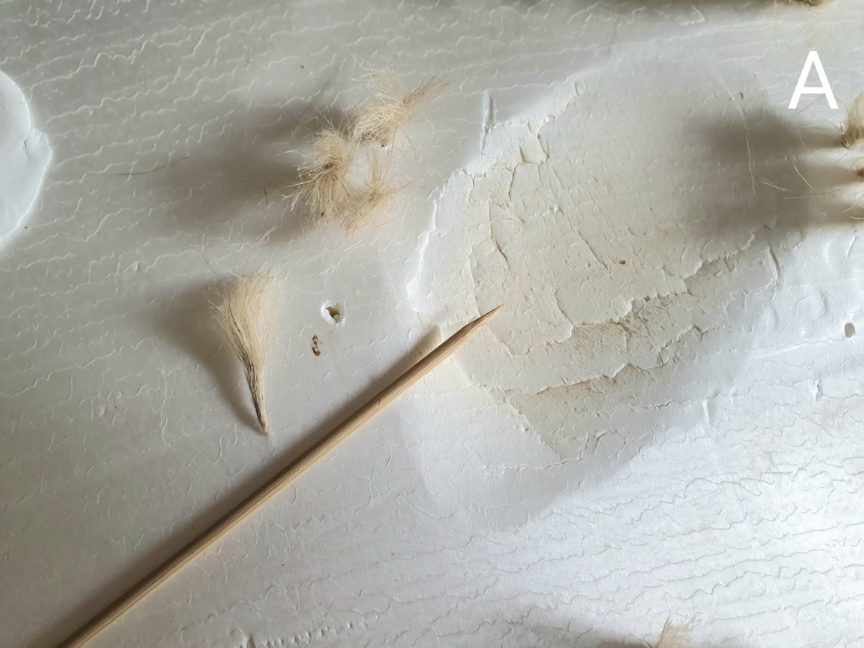
B / After placing my bunches of grapes (the illusion of dead trees is successful), I covered my decor with self-hardening modeling clay. I took care to give relief and smooth everything while moistening it to remove fingerprints.
The advantage of using this material comes from the fact that if it is moistened a lot, it will tend to crack when drying and this is exactly the desired result, especially at the level of the stretch of dried water.

C / I then covered the scenery to give it a sandy and rocky terrain effect. For this I made a mixture of wood glue, water and powdered pigments. It is necessary to obtain a liquid cream texture and apply it with a brush. We sprinkle the coarse sand immediately after so that it freezes and becomes fixed in the glue when it dries. We take this opportunity to add a few grains of litter to represent pebbles.
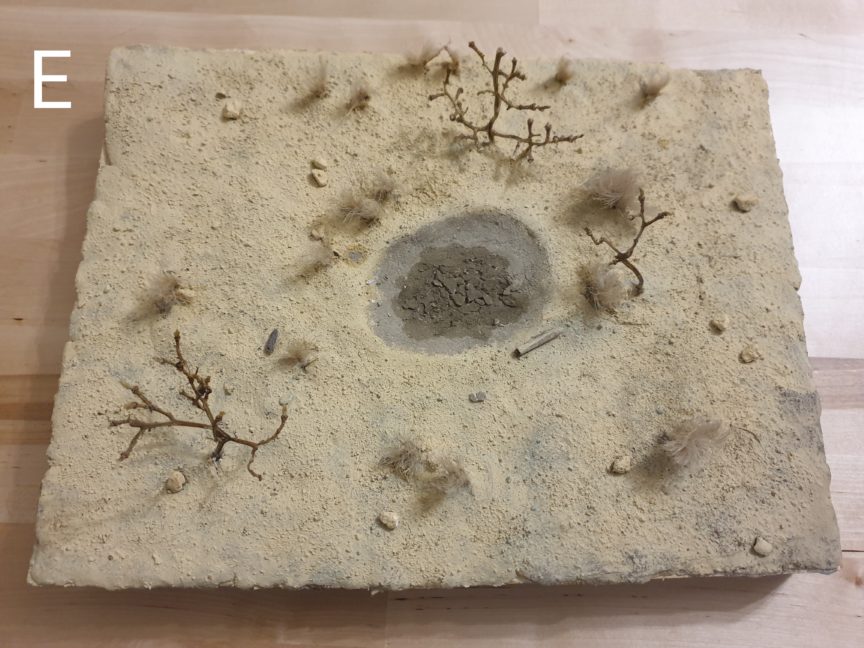
D / When drying, the result may be too dark like here. I had chosen a shade that was too dark. This can be remedied quickly by moistening a brush and dipping it into a bowl of powdered dry pastel (pass the pastel through a pencil sharpener). We rub the brush on the decoration which will tint it and let it dry.


E / As you can see, to represent the expanse of dry water, I chose darker shades. But you can also add a few drops of water to moisten the pigments, which will darken them for the duration of the photo.
You can also make a small mixture with glycerin suppositories, as for our winter decor, tint it brown and pour it into the hollow. You will get a muddy pond of the most beautiful effect.
Conclusion
To conclude, I would say only one thing, all this is only a tiny part of all that one can do. It is possible to make a multitude of themes or environments again. Besides, I will surely offer you others in the future.
I also wanted to clarify that I am not necessarily the author of all these tips. There are many that I found on the net by searching a little so I invite you to do the same if you want to get started. The goal was to show you that with a little preparation and a lot of fun (for my part anyway), it is possible to create mini environments that will enhance your photographic work.
Everyone is likely to pose a minifigure in the middle of a garden and photograph it, so remember, I’m not a pro I’m like you. I just take time to improve the environment of my photo to have precisely, a better shot
“Have fun” is my credo so if one day you have fun recreating this kind of decor, let me know I would be happy to discuss it with you.
SarouxBastoux
