I’m honored to have been contacted by Brickcentral to offer you the September tip of the month.
I’d like to talk about a technical subject that you probably won’t use every day, but which can be very useful in certain cases, and which I use regularly in my photography: focus stacking.
During photo shoots, we’re generally looking for good sharpness on the main subject. However, it can happen that the depth of field used is too shallow to fully contain the subject. In such cases, the focus stacking technique can help us to enlarge this area. This technique can also be used to obtain 2 sharp subjects on different planes or to have a sharp foreground and background.
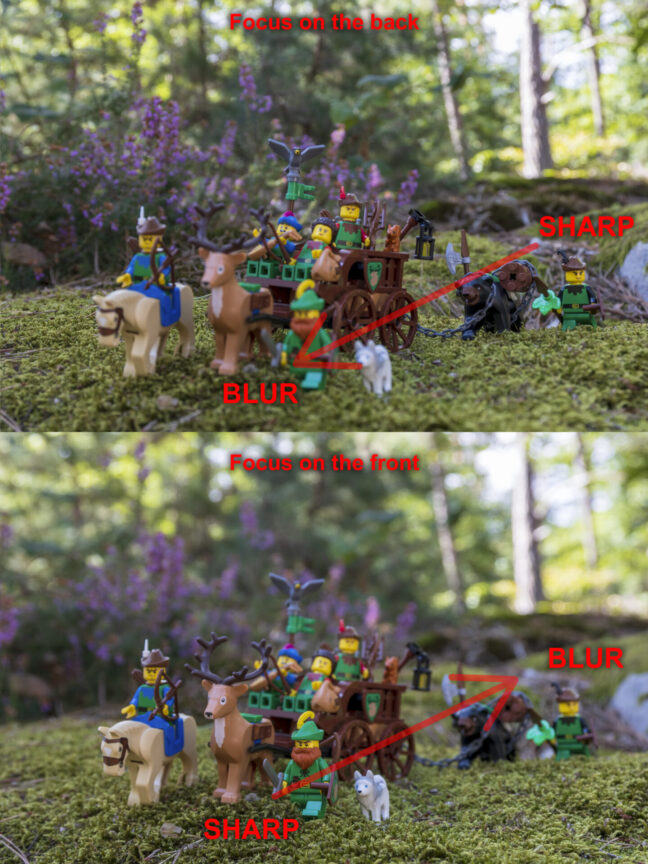
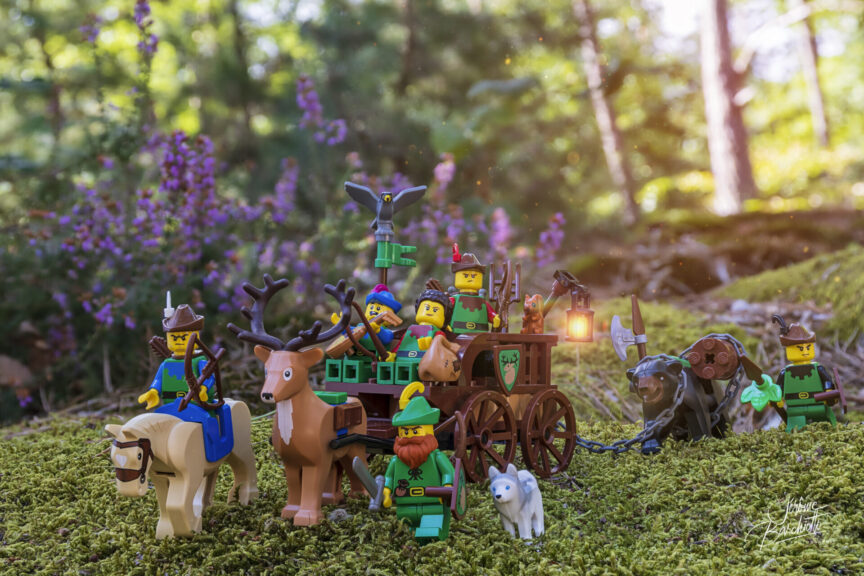
In this first example, I wanted to show a caravan of forestmen in the forest. It’s quite long, and as it’s framed in depth, I can’t get both the leading figures and those in the background in focus. So I’m going to use the technique described:
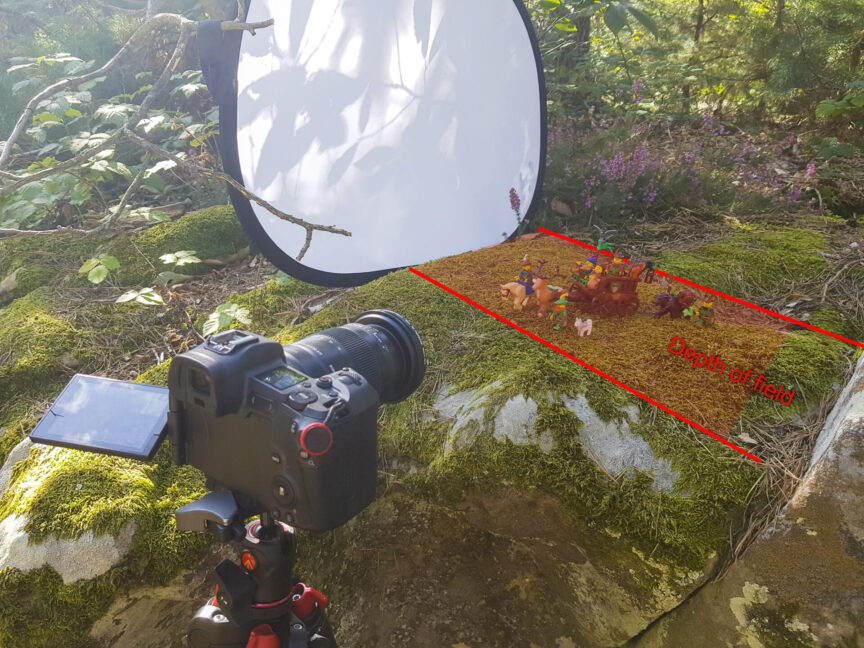
I’ve set the aperture of my lens to its sharpest point, the famous “sweet spot”, around f/8. Instead, I’m going to take a series of photos, sweeping the entire focus area from the closest to the furthest point.
To do this, you need a tripod, so as not to change the framing between each shot, and set your camera to manual focus. To be sure of scanning the entire subject, I can mark the focus interval on the lens ring. Personally, I use the visual aid of my monitor. Then I photograph my sample images, which can vary according to the width of the zone. In this case, 10 images.
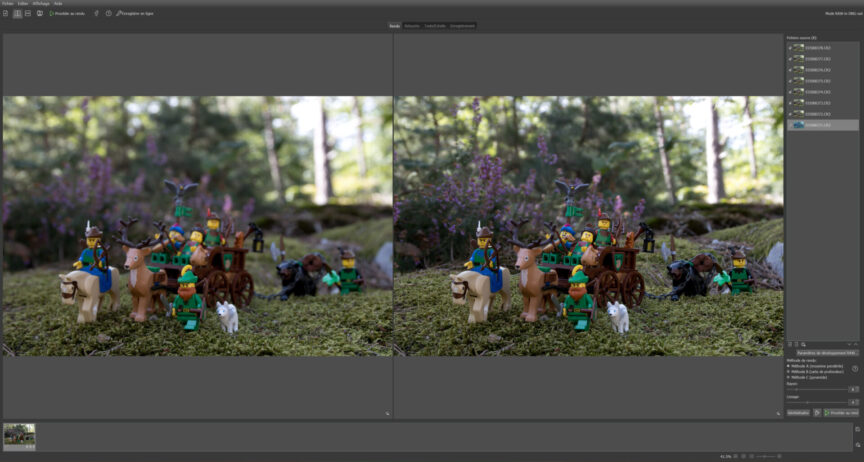
The rest of the process takes place on the computer, where you process the stack of images (hence the name of the technique) with your photo editing software, or with dedicated software such as Helicon Focus, which you can try out as a demo. The algorithm will isolate the sharp areas of each image to recompose an entirely sharp image.
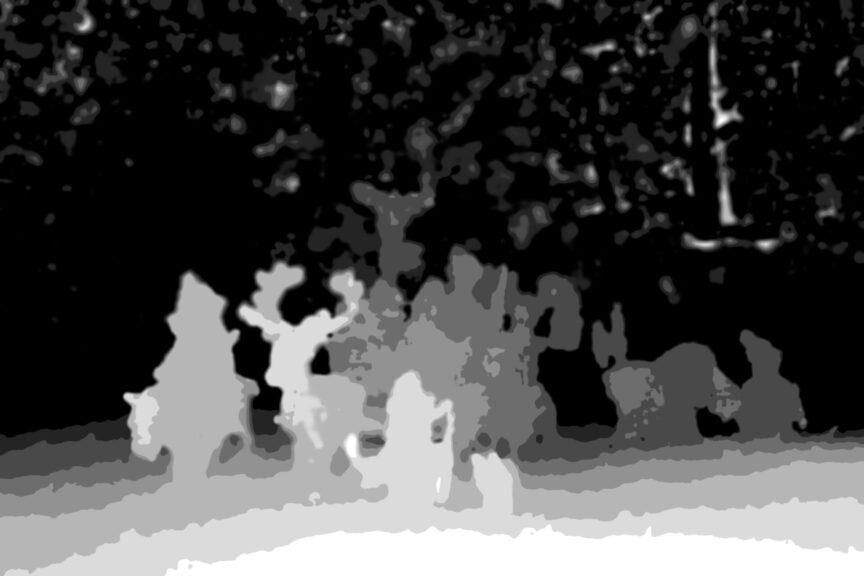
Funny detail, this technique creates a depth map that can be used to generate 3D content!
And then, the final pic is processed. I’m working with raw files all along the process, so I can edit the final picture just as a regular shot to enhance colors or add details. I couldn’t have achieved such a depth of field with a single shot unless I reoriented the subject to bring it more into focus.
For the second example, I’ve chosen an extreme situation. I’d like to show a dinosaur in front of a forest that is probably his territory at sunrise.
At the moment, he’s on a high vantage point in relation to the forest. In a normal situation, I’d have to choose between a close focus on the foreground or a distant focus on the forest. But thanks to the focus stacking technique, I can progressively focus on the whole scene and get a sharp photo from one end to the other.

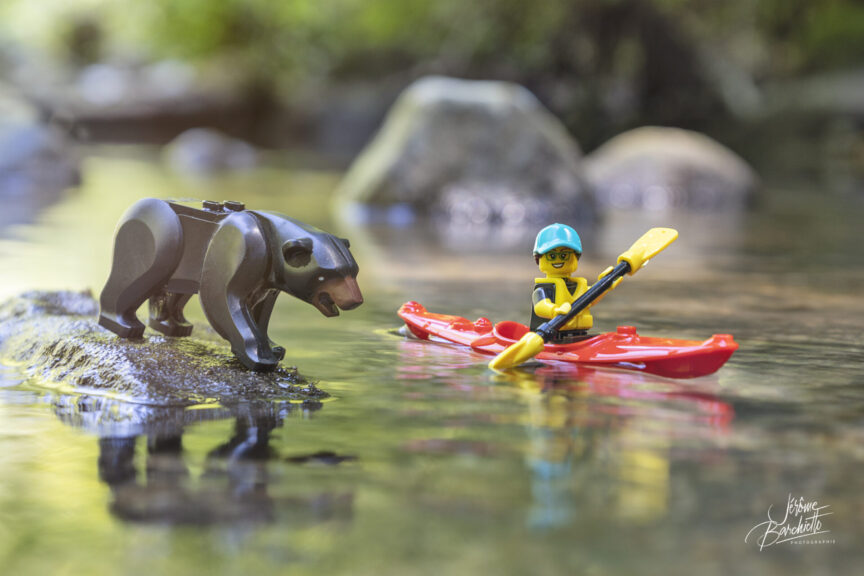
In the third example, I used a slightly different technique, which is also similar to focus stacking. In this case, I didn’t have a tripod, so I shot freehand. I wanted to capture an adventurous woman kayaking down a river in Canada. And she inevitably crosses paths with a bear.
However, I wasn’t sure whether I wanted to emphasize the adventuress and leave the bear out of focus, just to evoke her, or on the contrary, focus on the bear and make the kayak visible in the background. So I took 2 photos with 2 different focuses.

Then when it came time to choose, I also tested the possibility of having the 2 subjects in focus using the masking tools in Photoshop. In this way, I was able to have both subjects in focus on the same image.
Finally, one last example to show that this technique also works in the Studio. I’ve set the scene again in depth with the sailboat, which is quite long. My camera doesn’t allow me to obtain a depth of field large enough to contain everything.
In addition, there are 2 floors separated by glass to show above and below the sea at the same time. The bottom elements are set back from the boat.
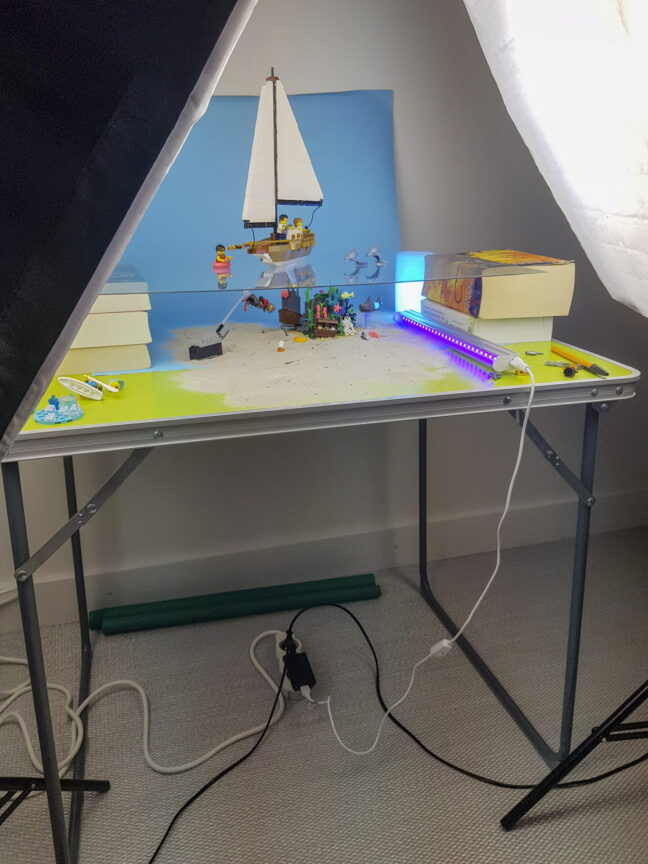
I proceeded in the same way as for the caravan of forestmen, varying the focus over the whole scene. Again, I took 10 images to cover the whole field and edited the stack in Helicon Focus.
The video shows the software’s analysis of the images and its ability to detect sharp areas and place different layers of depth in 3D.