For this month’s tips, I’m going to show you how to use silhouettes to help your audience easily identify the subject and action of your photo.
The use of a distinctive silhouette has been a staple of character designers to make easily recognizable characters. This advice comes from my college instructors in design and animation, and I’ve adjusted it so that you can apply it to toy photography as well.
A silhouette is defined as “the outline or general shape of something” in dictionary.com. The way our minds identify objects is to see the larger shape and color first, before processing the details.
Just like animals in the wild will quickly view the silhouette of something as predator or food, we use silhouettes to identify the person and what that person is doing.
Letting your audience quickly identify what is in your photo will help establish a connection with them, and perhaps make them more likely to pause on your work of art.
While you can literally take a silhouetted backlit photo, this can also apply to other kinds of photographs of any subject. A few effective ways to make the silhouette of a subject stand out are to:
1. Move the subject to a less busy background
2. Have the background behind the subject to be a contrasting color
3. Have the background be a different tone (lighter or darker) than the subject.
Making your character’s silhouette distinctive

Since many Lego characters have their designs already predetermined, there are less choices you need to make in order to have a better silhouette. It’s important to make the most distinctive features of your character stand out.
One good example of this is Mickey and Minnie Mouse and their very distinctive ears. In the cartoons, the ears of Mickey are never overlapping in the silhouette. Even in profile, the ears are moved so that there are two distinct oval shapes.
Make sure to rotate your character enough so that the silhouette is easily identifiable.

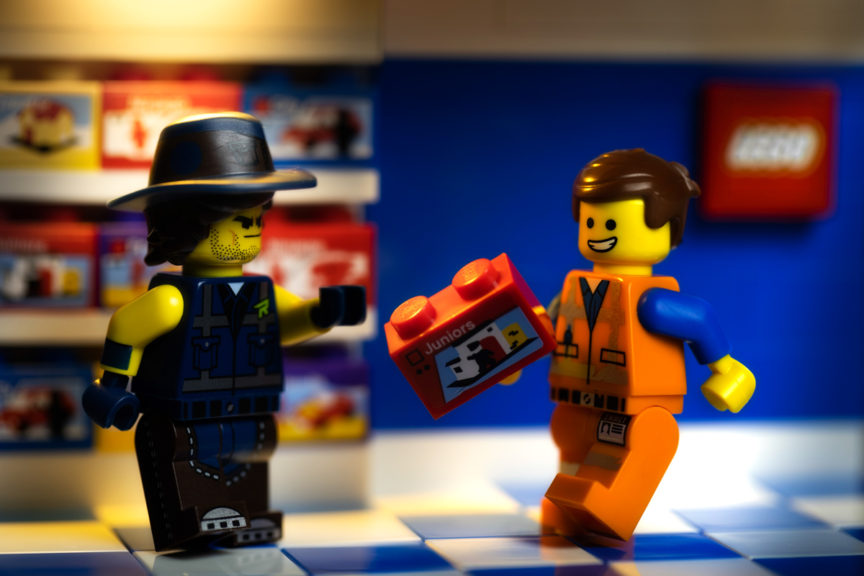
When creating your own group of characters, use head pieces and props that are distinctly different so that the silhouette is not too similar.
While having perfectly identical Stormtroopers representing the anonymous everyman could be part of an intriguing story, you wouldn’t want to use that in every situation. Different hair and hats are great ways to make sure your LEGO people are as individual as their real life counterparts.
Make sure the head pieces and props are posed in a way that is easy to see in silhouette.
Identify the action

While having a prop helps let your audience know what the character is doing, it can look a little stiff and static, especially since your LEGO figure’s limbs only pivot forward and back.
One simple way to imply movement is leaning or tilting the figure. Just a little tilt can make the silhouette look like it has momentum or weight.
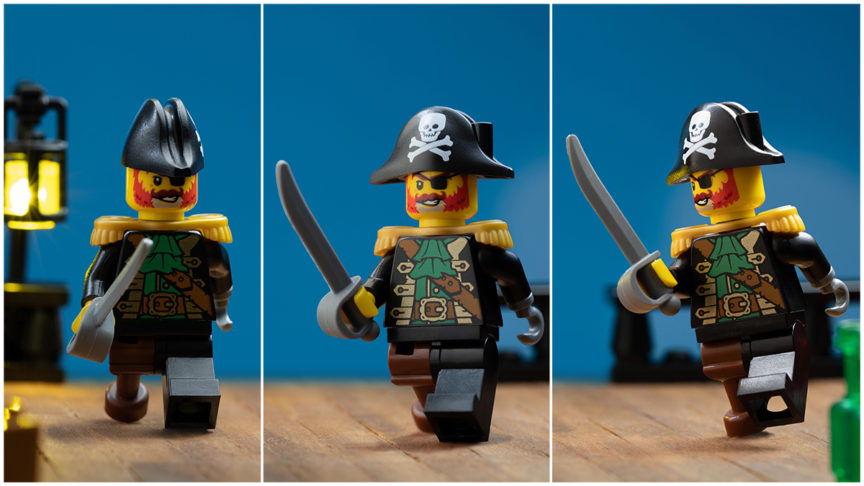
Rotating the figure slightly so that the placement of the hands and feet are visible is also another way to make it clear in the silhouette what the character is doing. It doesn’t need to be completely in profile. A slight turn, so that the figure’s limbs aren’t perfectly perpendicular to the camera, will give the figure more movement.
Some adventurous photographers break away from static, blocky silhouettes by popping out a limb. Once removed, it can be reattached with sticky poster putty for more posing options. This is entirely optional, since the limbs are not designed to be removed.
If you choose to do this, practice on a piece that is not too valuable to you, in case it gets damaged during removal.
Show interaction

Many stories consist of interaction with someone, or something, else. How the characters are positioned can enhance your storytelling. Holding hands, leaning towards or away, or simply looking at an object together will give narrative your characters.
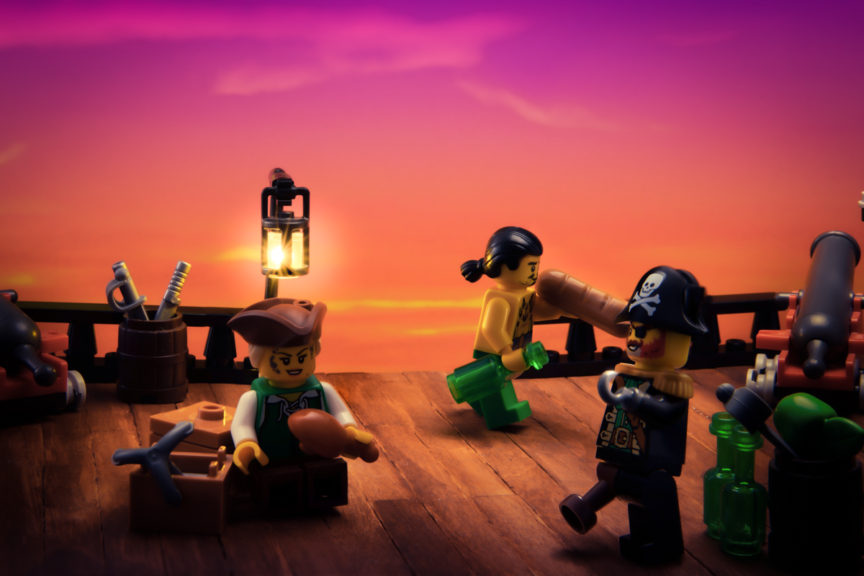
If your character’s silhouette intersects with another character’s or object’s silhouette, a bigger silhouette is created. The bigger silhouette created by multiple subjects may end up being confusing or inadvertently humorous, and overshadow the story you originally intended.
Be sure to look at the background around your subject, just in case something else is intersecting with your subject’s silhouette in an unintentional way. Lamps and trees growing out of people’s heads are common mistakes.
Using a clear silhouette in your photography can improve your storytelling. The silhouette can help your audience identify who the character is. It also helps illustrate the action taking place. Making sure the subject has an easily visible silhouette makes for a stronger image, which hopefully resonates with your viewer.
One Comment
Comments are closed.