There are many techniques minifig photographers can use to separate the subject from the background. The most common techniques are using a shallow depth of field, where just the minifig is in focus but the foreground and background are completely out of focus; and color, where the minifig stands out because of a dominant color.
For this post, I’m going to explore more advanced ways to create separation: rim lighting and atmospherics.
Rim lighting
Rim lighting is using a tight beam of light aimed at the back of a subject to create a lighted outline of the head and body. It’s typically used to separate the subject from a background of similar color, for example, black hair against a black background. The rim light is usually a light source that is modified with a snoot, barn doors, a grid or some kind of flag to create a slice of light.
This is different from backlighting, which is basically putting your subject in front of a lit background, causing the light to wrap around the subject. Here’s an example of backlighting with Ripley placed against the window:

The challenge with rim lighting a minifig is getting a slice of light that fine. Instead of using a flash for this photo shoot, I opted to use a selfie clip-on light as the rim light.


For one thing, I had it ready since I had just used it inside a LEGO set to light the interiors for a previous shoot. Second, as a continuous light source, it immediately let me see the effect of the position of the rim light, unlike a flash, where I’d have to setup, fire, review and adjust until I got the results I wanted. Also, my flash may be too powerful to use as a rim light on such a small subject for this tightly framed setup.
Restricting the light on the selfie light to make it usable as a rim light was just a matter of adding some gaffer tape:


Without the gaffer tape, the light wraps around Mr. Incredible and spills all over the tabletop. With the gaffer tape, I was able to carve out his right side in an outline of light and minimize spill on the table.
The minifig
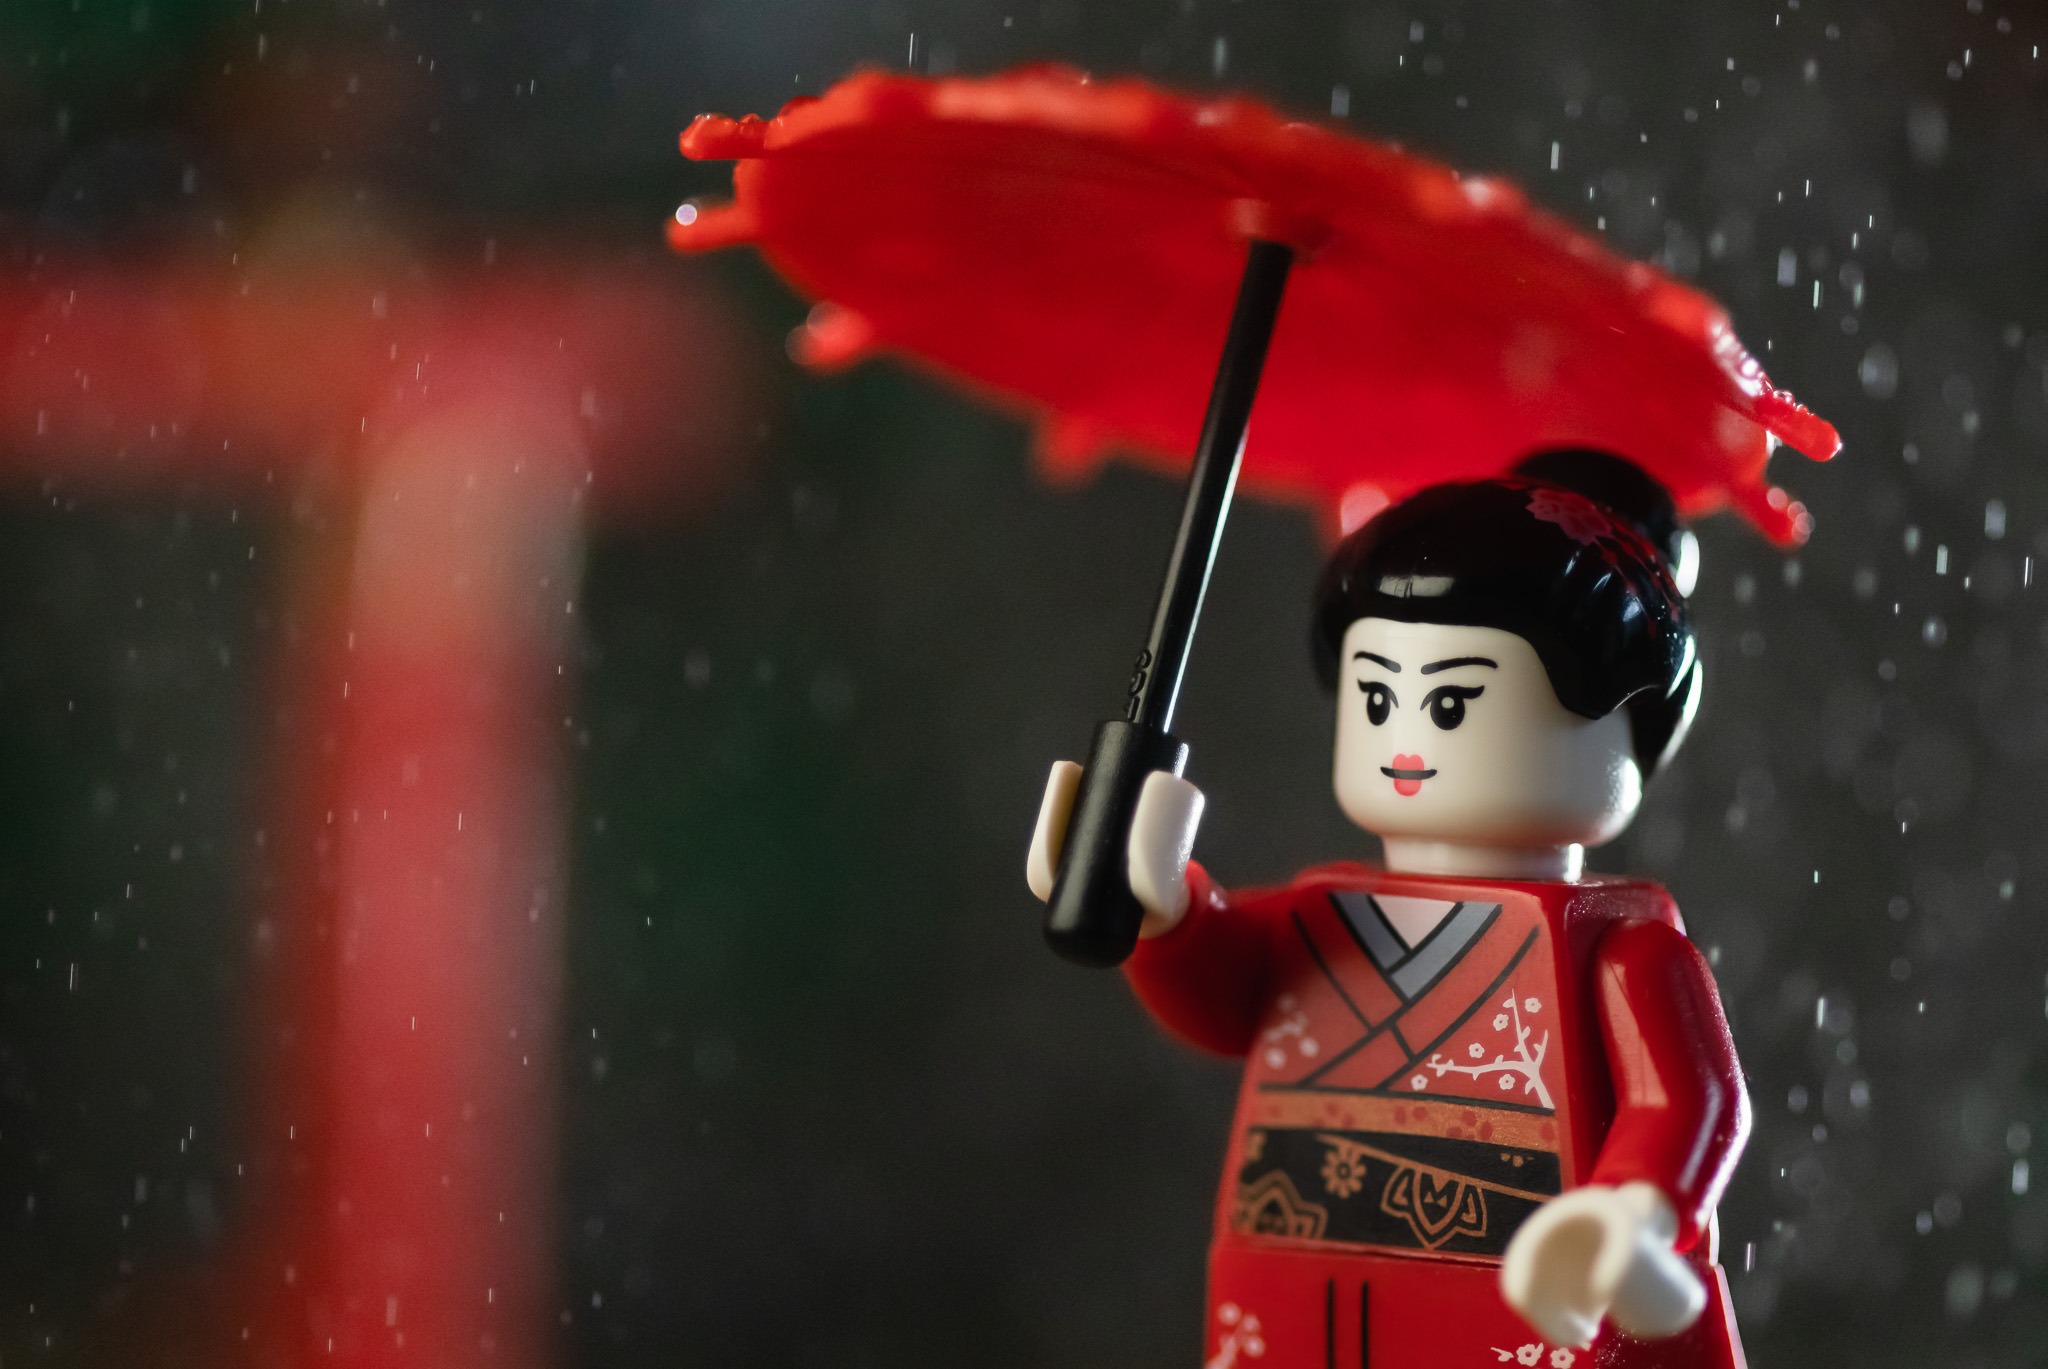
I picked the Kimono Girl from CMF Series 4 as my muse for this project partly because of her novelty, to me at least, because I had just obtained the missing parts to complete her. For months, I only had the dress slope from a Build-a-Minifigure impulse purchase at the LEGO Store but now she was whole.
I also had these Japanese-style footwear and umbrella from Si-Dan Toys that were perfect for her. I really dislike the dress slope because it’s so static (and it’s too tall and the clutch power sucks) so adding the geta to the bottom of it really helps sell the idea that the geisha can move.

The downside of the geta is that they don’t have LEGO connections at the bottom; any minifig wearing them would essentially be freestanding. That’s not a problem for me since I don’t typically attach my minifigs to LEGO plates when I shoot them.
The setup
With my minifig selected, I set up a scene that would complement her. The scenery itself is a brick-built mountain that I had used in an underwater shot months ago with some tree elements added in and a torii, a red Japanese gate, from one of my kid’s Ninjago sets to provide some interest. I just had these set arbitrarily on the dining table since I still needed to do some rim light test shots with the geisha.

My dining table is 3 or 4 meters away from a large window but the window light that reaches the table isn’t bright enough to be a main light. Shooting anything there even with a wide open lens means cranking up the ISO, slowing down the shutter speed or adding more light. When I shoot here, I always rest my camera on the tabletop or I set up a tripod, which is what I did for this scene.
On the tripod, I had a Sony a6500 with a macro lens attached, a vintage Minolta 100mm f2.8. It’s pretty much my default lens for minifig photography because I like to shoot tightly framed photos, but occasionally I’ll shoot with a Sigma 30mm 2.8 if I want something wider.
Setting up lights
Lighting this scene required building up, that is, adding light sources in one at a time. To start, I wanted to see the effect of the rim light on the geisha so I intentionally underexposed the shot so it would be easier for me to see.

Having achieved that, I put all the elements into place for the scene: the mountain in the background, the torii in front of it but off to the left side, the geisha on the right, and the rim light behind her at more or less 45 degrees.
In retrospect, I should have just kept the geisha in the same position I had her in for the test shot because I had already gotten the rim light on her back and some of the window light providing fill on her face. I just needed to bump up exposure and place the background elements in relation to the minifig. That would have been the smart way to proceed.
Instead, I did it backwards and hastily moved both her and the rim light to where I set up the background. Because I essentially flipped the position of the geisha and the rim light, I messed up everything.
I got distracting highlights on her dress because I didn’t set up the rim light at just the right angle. I also ended up letting that window light build on to my rim light. Finally, I had to add a second light camera left to add some fill to her face.
That one poor decision to move the minifig cost me a lot of time and resources to correct it. The lesson: be more mindful before making big moves.

Adding atmosphere
Next up was the adding the atmosphere, in this case, rain. I had a little spray bottle filled with water ready and my aperture set to f/2.8 to create some bokeh out of the drops of water where they were out of focus.
To get rain to show up in a photo, it needs to be lit from behind. In this case, I already had some light coming from the back in the form of the rim light so I knew rain would show up more prominently there.
Shutter speed is also a consideration for capturing rain. At 1/250, the rain shows up as streaks as in this test photo:

I had to increase the shutter speed to 1/1000 to get the shape of the rain drops close to what I had imagined them to be. Increasing the shutter speed also made me increase ISO to 3200, which introduced a lot more noise.
Post processing
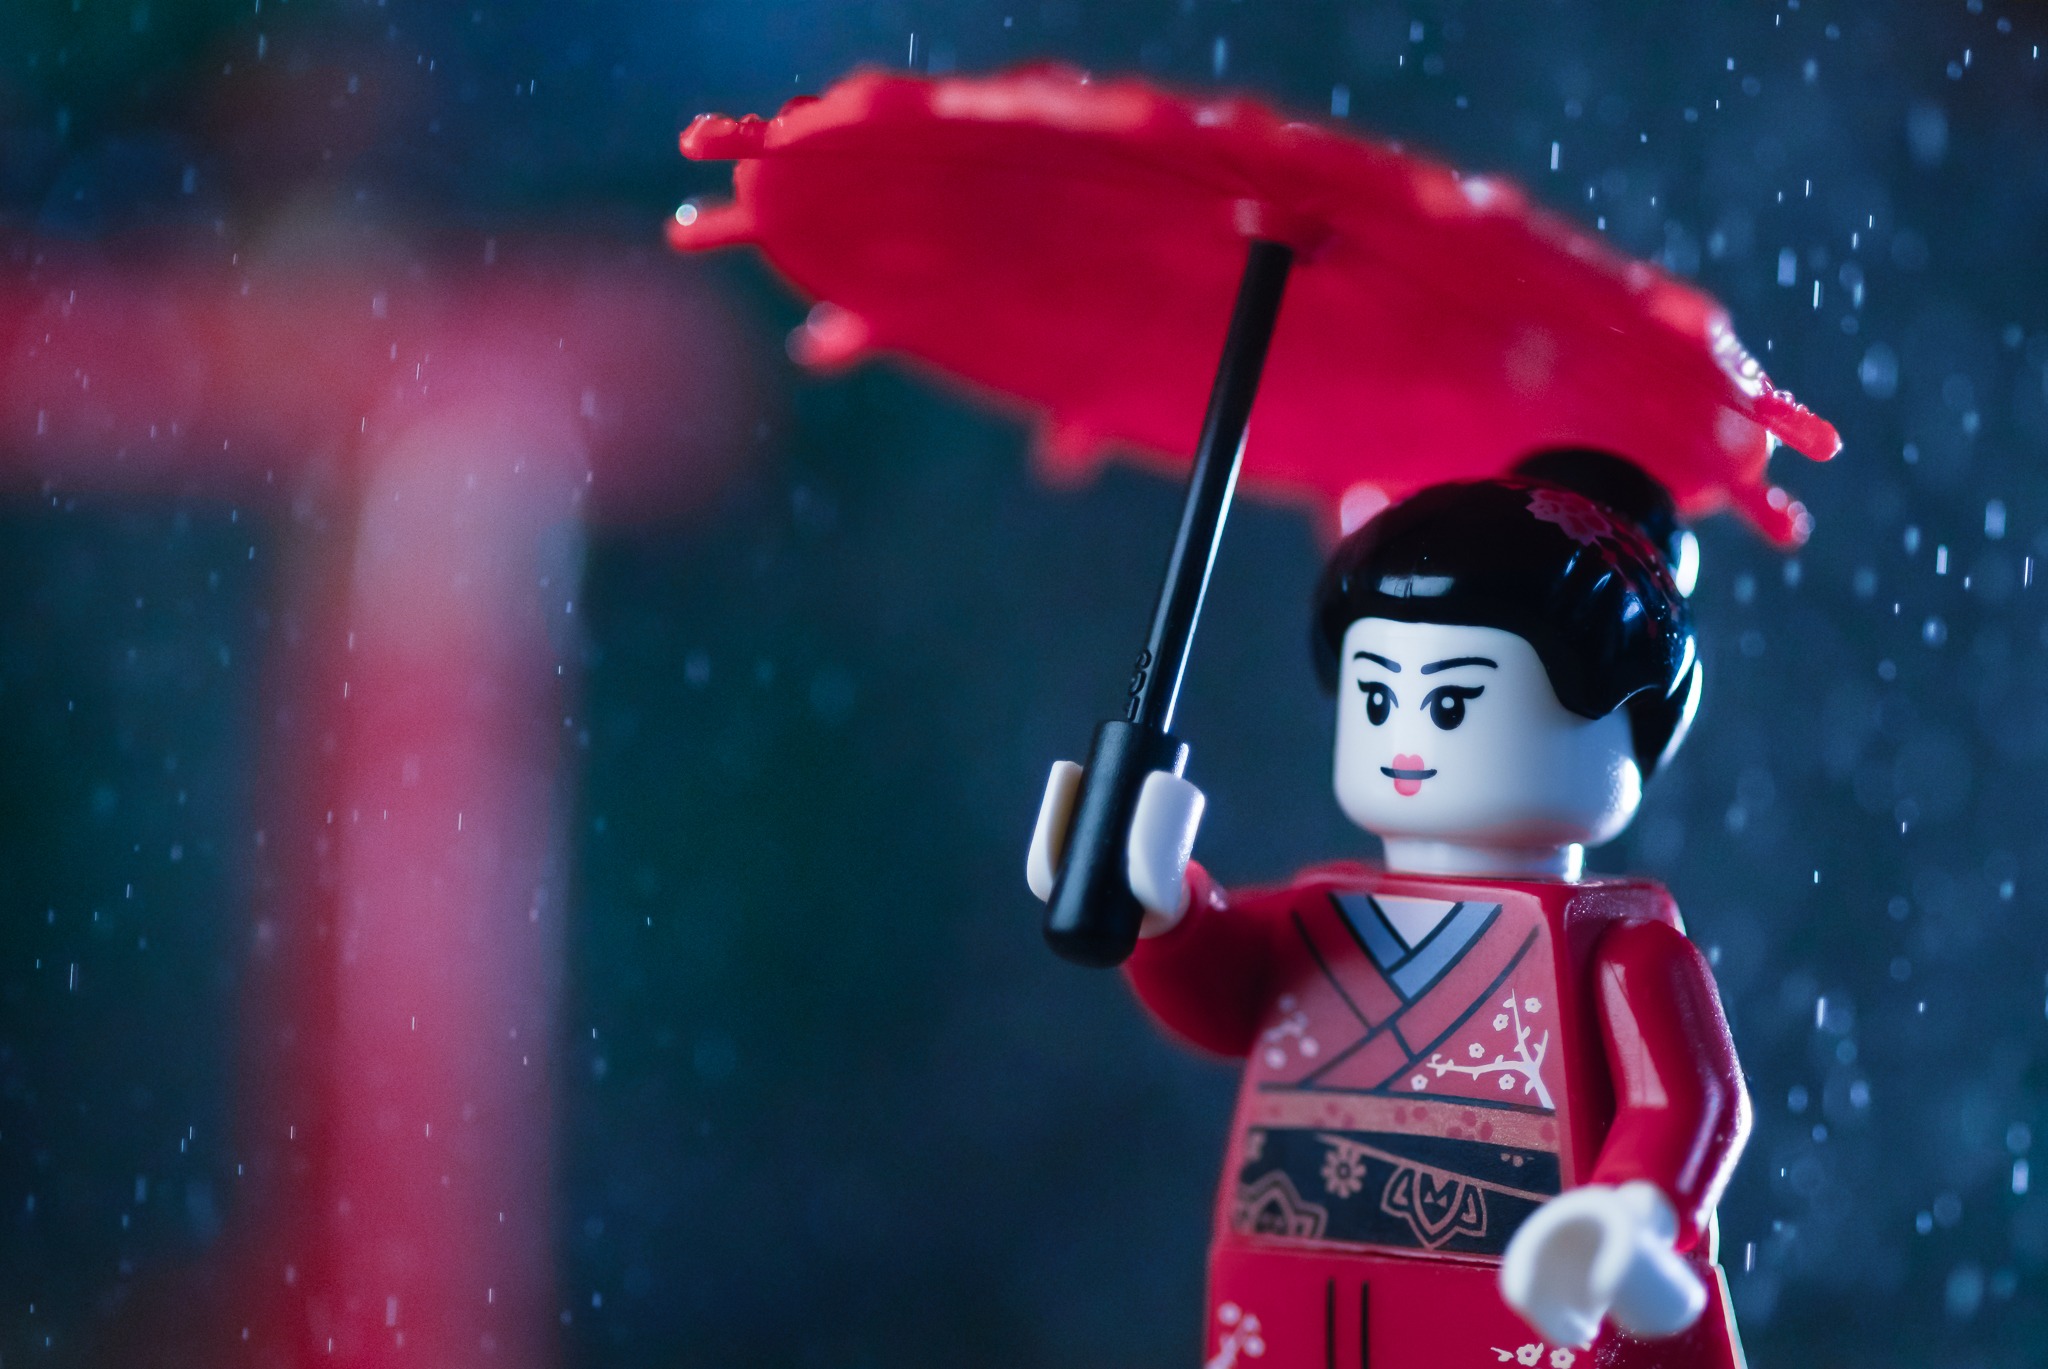
With pretty much all the work done in camera, I just needed to apply some more aggressive noise reduction than I typically do because of the high ISO. The other thing I did was to change the white balance to make the photo bluer. Rainy scenes and night time scenes always call for cooler tones in my workflow.
Here’s a before and after showing the effect of the white balance adjustment:
This rim lighting part of this experiment was fairly difficult for me but having that extra detail in the final photo was worth it. I’m still not sure the selfie light was the best light to use as a rim light, so I’ll have to try this again with my flash and compare.
If you’ve tried rim lighting and atmospherics in your minifig photos, I’d love to read about how you pulled it off.
Hey Anna, what an inspiring article! Loving all the aspects you touched. You may have taken a little detour here but I do think it was well worth it. To me the direction the Geisha is facing feels perfectly right so taking her to the set-up instead of placing the set-up around her was a good idea. But yes, sometimes it´s ok to think before acting. Thank you for linking the shop for the umbrella. It´s a sweet little accessory.
It´s very good to read about your workflow and knowing your thoughts (what at which step). It´s fantastic to see the test shots as well. Must admit that I´d have preferred the streaks (of rain). Then you could have used the actual drops as snowflakes in a later project. And yes, changing the white balance to a rather bluish tone really adds to the atmosphere of rain.
Thank you for sharing your experience here with us (and saving me some time- wasn´t really aware of rim lighting though it´s so easy yet great).
Looking forward to reading more bts here.
Best, Stefan
You might have changed my mind about the streaks of rain. I thought that maybe the streaks would look too torrential, and not really weather that anyone with an oil-treated paper umbrella would be out in.
When I envisioned the scene, I wanted blobs, so perhaps I was too married to that idea.
Found your blog from Instagram, great article! I have never “intentionally” used rim lighting but I think I might just do it in the future!
Cool! Tag me when you do. I’d love to see it.
A great insight into your thought process and workflow. Thanks Anna.
Hi! Wow such a nice behind the scenes article, thank you soooo much for this. I know the kind of effort it takes to take a shot like this and to register every step for explanation is just amazing. That trick with the little light is awesome! How can a find a light like that? It has been a while since I´m looking for a portable light that can help in new compositions, but this small one I never saw before.
Congratulations for such a good post full of great advice. Thanks for sharing!
Hi! The light is just one of those lights you clip onto a phone to take selfies. In particular, it is a Godox LED M32. I don’t really recommend this model because sometimes it doesn’t power on or the battery just drains for some reason.
You could probably get a similar effect with any flashlight 😉