Every month, we pick a LEGO photographer active in our community and share some of their work and a little about themselves. This month we meet lego_nuts!
Hi, my name is Yuan He, also known as lego_nuts in the AFOL community.
I began my LEGO photography journey in 2018. Initially, I just wanted to take photos of minifigures and official sets, creating interesting stories.
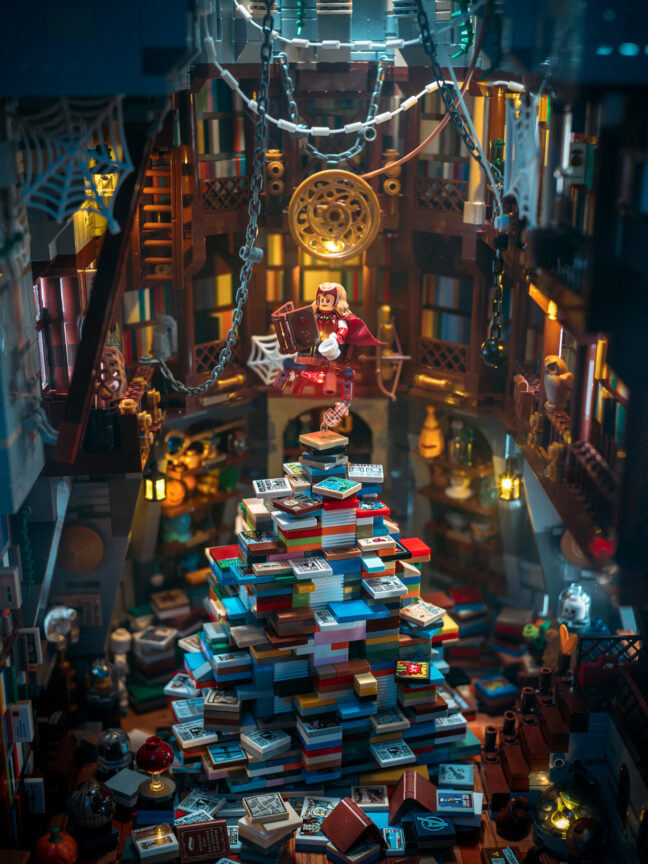
Later, I got into the MOC (My own creation) game, so to have full control of my stories and build more unique scenes, and to me is the best way to explore my creativity.
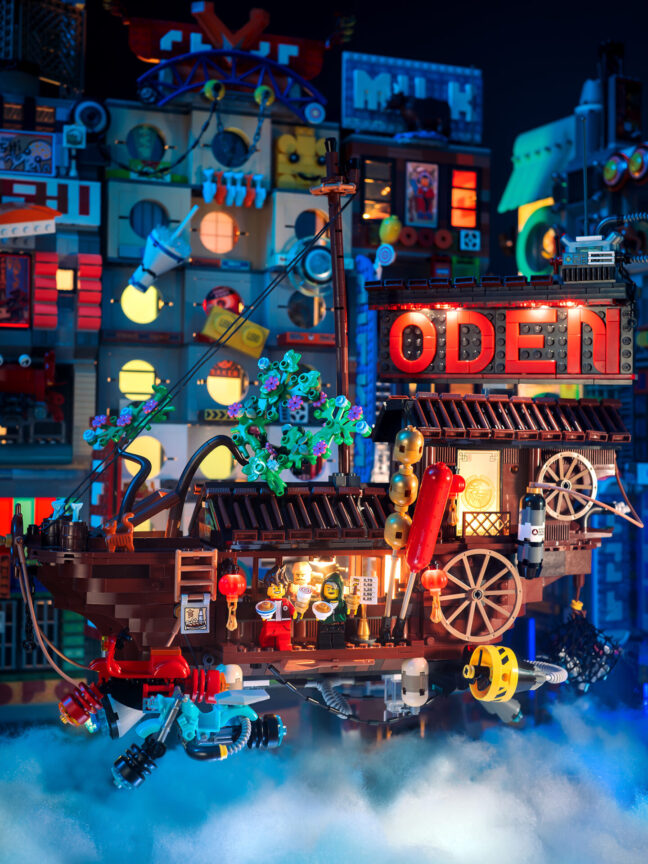
My works includes various themes, but as previously mentioned, storytelling remains at the heart of my creations and because of that I’m always trying to create the perfect moment for my stories and capture them through my camera lens.
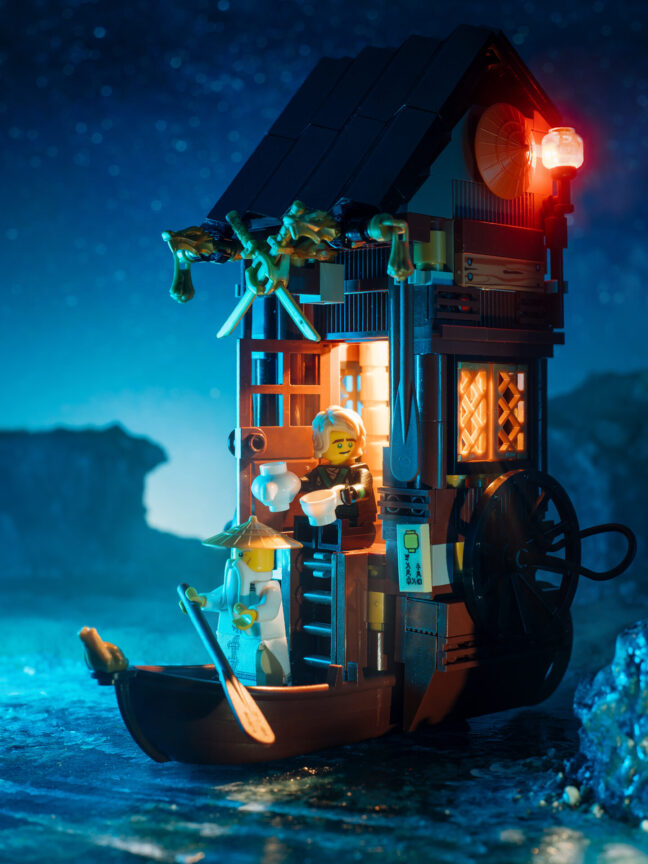
I love using lightings to create different vibes on my projects. My favorite lighting setups are sunset and nighttime, where I appreciate the captivating drama and striking contrasts they can offer to viewers.
I would say the combination of environment, character and lighting is the key of my photos.
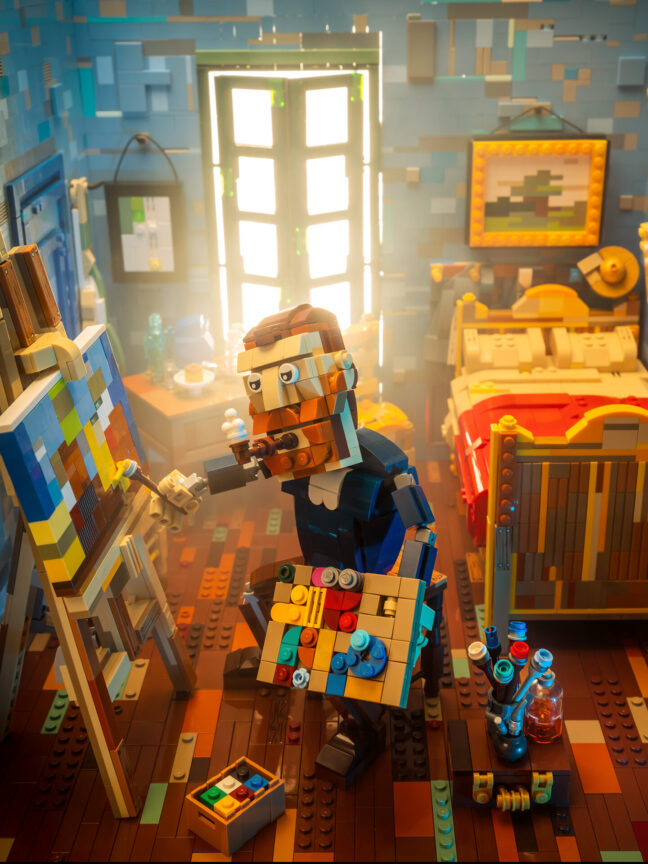
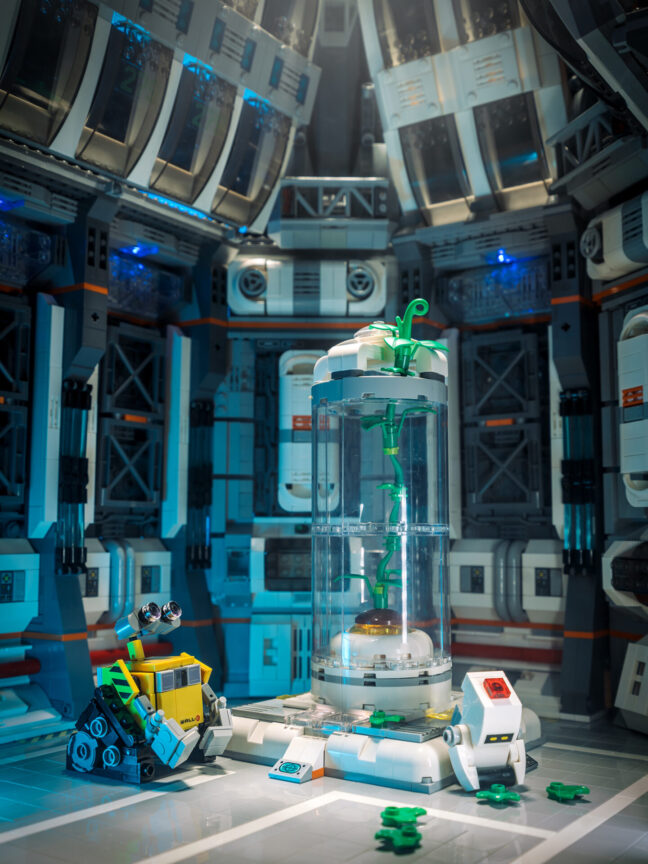
I used to love shooting and building sci-fi themes, and I still do, but I don’t want to be limited in specific fields, that’s why I love exploring something that I have never tried.
I’ve been using SONY A7R2 camera since the beginning. Initially, I relied heavily on a 70mm macro lens, as I focused on capturing intricate minifigure scenes.
However, as I started to make my own creation which became bigger and bigger, I found that wide-angle focal lengths such as 35mm and 24mm became more versatile lenses to use. They allow me to capture a wider field of view and better accommodate the scale of my scenes.

As I mentioned before, I firmly believe that good lighting plays a crucial role, even more so than the camera gear itself. For this reason, I have a collection of various lighting equipment. Among them, my go-to lighting fixtures are RGB LED lights. Their versatility allows me to mimic real-world lighting conditions with great convenience, resulting in more realistic and immersive scenes.
In my workflow, since I primarily focus on LEGO MOCs, I tend to envision the final shot of my projects during the planning stage. This allows me to strategically incorporate elements such as windows, doors, or hidden spaces that facilitate optimal placement of micro lamps and wiring. Once the project is completed, I typically experiment with various lighting combinations to achieve the desired overall atmosphere. This process often involves taking multiple shots, sometimes dozens, until I capture the perfect image that brings my vision to life.
I use Camera Raw in Photoshop to edit my photos, and the editing process is not as long as you may think. If the lighting is right, normally I would only spend like 10 minutes to clean up some dusts or exposed lighting wires.
The exclusive photo
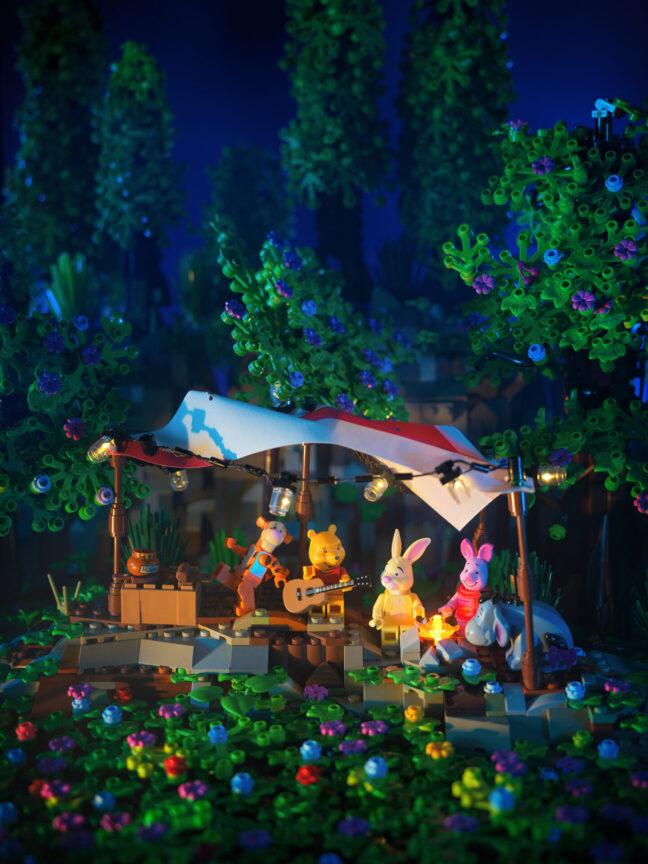
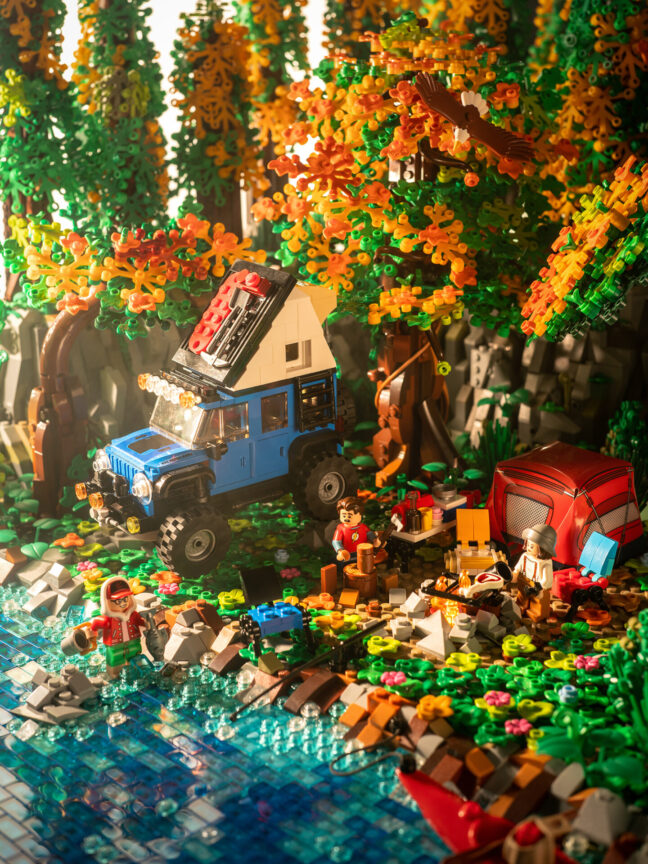
I’m an interior designer, therefore most of my MOC projects are setting up in interior spaces or architectural scenes. I haven’t done too many projects in natural environment, which sometimes I found it very challenging and interesting. In this shot, I wanted to create a scene of bunch of friends gathering together in a forest, sort of like a camping trip, and in this case, it’s the characters from Winnie the Pooh.
In order to hide the boundary of the scene and creating a more realistic environment, I designed some rocky structure on the back, along with some trees and bushes. There is an awning at the center, and the friends of Winnie are playing music, telling stories and dancing, surrounding a fire pit, enjoying themselves and having fun. I planned the scene to be set in night time, in that way I can create contrast of cold and warm lighting colors in this shot, and the viewer can easily focus on the characters, to feel their joy.
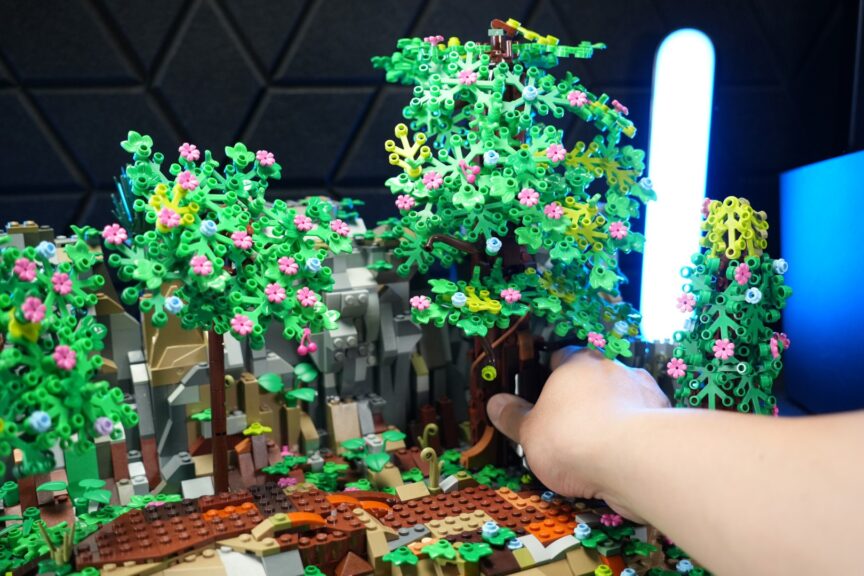
Despite the scene may looks complicated, it’s actually a relatively simple one, just lots of random items and repeatable steps, and it takes time to build. I spent almost two weeks on it, most of the time spent in placing flowers, grasses and trees.
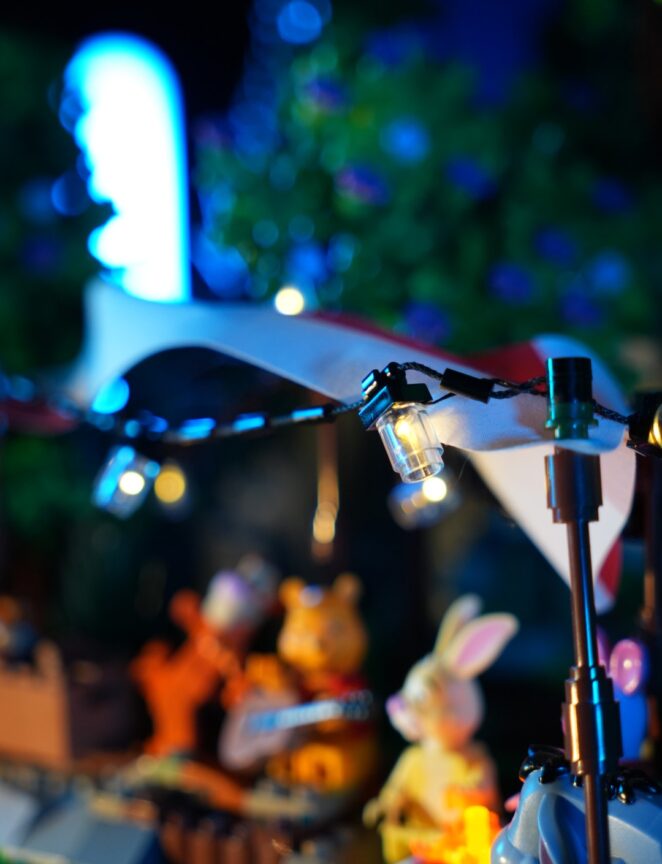
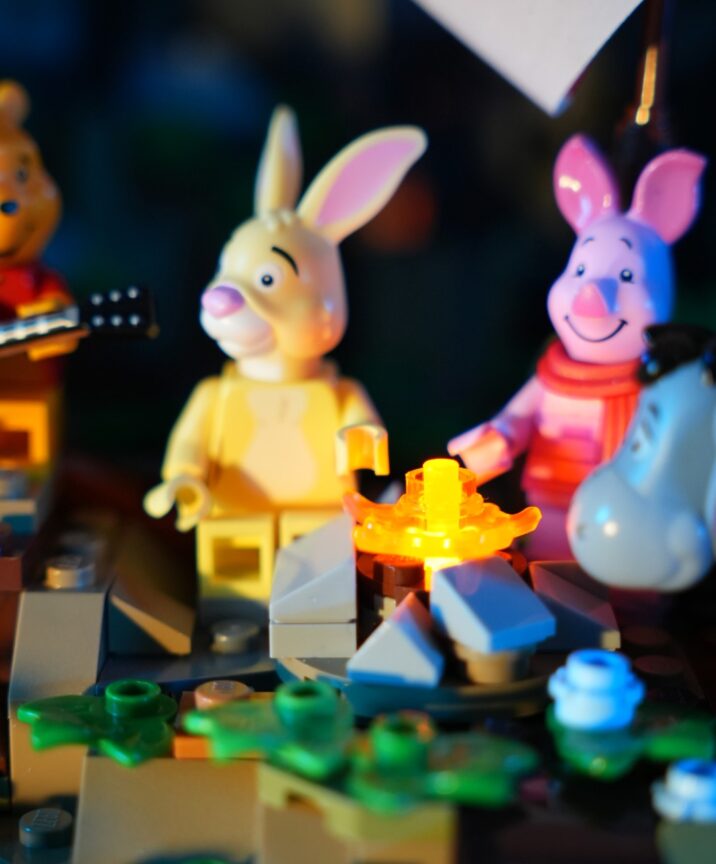
As I mentioned this is a nighttime scene, I needed to set up some camping lighting to light up the awning area. I’ve used micro-LED lights inside of the translucent bricks, but they are not that bright, just for decorative purpose. Another light source is in the fire pit, again it’s not bright, but sometimes it is helpful to add more details at the scene.
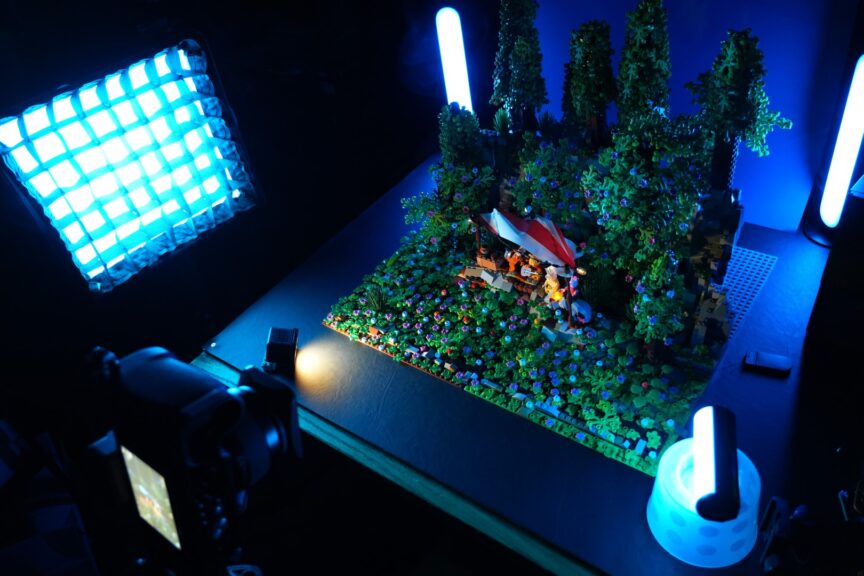
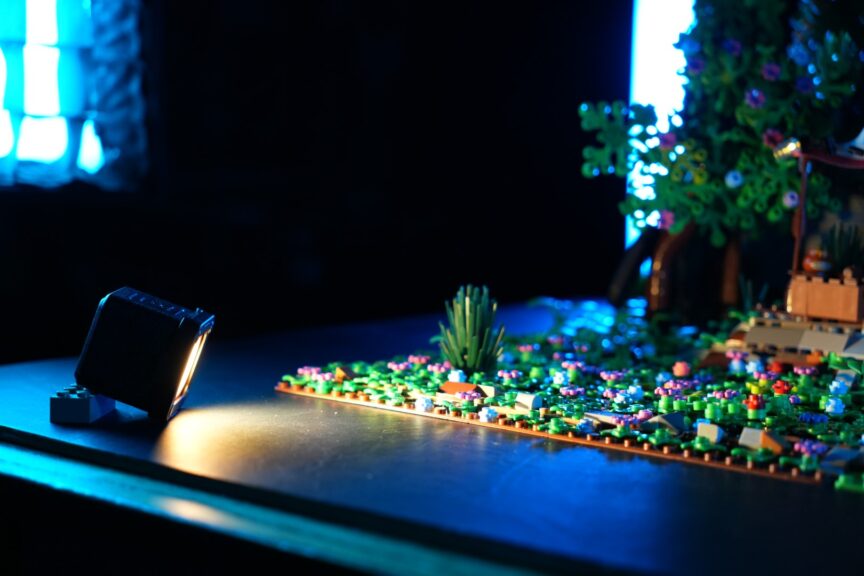
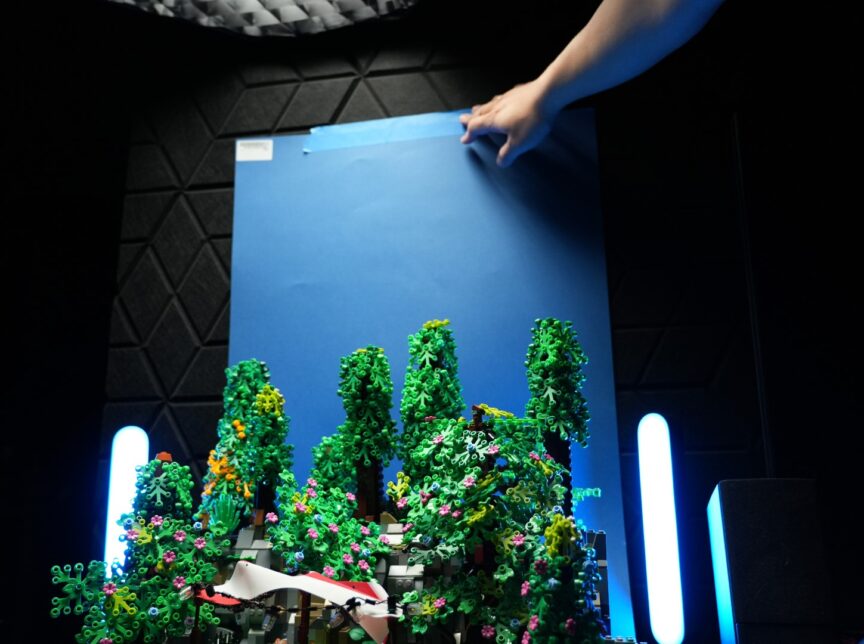
After posting all the minifigures, it’s time for the big boys to actually light up the whole scene. As you can see in this photo, I have 4 blue lighting fixtures to create the night time atmosphere. The two tubes on the back are for slightly lighting up the blue backdrop paper, to separate the trees and also mimicking the night sky, will get into that later.
Besides of those, the front left light is serving the purpose of creating the general blue-sky light at night, which can be reflected on the front elements like trees, grasses etc. There is only one warm lights in front of the scene, since those decorative micro-LED lights are too weak, this small cube light is the key to light up the awning and minifigures, and generating a growing spot at the center. The small LED tube at the front right acts as a fill light, specifically for brightening minifigures, restores more details on the dark side.
If we are shooting indoor, there are few tricks to create more realistic background for the photos. I used to have my computer monitor as a background to simulate the sky, distanced buildings etc. But sometimes it can be tricky, I might need to adjust lighting and monitor brightness levels to accommodate each other, or my scene is just too big to move. In this project, since the trees needed to be blended in with the “sky”, I’m using a blue paper as a backdrop to creates more depth on the scene and making it look bigger, it works great for night scene, but different scenarios like broad daylight might be too bland for just using a paper.
Hope you enjoy this project and found it useful for creating your LEGO photos. I’ve learned a lot from other amazing photographers and creators all these years, I found it very interesting and inspiring to watch how others create their amazing photos. And like I said earlier, for LEGO photographers, camera gears are not that important, what matters is how your story want to be told.
Amazing gorgeous art!