It’s September so are you ready to start seeing Christmas stuff? Yes? Then read on! This year’s winter set is Santa’s Visit 10293 featuring a bright light blue house that shares the similar dramatic sloped roof style of the previous year’s Elf Club House 10275. This is no surprise as the designer of both these models is Chris McVeigh.

Minifigures
There are four minifigs in the set of which the little girl in pajamas is the most exciting. She has an all-new torso print, a new head print, and a new cookie with sprinkles tile.
I am a fan of the pajamas torsos in general but this one has snowflakes on it so it’s less useful to me.

I love the new head. It’s great to have another closed eyes print on a kid’s face. Her sleeping expression pairs nicely with the alternate face on Violin Kid from CMF Series 21. I foresee slumber parties in her future!

The Santa minifigure in this set also has a new torso print but it’s very similar to designs of years past but without a candy cane tucked into the belt on the backside.

Santa has a new head print that kind of resembles the Lawn Gnome from CMF Series 4 but rather than a smile, Santa has a moustache. The legs are dual-molded red and black so now Santa has boots!
The parental minifigs are meh although it still is nice to have another Peter Venkman hairdo.

Model
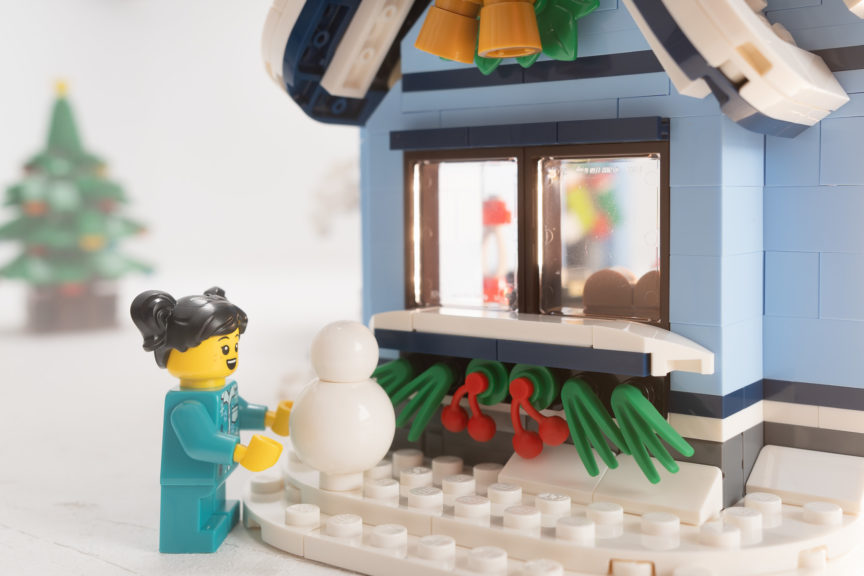
While we’ve seen steep roofs in these seasonal sets before, this is the first time I’ve seen non-right-angled walls in a house model. This architectural design is achieved with dark blue swivel hinge plates where the left and right wings of the house join with the foyer.
The winter decoration on the door is a clever use of the 1×2 round plate and 1×1 round plates with a shaft. The thin window frame on the door is sandwiched between those pieces so it’s not firmly set, but rather jiggles around.
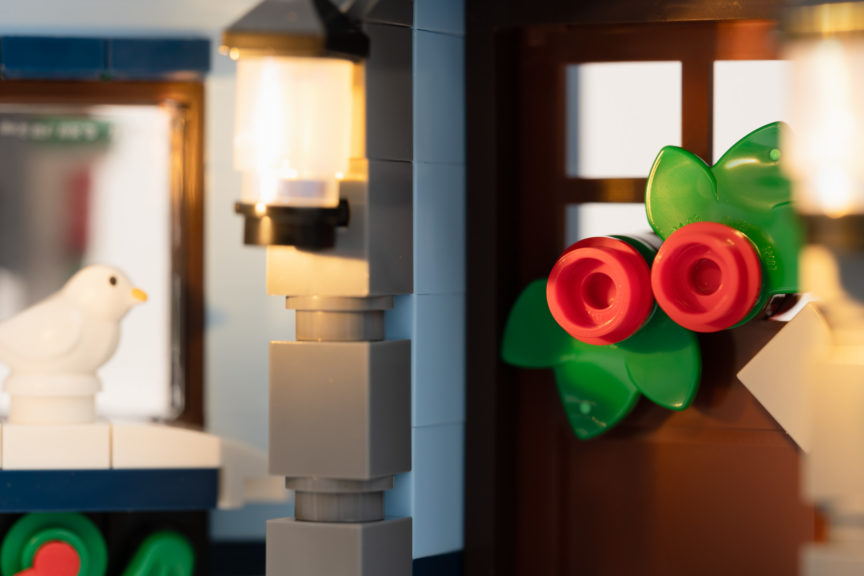
Speaking of decorations, the greenery around the house are bladed claws in green, which is a part that was only previously included in the Ninjago City Gardens 71741 set. Santa’s Visit has 17 of these.
Other notable parts in the model are the opalescent 1×1 round brick in the lanterns, which are slotted into dark bluish-gray 1×1 Technic bricks with axle hole around the front door.
I really like how McVeigh added texture to the chimney with combos of 1×2 round plates, 1×2 plates, and 1×1 plates rather than just relying on masonry bricks. I am inspired to texturize my Medieval Castle 31120 in a similar way.
There are a bunch of fun brick-built details in the set too: the pearl gold bells, the Christmas stockings, the food mixer, and the mini Saturn planet in the girl’s bedroom.

The whole house makes for an engaging build and an impressive display.
The play feature of this set is in the Christmas tree, which lights up when it’s pressed down on. There’s a Light Brick sat in the base with the light pointing up and shining through the numerous transparent plates and bricks in the tree.
Verdict
Santa’s Visit is a no-brainer addition to anyone who already has the previous winter Creator Experts sets. On its own, it’s a great building experience and display piece.

I hoped for more unique parent-type minifigs but having a few new parts for the little girl and Santa is good enough.
I give this set a 10/10.
Santa’s Visit will be available on October 1 on LEGO.com and stores worldwide. Price: £79.99/$99.99/€89.99.
Behind the Scenes
It’s not very often I whip out my 24mm 2.8 macro lens and fill the frame with a minifig, so I’m going to cover that shot of the dad admiring the new trumpet that he got for Christmas for this BTS.

My lighting is uncomplicated for this photo: I set my camera to a longer exposure and waved a LitraPro LED over the dad minifig to get more light inside the model. This is a technique called painting with light and if you haven’t heard of it before, check out my video:
You might notice in the photo that I removed the table and chairs. Yes! Feel free to remove builds from your sets if they are cramped or you want to minimize distractions!
Photographers move furniture around all the time so don’t feel like you are bound to keep LEGO builds intact when shooting either.
One other thing I almost always do in post is to brighten faces. This is something I learned as a portrait photographer and so I carry it over to my LEGO photography because I am essentially shooting people, just plastic ones.
In Lightroom, I typically drag a radial filter over the head and increase exposure a few points.

You can do this in any photo editor with other tools like a brush. In Snapseed, you can do something similar with the Selective tool and increase brightness (B).
I hope those tips are helpful!