Mixing yellow and licensed minifigs in one scene doesn’t make me cringe as much anymore since Batman and Wyldstyle starred side-by-side in The LEGO Movie a few years back, but seeing a hybrid yellow-flesh minifig on my Instagram feed makes me wince… and scroll, scroll far away from that aberration as fast as I can!
Luckily for us all, this LEGO photography faux pas can be quickly rectified with Photoshop Fix, one of Adobe’s free mobile apps.
Photoshop Fix is a stripped-down version of Photoshop, but it can do a decent enough paint job for people who only post to Instagram. Given the small screen and how quickly users are encouraged to scroll, Instagram is very forgiving of mistakes. The imprecision of using your finger to make these kinds of edits won’t be so glaring.
For photographers who also post to Flickr though, you will probably want to stick to the full-fledged Photoshop program since the viewing experience there is slowed down and photos are more deeply scrutinized.
Getting started
To get the best results, use the highest quality photo you have, not one already downsized for Instagram. The more pixels you have to work with, the easier it will be to zoom in close and change their colors in Photoshop Fix.
Once you have installed the app, launch Photoshop Fix and select a photo from your device.
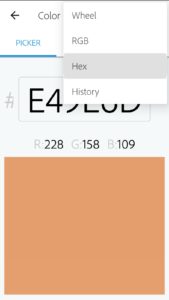
Next, select the Paint tool from the menu and then tap Pick Color. In the options dock along the left, tap the Color circle to open the color picker.
If you have a flesh hand already in the photo, just sample a color from that area. If not, open the hamburger menu, select Hex and enter #E59E6D to get the LEGO flesh color (officially named “nougat”) loaded.
Conversely, enter #FFCD00 if you want to change the color of a flesh minifig to yellow. Here’s a list of codes for LEGO’s color palette, if you need them.
Understanding the brush
Before you begin painting, finish setting up your brush with the other options in the side dock. To increase or decrease values, just tap the option you want to adjust and drag your finger up or down.
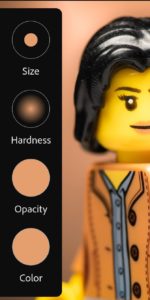
- Start with a smaller brush size by tapping the Size circle and dragging your finger down. The size of the brush will need to change as you edit depending on what kind of area you are painting. If it’s in between eyebrows and the eyes, you’ll need a much smaller brush, for example.
- Make the brush edges softer by tapping the Hardness circle and dragging it to somewhere around 50. This will make for more smooth looking edges rather than abrupt ones.
- Set Opacity to 100 for areas without any print. Reduce the opacity when painting around and under the print. The LEGO print especially on the heads isn’t perfectly opaque or sometimes, not even aligned, so the underlying color will come through.
- Leave the Blend mode turned on so that shadows and print still come through.
Once you’re all set up, zoom into your photo and start painting away!
If you make a mistake, you can use the Restore tool and paint over it. There’s also an Undo button which can step you back to earlier states. The difference between the two is that the former is for more precise corrections while the latter undoes the entire brush stroke.
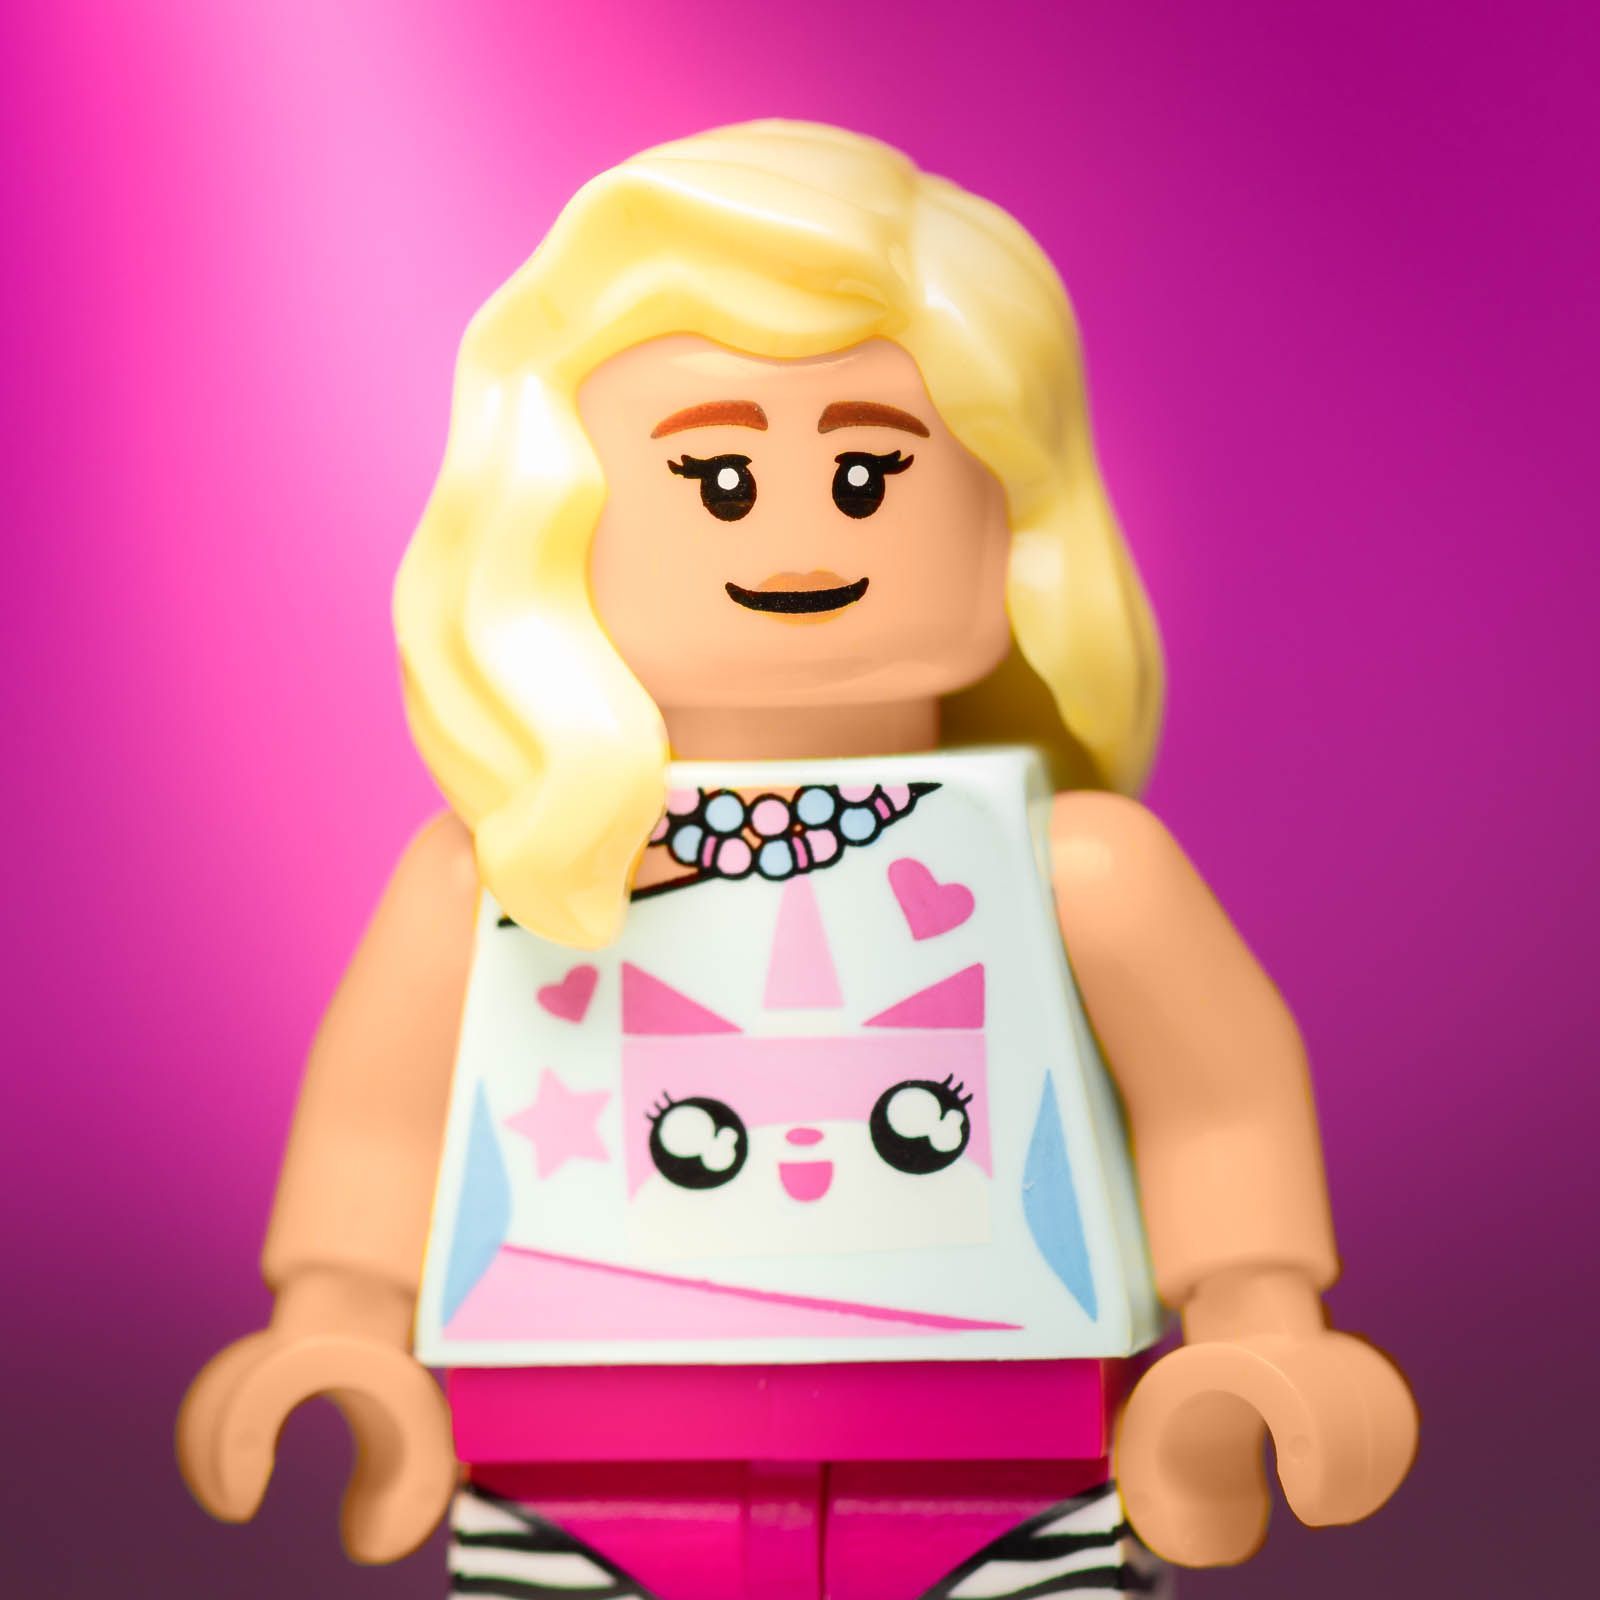
Here’s how I used all these settings to change my sigfig from yellow to flesh using Photoshop Fix in just a few minutes:
Fine-tuning
Once you think you’re done painting, zoom into your photo and make sure you have corrected any glowing edges where your brush may not have reached.
And don’t forget to edit any color casts or reflections especially in the hairline or sides of torsos.
In this photo, the arm created a color cast on the white torso. I simply sampled the torso color and used a lower opacity brush to paint away the yellow. I chose not to create a flesh color cast because I thought it looked better without any.

Conclusion
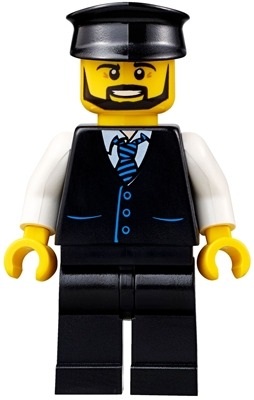
LEGO photographers who prefer shooting licensed or flesh minifigs are usually the culprits of mismatched colors but occasionally, someone will overlook the flesh-colored neck detail in a torso and use it with a yellow head. Even LEGO has done that as seen on this limousine driver:
If you must use a yellow head on your otherwise flesh minifig because you just need to have that particular expression, do the right thing and correct that before posting your photo online. Photoshop Fix is free and pretty easy so now there’s no excuse.