Most of you probably don’t know that I have a degree in fine art and I enjoy putting it to use when making dioramas.
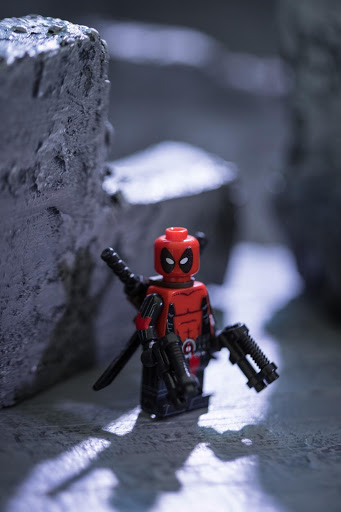
This month I will be showing you how to create realistic looking concrete walls out of styrofoam and plaster of Paris to create interesting environments for your minifigs like this:
It’s quick, easy and fairly cheap with great results and you definitely won’t need an art degree. You can get what you need from most DIY and hardware stores.
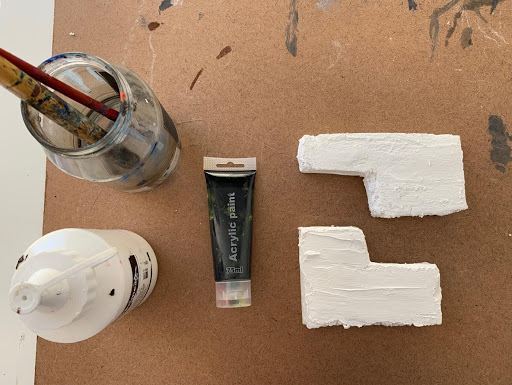
To get started you will need the following:
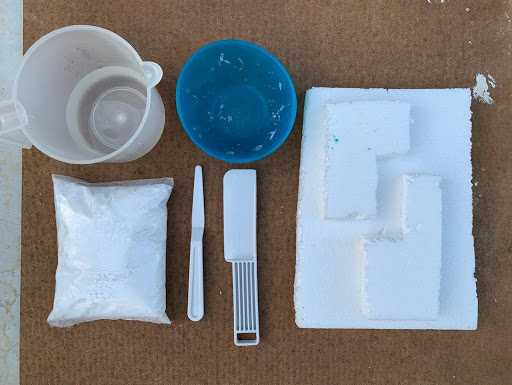
- Sheet of styrofoam
- Bag of plaster of Paris
- Mixing bowl
- Jug of water
- Spatula
Start by cutting your styrofoam into different shapes and sizes for the walls and floor you would like to create.
Then add a small amount of plaster of Paris (about two tablespoons) in a bowl. Add small amounts of water and mix until a smooth but firm consistency is reached.
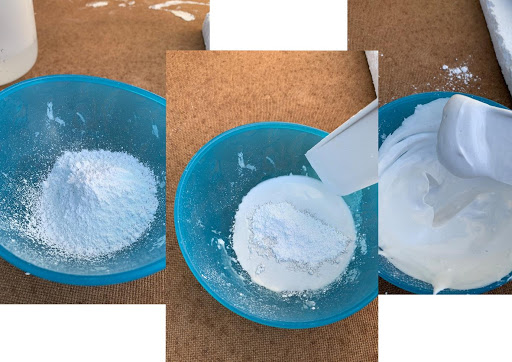
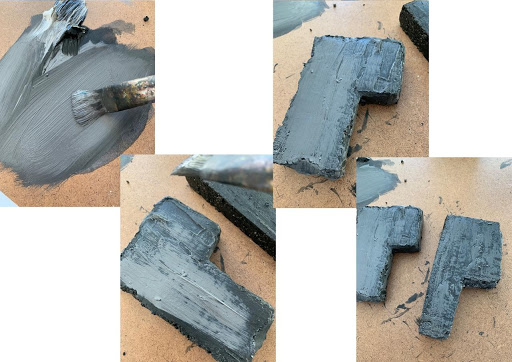
Now start spreading the paste onto the styrofoam as if you are icing a cake. The layer does not have to be thick at all. You need to work fast as the plaster dries pretty quickly. I like to drag the spatula over the plaster as it’s hardening to create some texture into the plaster and gives your wall some character.
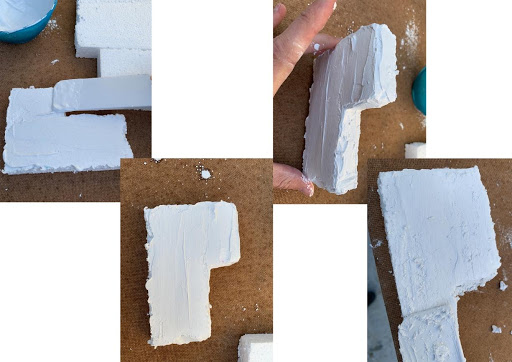
Repeat this process until all your pieces of foam are covered and don’t forget the sides and corners. This may take a few batches of mixing but start off with small batches because it does dry quickly! Once you’ve covered the front and sides of the foam allow to dry for a few minutes.
Now for the paint effects. I only used black and white acrylic paint to achieve this look.
Start by painting a dark grey base coat layer first, get it into all the nooks and crannies. This will give your wall depth as we build colour layers from the darkest to the lightest.

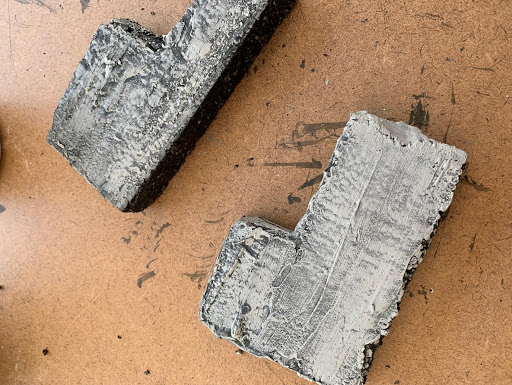
Now mix a mid-range grey and using a dry brush technique paint over the dark grey with a very light hand.
Keep adding lighter layers of paint until you are happy with the results. I normally only use 3 or 4 different shades of grey. The important thing to remember is to work from darkest to lightest.
Repeat these steps on as many different shapes and you will have lots of walls that you can place in different arrangements to create some interesting shots.
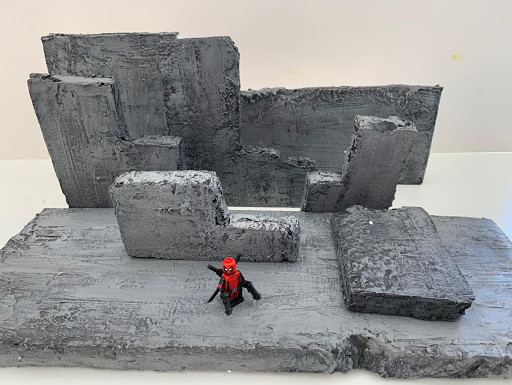
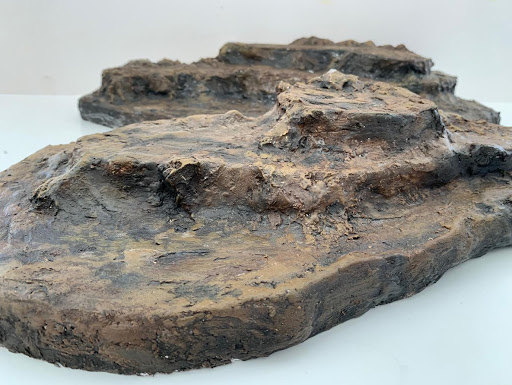
You can use these same techniques to create rocks and other landscapes like these with a bit of painting practice.
I hope you have found these tips useful and help to get your creative juices flowing!
Really nice! Thanks for sharing!
Very useful post. Thanks for the tips. I’ll give it a try
Very cool. Was looking of ways to mix lego with traditional dioramas, this looks great! Thanks for sharing.