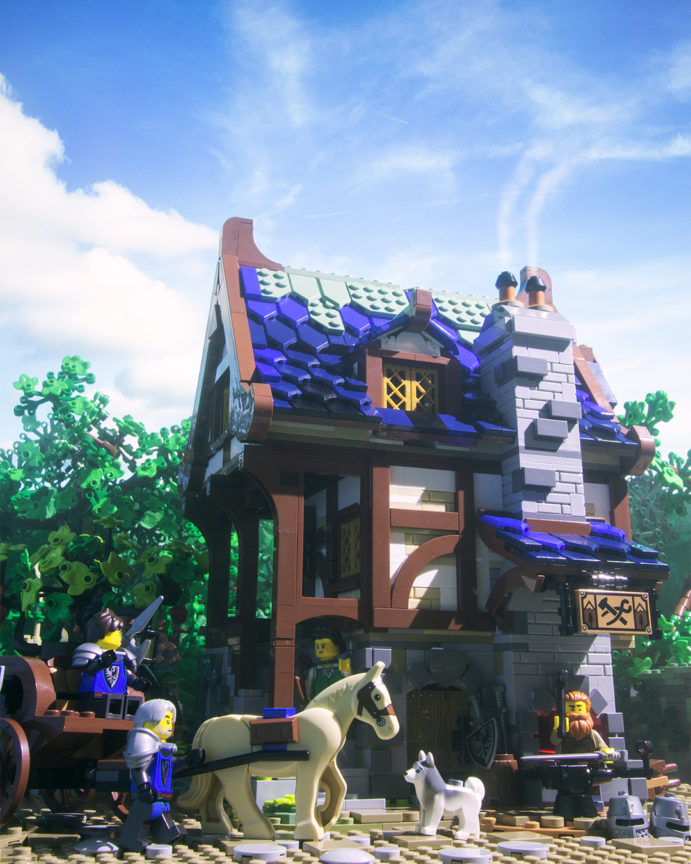
The LEGO Ideas Medieval Blacksmith is one of those sets that does not have a bad angle. Top to bottom, inside and out, 360 degrees around there is something fun and beautiful to look at, which makes photographing it both a delight and a massive undertaking as you could easily spend weeks finding creative stories to tell.
Below you will find a selection of wide shots, exterior detail shots, a few interiors, and along the way there will be some behind the scenes images with a breakdown and the challenges faced.
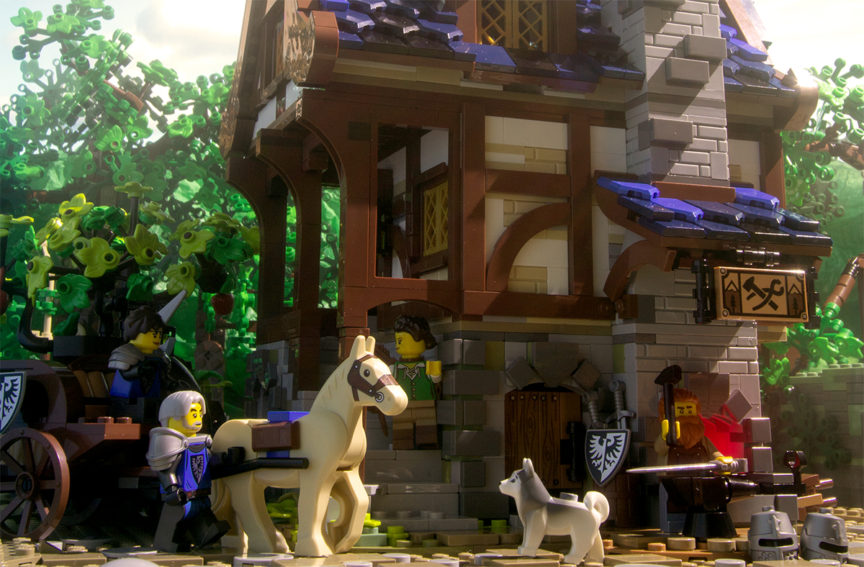
Exteriors


Stylistically I love shooting wide angle and creating as much depth and atmosphere as possible in my all-brick scenes.
Outside of wide shots, there were many small details around the exterior that made for interesting backdrops that allowed me to play with the minifigure poses.
In addition, the height of the building allowed me to place the camera low and angle up without having any empty space to worry about.
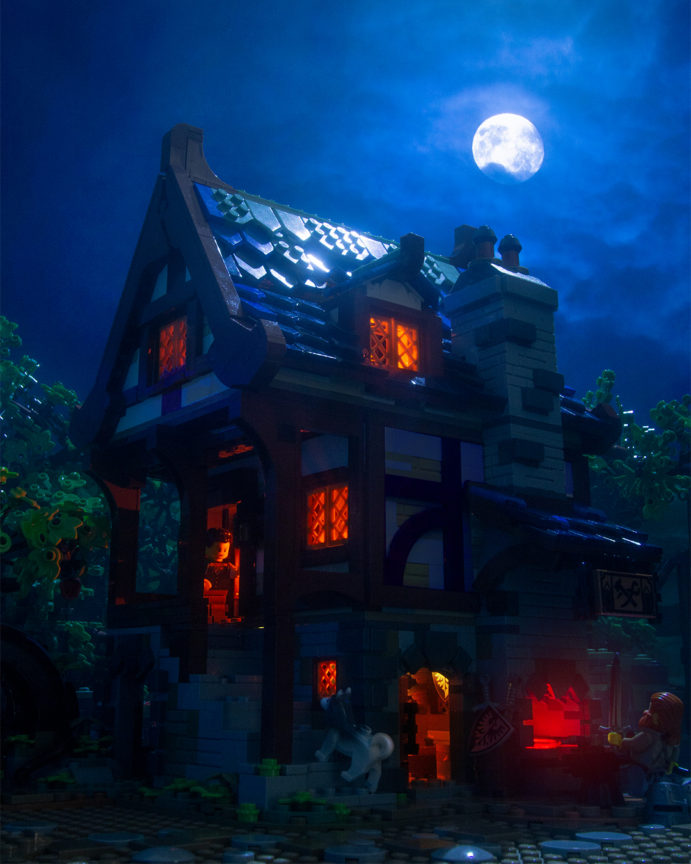
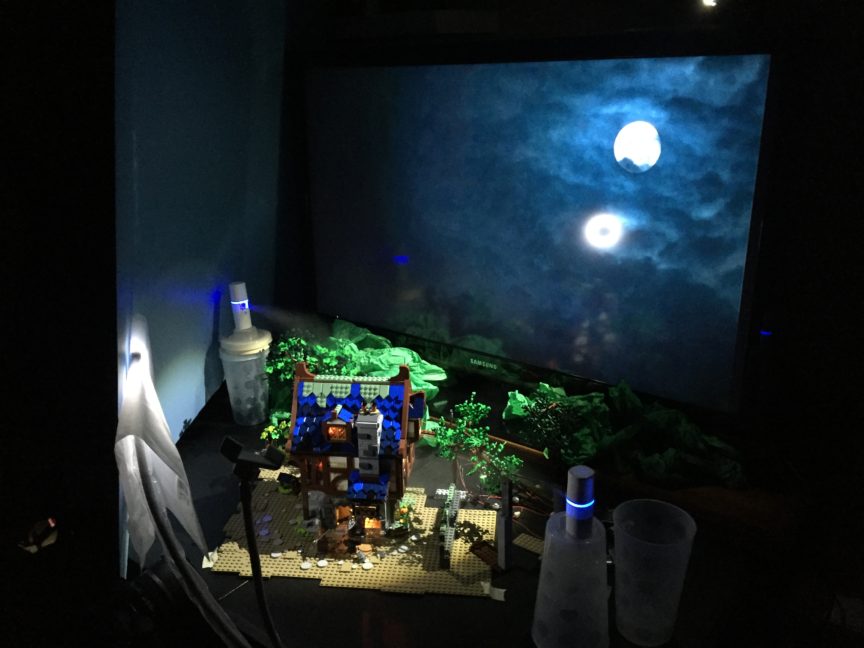
For both the day and night wide shots I set up in front of a large TV screen to get the screen’s light and color bleed on the edges of the Lego elements.
The base was extended with dark tan plates and minimal stonework so not to detract from the building itself. To create some additional atmospheric depth in the image I used some small water diffusers.
These were placed in the back near the tree line and also a quick burst of aerosol spray to recreate how light naturally would travel through the atmosphere.
The most challenging part of the wide shots was keeping track of all the variables that needed to come together just right. Light, environment, atmosphere, minifigures, screen, moon placement…
I spent several hours tweaking everything while looking at it from the camera’s perspective to get the day and night shots, but inevitably something would be off right when I started taking pictures!
To fill some of the gaps between the foliage in the background I placed green tissue paper along the horizon line for a more natural feel.
On the left side I placed a large light blue piece of board to help bounce some of the moonlight back onto the face of the building and also to help contain the atmosphere spray.

Interiors

What struck me while building the interiors is that there was no way to include all the great little details in a single shot. In the end I opted for the angle that got as much in as possible while also being able to tell a story.
Some of my favorite individual details include the grindstone on the ground floor, the brick built chairs in the kitchen, and the bearskin rug on the top floor.
However not pictured are some other great details like a butter churner and a small writing desk. What made the decision process of what to shoot more challenging was that all the interiors are enclosed by walls except the top floor which has access by removing half of the roof.
In order to get eye level full shots of the room I needed to deconstruct one wall and get the camera lens practically touching the set to emulate the feeling of taking the picture inside the room.
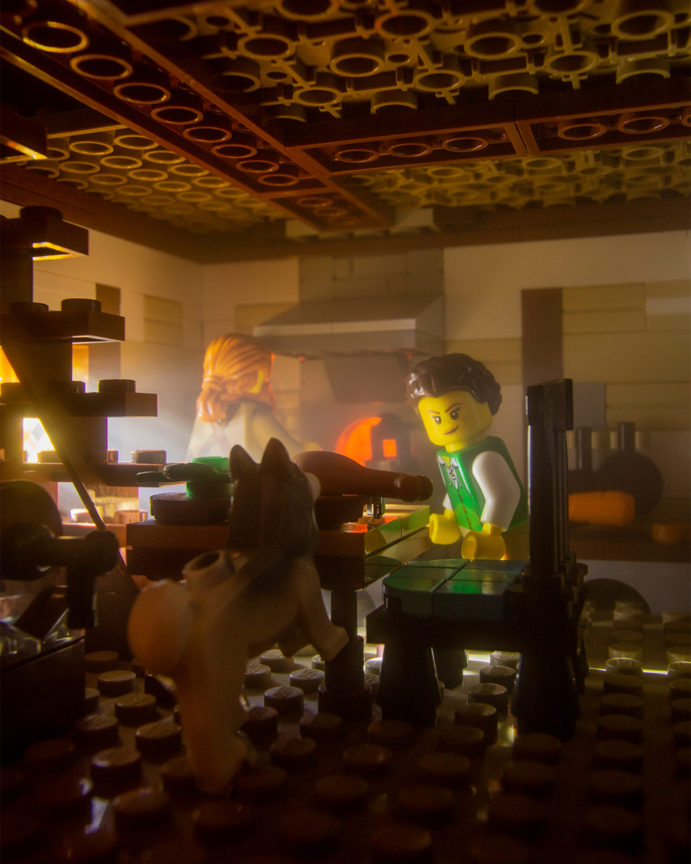
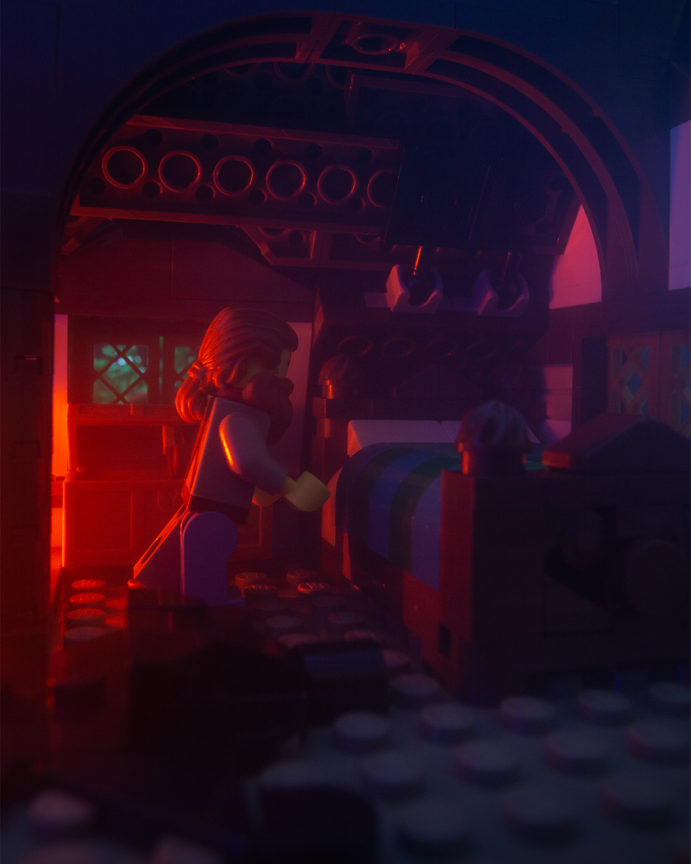
Breaking down the interior dining room shot above:
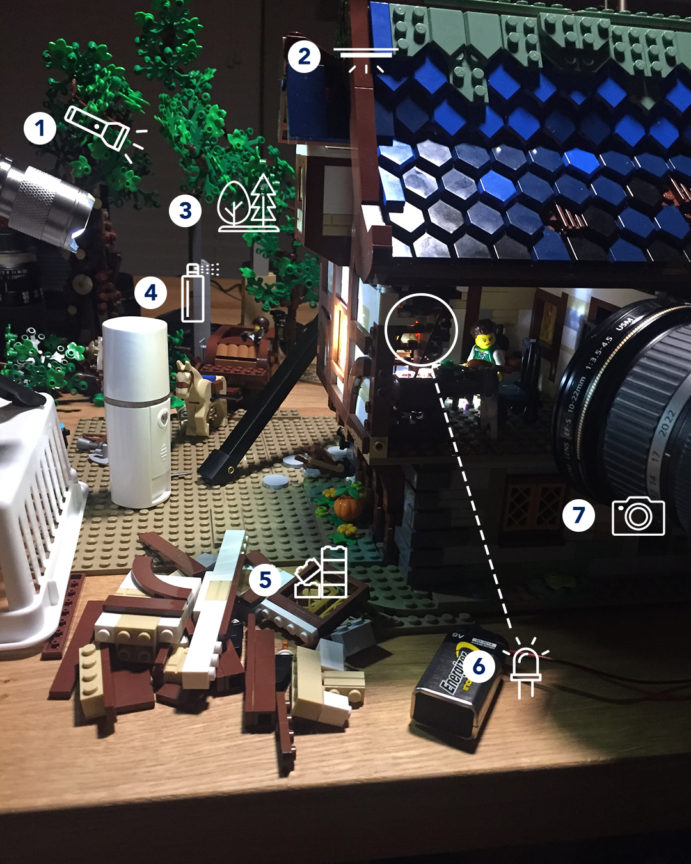
1. A single small flashlight (torch) was used with a focused beam through the side windows. The goal here was to get as much light through the window as possible while still being intentional about highlighting the subjects of the scene.
In this case I tried about a dozen different layouts with the minifigs at the table, away from the table, mixed, the dog and different angles, etc. and due to the tight space this setup offered the most visibility of the room and the minifigures.
2. An LED panel with a warm gel diffuser was used to add some additional ambient light in the room but this was very controlled as I didn’t want too much light to spill in from the direction of the camera.
3. While no trees are visible in this scene you can see I had created a set of different tree branches that were “posable” and I moved them around as background filler in different shots.
4. A small water diffuser was used sparingly to add just a small amount of haze in the room before snapping the picture.
5. As this set is completely closed in, I had to disassemble a wall on the bottom two floors to get a decent angle of the interiors.
6. After removing a few bricks from the chimney on the backside of the set I was able to hide an orange LED in the stove to give that practical orange glow you see by the blacksmith.
7. To make the room feel bigger and to get more of the room in focus, I used a wide-angle lens with a high aperture (although I used a much higher aperture for the wide shots). To compensate for this, my exposures are usually really long: 2.5 sec.
Conclusion
I cannot overstate how much fun it was to build and photograph this set. My only regret is not taking more pictures! But no matter what I will enjoy looking at this LEGO Idea’s set for a very long time… or maybe one day incorporate it into a larger medieval village scene!
This article was written by guest contributor & community member Circus_Robot. Brickcentral and LEGO provided Circus_Robot with the medieval blacksmith set to photograph and share some of his thoughts and behind the scenes insights into his shoot.
Awesome, shots- love them. can you [please tell us what wide-angle lens did you use for such a close shot? please help.. Thank you