Every month, we pick a LEGO photographer active in our community and share some of their work and a little about themselves. This month we flight to Nederlands to meet SKABRAM.builds!
Hi everyone, I’m Bram and I live in the Netherlands.
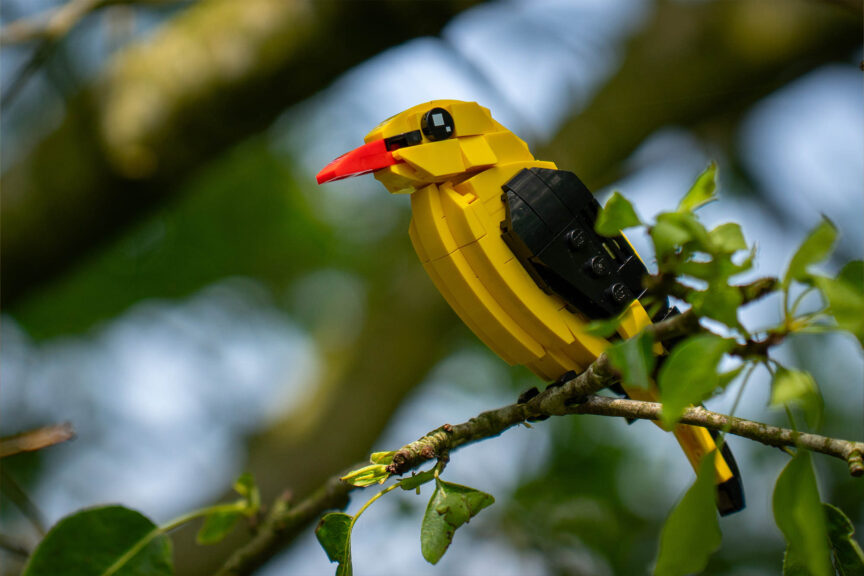
I rediscovered LEGO when my oldest son got his first set about 2,5 years ago. Soon I found out about digital building LEGO and got hooked building MOC’s of one of my favorite things: birds.
I created some of my favorite birds to display in our house and published the building instructions for others to build.
That was all I did until LEGO announced the Icons Kingfisher set.
It got me thinking about sharing my own bird builds too.
This idea got kickstarted when I got tagged in a photo where someone used my instructions for a bird build. Apparently there was a little search for brick built birds in nature photos. I got in touch and was encouraged to participate.
Since I already have some years experience with wildlife photography this seemed fun. I emptied my camera bag, filled it with my bird models and went to a local park. And here we are…
I see my photography as the final touch of my MOC. I spend a good amount of time designing and building the model, getting it out in it’s natural habitat feels like a logic last step. I try to get as close to the real bird and it’s environment as possible and aim to create realistic photos.
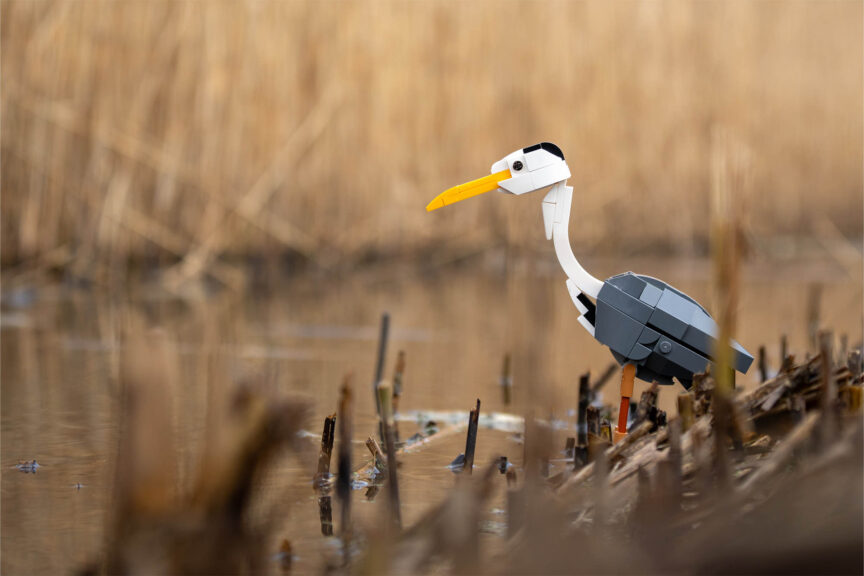
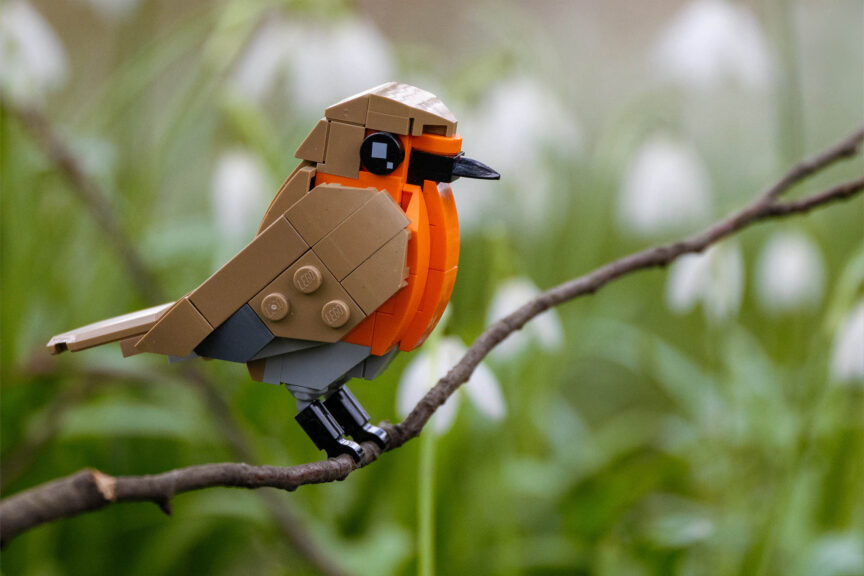
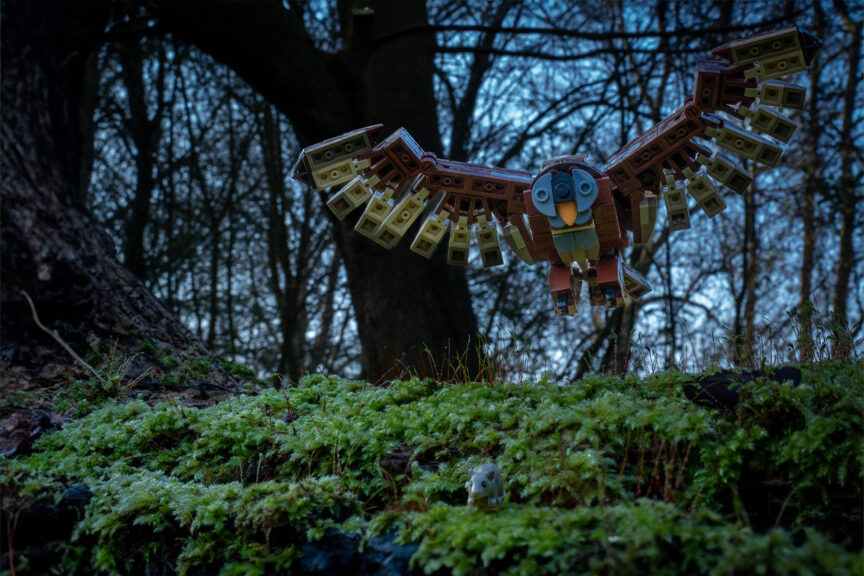
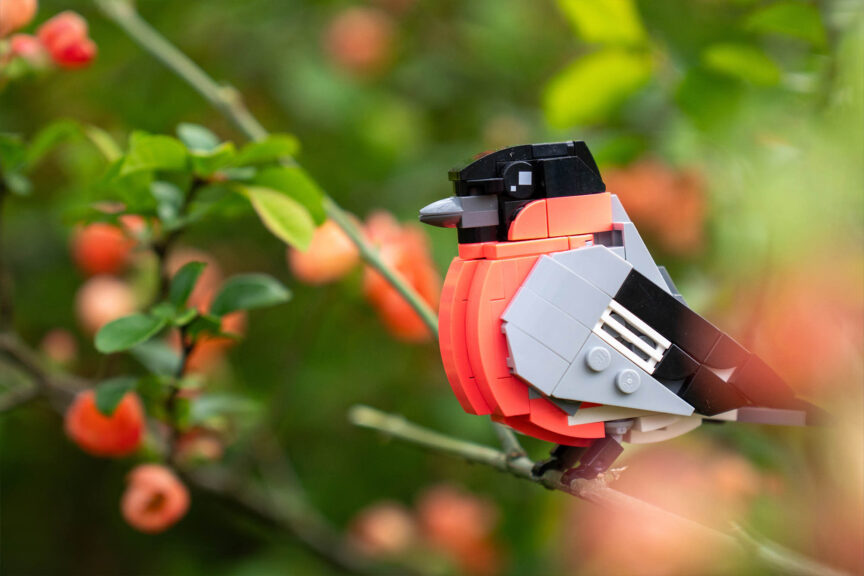
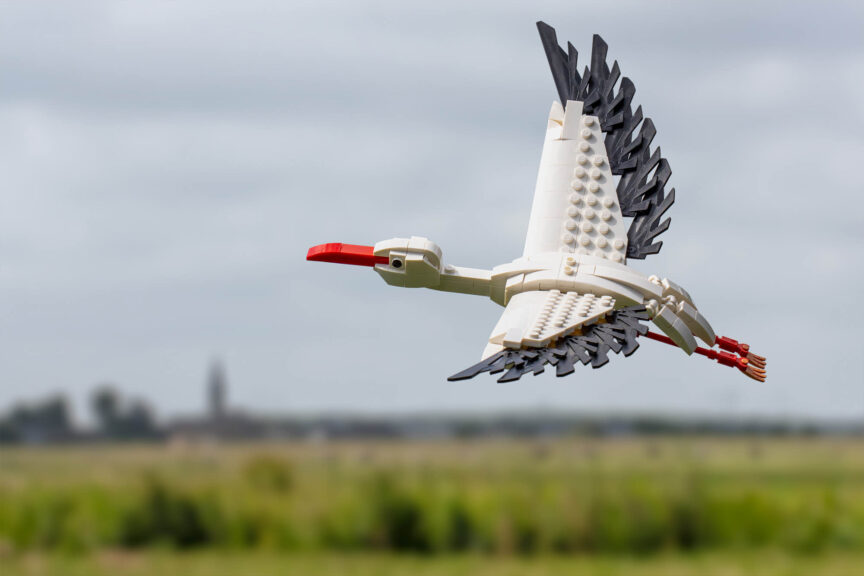
My approach is the same as in my wildlife photography: I want to show the bird and some of its surroundings. These surroundings are important since they tell a lot about a bird and it’s behavior and habitat.
Since I’m shooting a LEGO model this is a lot easier than with real birds, so I got plenty of time to focus on composition. I often try to get on eye level with my subject and to find interesting colors or lines that complement the composition. Most of my images are composed using the rule of thirds.
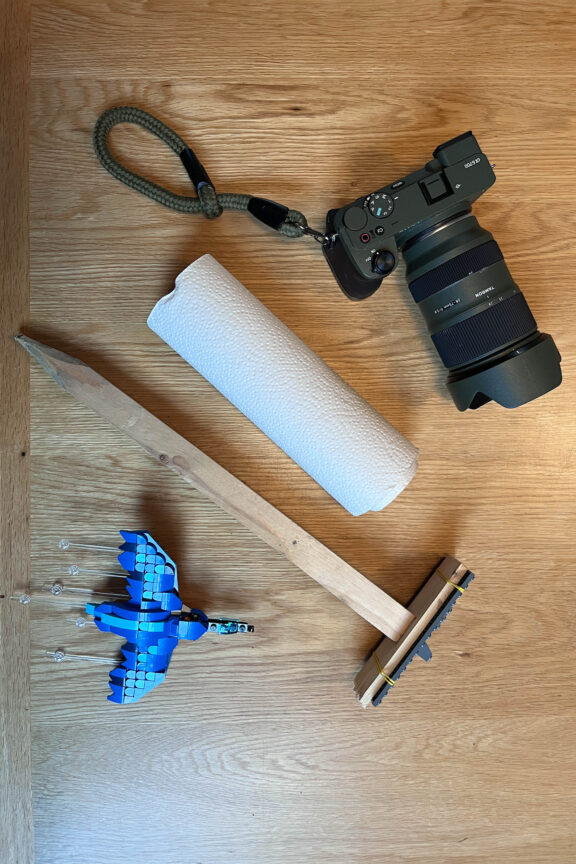
I prepare my photos not extensively. I think about the posing and what I might need for it (string, stand or extra LEGO parts) and throw everything in my bag when I go outside.
I don’t take a model of a coastal bird to the forest, but besides that it’s just looking for the right opportunity. Working with natural light and shooting without a tripod makes everything very flexible.
My 50-400mm lens is very versatile, so I can shoot real birds and LEGO ones during the same walk. The higher aperture (4.5-6.3) of this lens is no deal breaker since I often shoot with higher aperture to include more of the surroundings.
The hardest part might be getting the model posed right. It’s not always easy to find the right branch to clip the feet on (not all branches are in system…) and wind should not be underestimated when shooting around water (yes, I had to fish).
Sometimes someone is holding a loose branch with a bird model up so I can get the right image. To compensate for the inevitable movement here I increase my shutter speed (which is already high because I shoot handheld).

Combining my love for wildlife photography and LEGO has been a bliss thus far. Working with static models and a lighter lens has it’s advantages! The gear i use is a Sony A6700 Tamron 28-75mm 2.8 Tamron 50-400mm 4.5-6.3 Tamron 150-500mm 5.0-6.7 (used for wildlife only) I do have a simple Rollei tripod, but only use it inside.
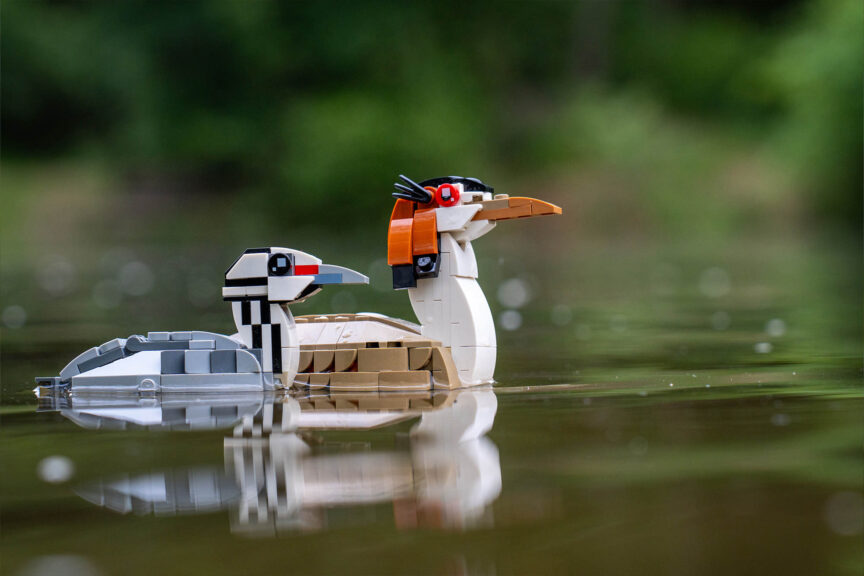
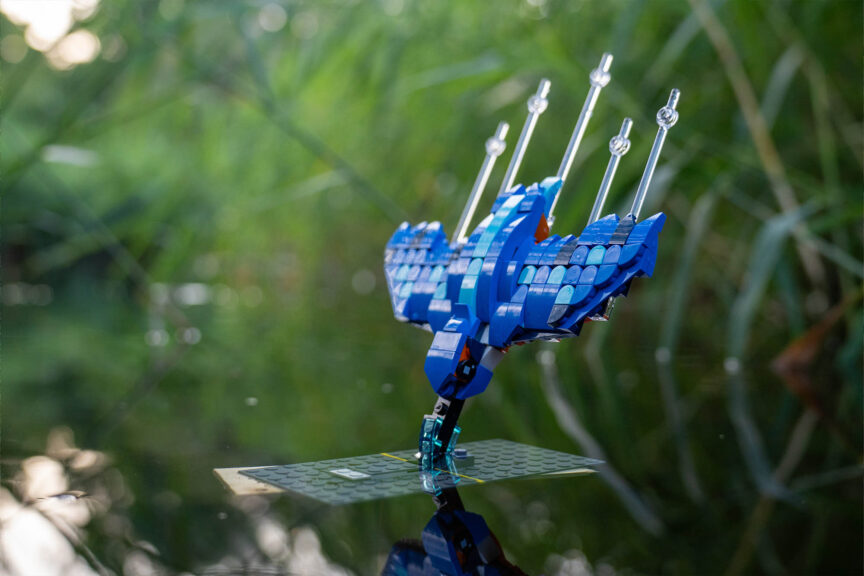
The exclusive
I had this photo in mind for quite some time and now finally took it! This model was finished a couple of months ago, but I never took it with me to shoot it outside. Being asked to create a new photo for Brickcentral felt like the right opportunity to finally go for it! I prepared the photo by picking and preparing a little stand with plateau to place my model in the water. I made this for an earlier photo with a great crested grebe and a chick. I now added a plate with rubber bands so it could resist the force of the kingfisher model tipping it. Beside the stand I also packed some paper towel to remove drops from the model and my camera and lens. For this photo I specifically picked my 28-75 lens, because I knew beforehand I would be very close to my subject.
When I arrived at the location I had in mind I found out that everything was overgrown with reeds. I had to find an other spot without the reeds. Unfortunately no reeds meant less shallow water. My stand was not long enough to reach the bottom. I improvised by extending it with a branch I found. Here the rubber bands came in handy, because that’s how I attached the stand to the branch. Phew…
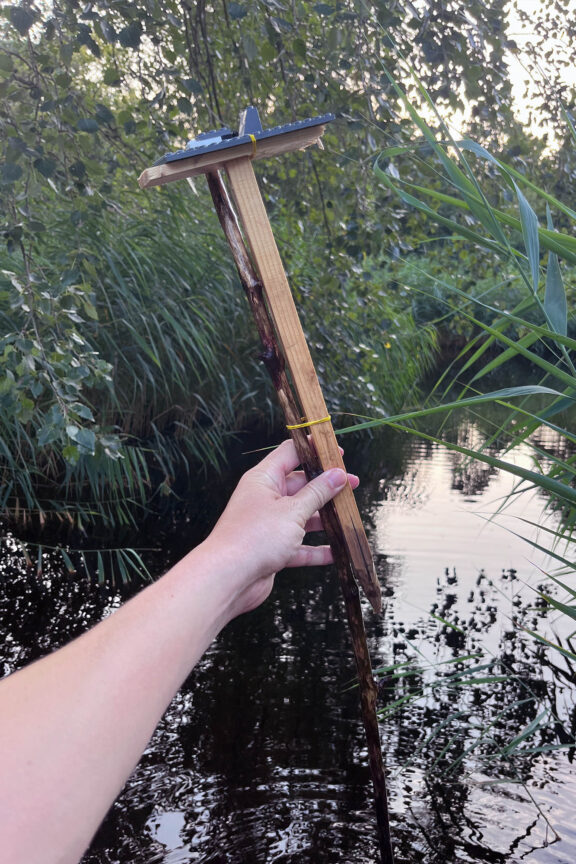
I placed the stand right below the surface of the water. Time to attach the model!
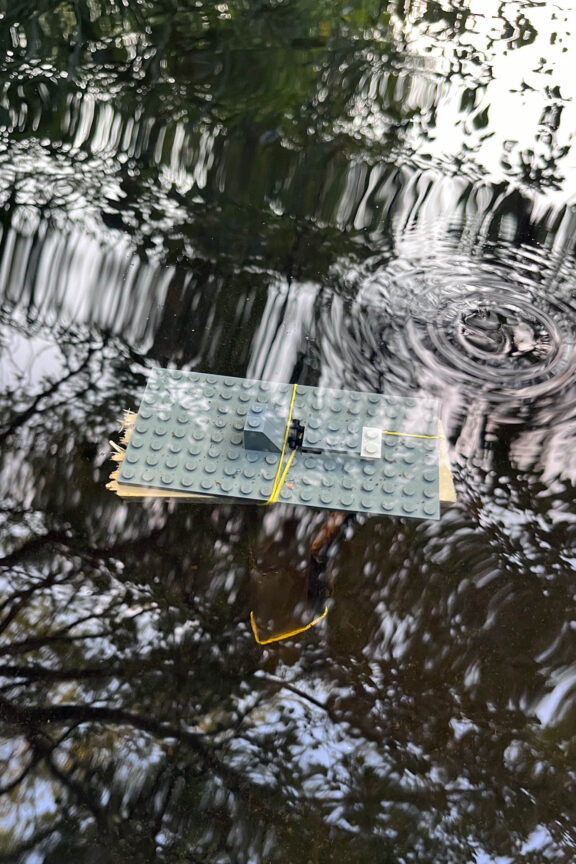
After a couple of photos I decided to change the placement a little to make better use of the background (more reeds visible). I picked the stand entirely to move it when I messed up big. The kingfisher fell off the clip and dropped in the water. For a second I was in shock, but luckily it was floating. I even had time to take a picture of it floating.
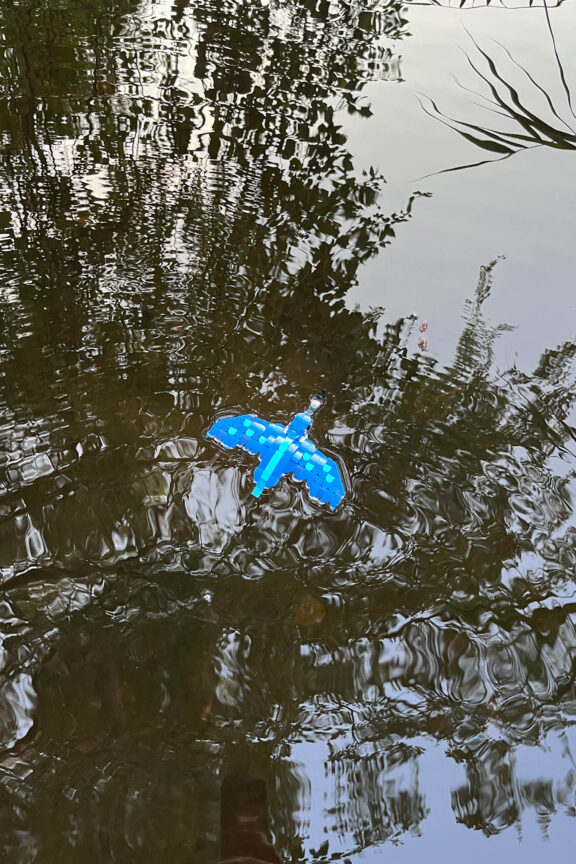
After drying the kingfisher with the paper towel the setup for the final photo looked like this.
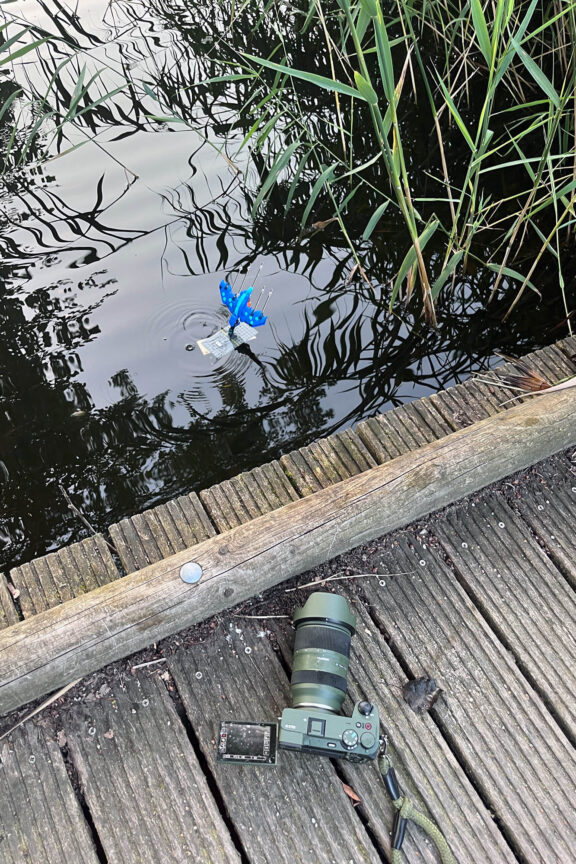
I took the photo just above the surface of the water to capture as much of the surroundings as possible. As you can see I was pretty close to the subject and holding my camera below me. Keeping it steady was not easy, so I chose a shutter speed of 1/200. Beside the shutter speed I played with the aperture of the lens. I tried 2.8 and 4.5 and was most satisfied with 4.5. The sharpness in the model was better and the surrounding reeds had more character.
Unedited photo taken with an aperture of 2.8 for reference
I placed the subject into the frame using the rule of thirds with the movement of the subject in mind (moving into the frame).
As you can see in the unedited image I had to get rid of the plate below the water surface in the edit. Here I used a combination of the clone tool and generative fill in photoshop. If the water was more wrinkled the plate would have been a lot less visible. Downside from wrinkles is a less clear reflection. After all I’m pretty happy with the final result and hope you enjoyed this little insight!

Hello,
i want to buy 9 instructions of nice birds of you.
How i can pay the 9 in once?
with kind regards,,
You can get on letbricks, they got the license from Bram and sold all these birds