Every month, we pick a LEGO photographer active in our community and share some of their work and a little about themselves. This month we flight to UK to meet siwaddington.

Alright, I’m Scott (siwaddington on Instagram, I promise my work is more creative than my handle) and I’m a hobbyist LEGO photographer and professional animator from the UK.
I exited my Dark Ages in 2015 with the LEGO Ideas WALL-E set.
A year later, I got the job a TT Games – I don’t do things by half.
I originally bought a camera in 2021 in anticipation of getting my first cat. I very quickly found out how tricky photography is when your subject can move around of their own volition, so I soon pivoted my attention to something I had in abundance around me: LEGO.

Early on, while looking to develop my skills, I discovered the toy photography community and fell in deep, never looking back.
The support and inspiration have been a huge impact on my pursuit of this hobby.
Now I have the perfect work-life balance: animating LEGO video games by day and LEGO photography by night. Perfectly balanced, as all things should be.

I currently use a Sony A6700, and my go-to lenses are my Sigma 105mm Macro and Laowa 24mm Probe. My favourite gear would include my Smoke Ninja, an external monitor for setting up scenes to camera, and the humble spray bottle for raindrops. I mostly photograph indoors, as I can fully control all the elements such as light and avoid the archnemesis of the toy photographer: wind.
Plus, it also saves me having to lug all my gear around.
I would say my style is rather whimsical, with a focus on character and narrative. As an animator, I like to approach my photos as if they were a single frame of a full story.
I also dabble in stop motion animation from time to time.
The exclusive photo
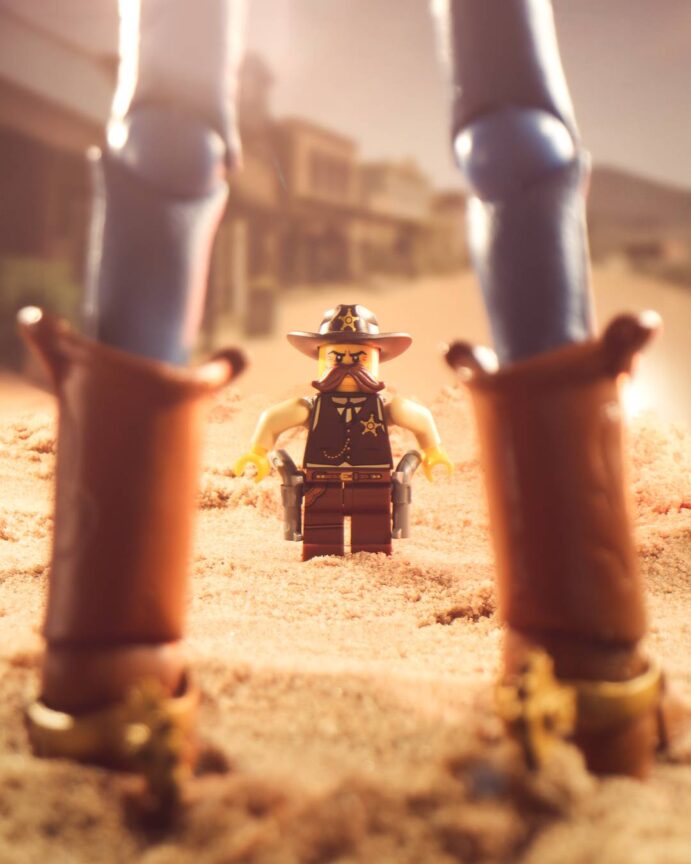
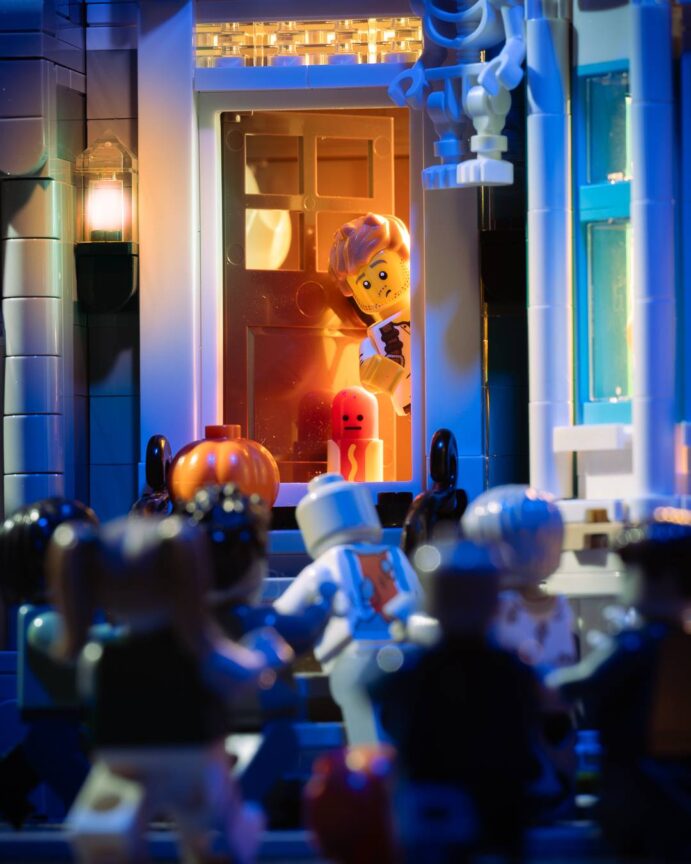
Exploring through my back catalogue of photos, you’ll see I usually like to get up close and personal with the minifigures. This time, I wanted to work on a larger scale. You know what they say, go big or go home – and I’m already at home.
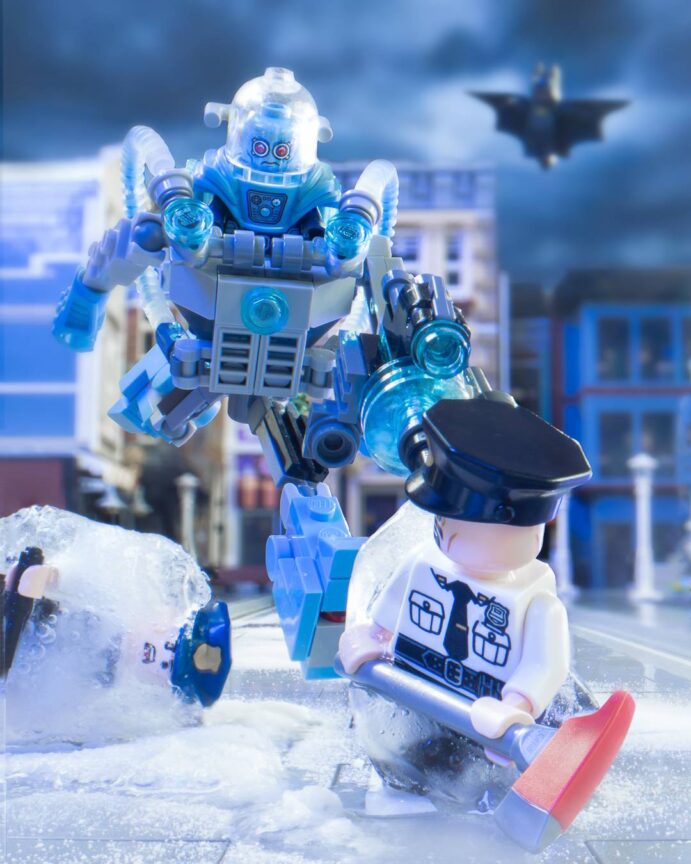
Since the recent announcement of our upcoming game, I’ve been in a bit of a Batman phase. So, my idea was to create a scene of Mr. Freeze’s reign of terror through the streets, as Batman looms in the distance – alluding to Freeze’s impending defeat. Mr. Freeze and his mech are from set #70901 Mr. Freeze Ice Attack.
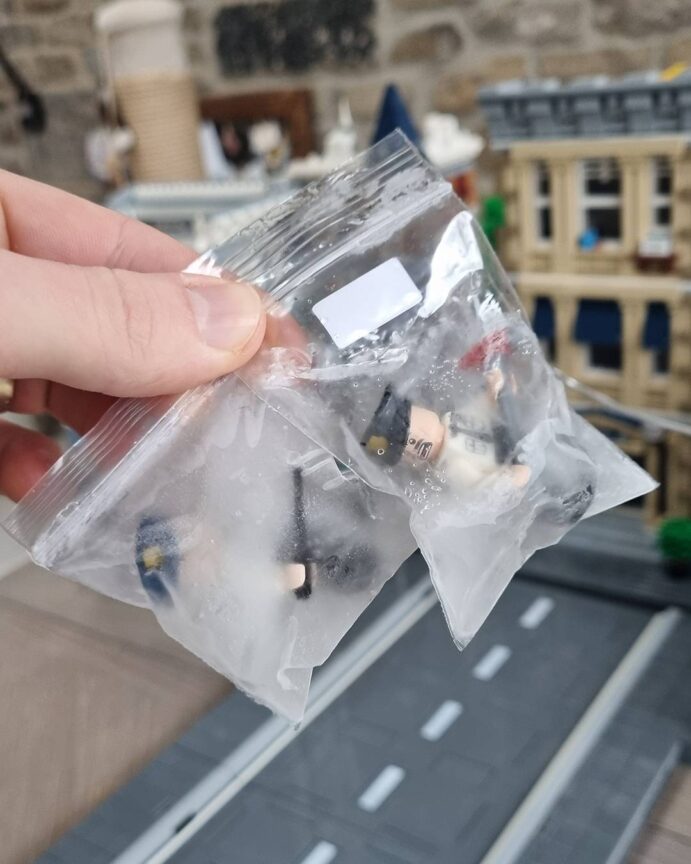
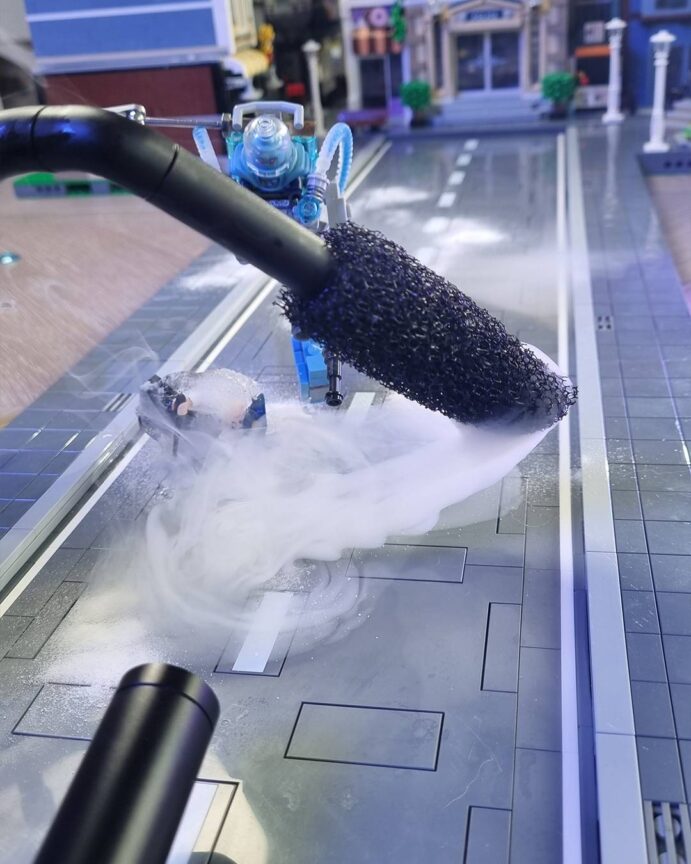
Now, it wouldn’t be a Mr. Freeze attack if we didn’t include his frozen victims. I made use of some of the many plastic pouches I’ve received from past Bricklink orders, put the Minifigures inside with water, and placed them in the freezer. Once ready to shoot, I shaped the ice to my liking with water and a knife. This was the biggest challenge of the shoot as once you have the ice ready it becomes a race against time as they slowly begin to melt. Especially as I still had the lighting to adjust and planned to use focus stacking to get both the frozen minifigures and Mr. Freeze in focus.
I used my Laowa 24mm probe lens for this shot, as I wanted to get close to the action while allowing for space to frame the entire mech. This low-down shot, angled up, creates the need for a sky, and for someone who likes to shoot indoors, that’s a problem. A lot of the time, I will use blue foam boards or screens to fill in the space. However, the scale of this shot meant I had to add the sky in post using Photoshop.
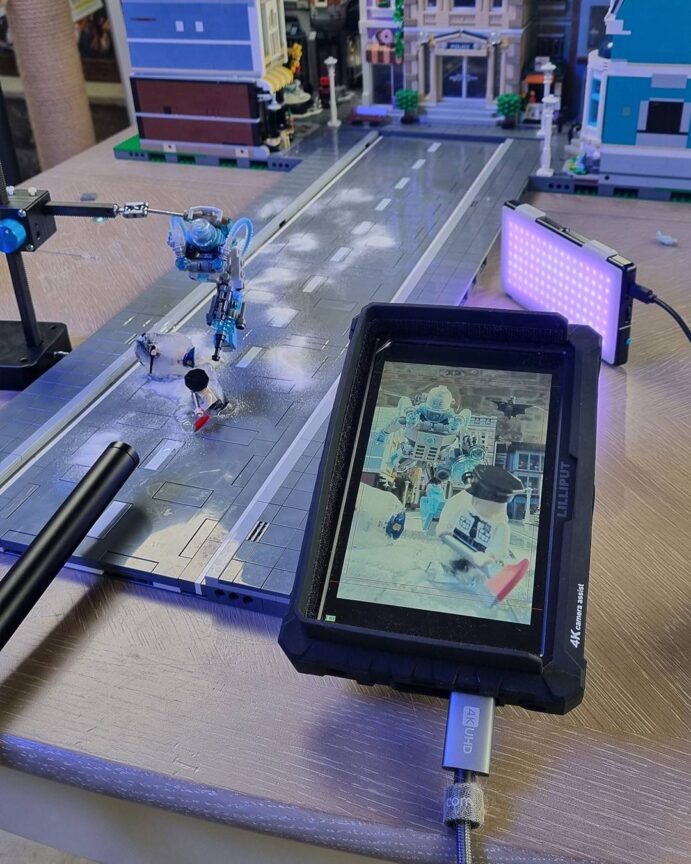
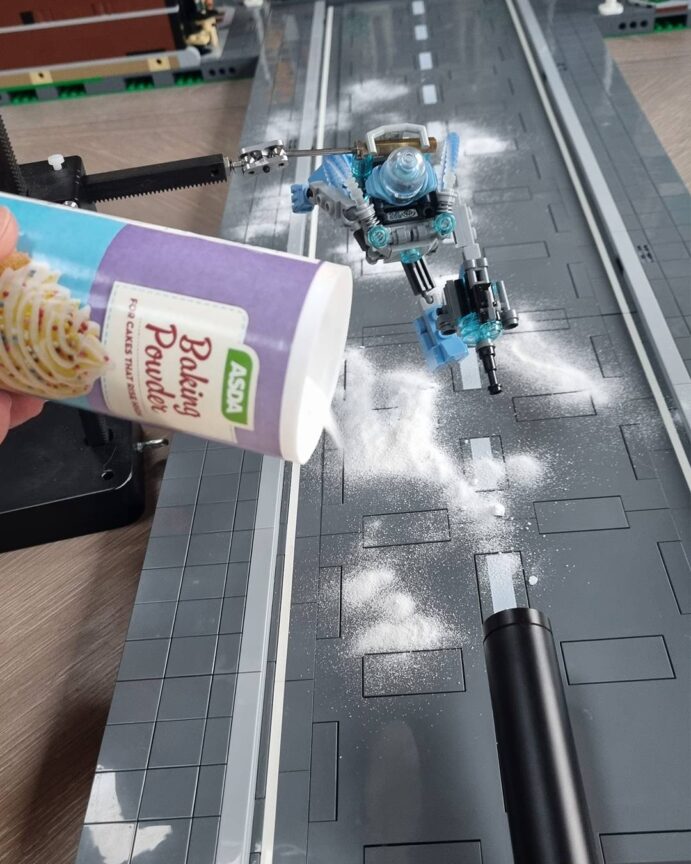
I like to use an external monitor attached to my camera to be able to set the scene up to frame, without needing to constantly head back to the camera to check the viewfinder. This is especially useful when using the probe lens, as the camera is so much farther away. To create a touch of snow and ice in the streets, I sprinkled some baking powder and used my Smoke Ninja to create a subtle haze along the ground.
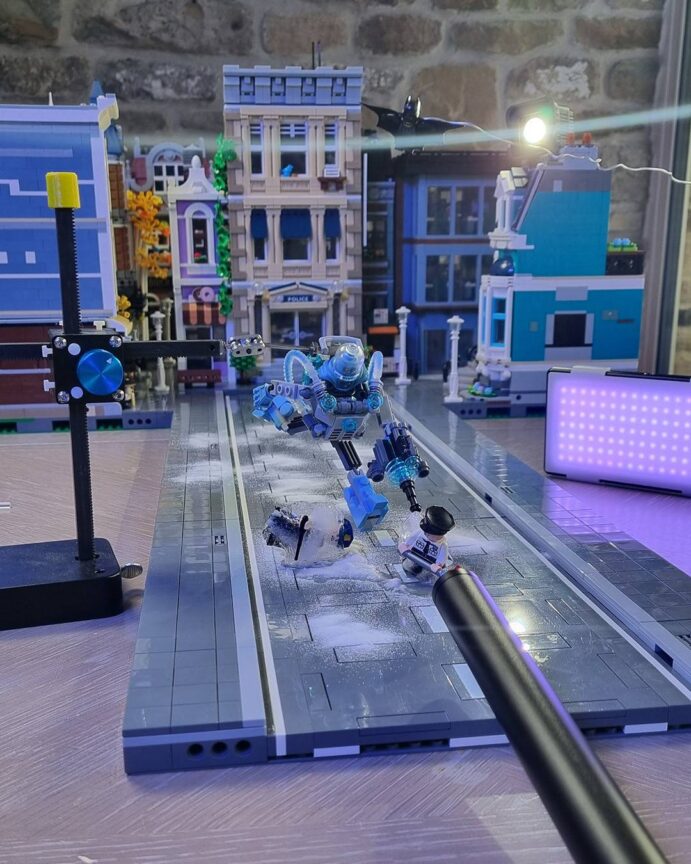
Mr. Freeze is held up with a stop motion winder rig. I mainly bought this for my stop motion animation, but it comes in handy for my photography too as you can precisely position characters by adjusting the X and Y axes independently. Batman is simply held up by a wire, with a Lume Cube pointing at his back to create a rim light on his silhouette.
Finally, I fleshed out my scene with a variety of Modular Buildings. I have all my buildings on MILS plates for stability and compatibility with my MILS plated roads. This is what people normally do for a LEGO city, but I find it really useful for setting up city scenes for photography as you can position them however you want quickly and easily.
Thank you, BrickCentral, for having me as part of their Artist Spotlight!